

Smocking Secrets Book Tour
Posted by Maggie Hofmann on Jun 20th 2022

Hello! I’m Maggie Hofmann and I’m so pleased to share the release of my new book, Smocking Secrets, and the companion product Smocking Stencils. I’m a cosplayer and professional costume maker for theatre and love making highly-detailed intricate costumes and garments. I have found smocking to be a versatile and dynamic tool to add texture and dimension to my costume pieces and hope that this book with inspire folks to experiment with smocking in their own projects! I was also so happy to be able to feature so many fellow creators who have used smocking in unique ways in the book as well.

The book includes 20 pattern charts for both North American and English smocking and I would like to show you how to stitch one of the most popular patterns in North American smocking- arrow or dragonscale smocking. Arrow smocking has been seen in several costumes from popular pop culture fandoms and is often used in costume applications by cosplayers.

Lady Kitz Cosplay; Photo by Alexandra Lee Studios
The first step is to mark a dot grid on backside of the fabric. 1”x1” is a good place to start but the grid can be smaller or larger than that! Using the companion stencils can make this process much faster! Then you will mark out the arrow smocking pattern using the smocking template as a reference.

Step One: Thread your needle and knot the end your thread. Take a small stitch (just 4-5 threads worth) at the bottom of the top leftmost “V” on your drawn pattern (point A on the template).

Step Two: Take another stitch at point B and draw point B to meet point A. Take a few small stitches on top of each other to hold the two points together.

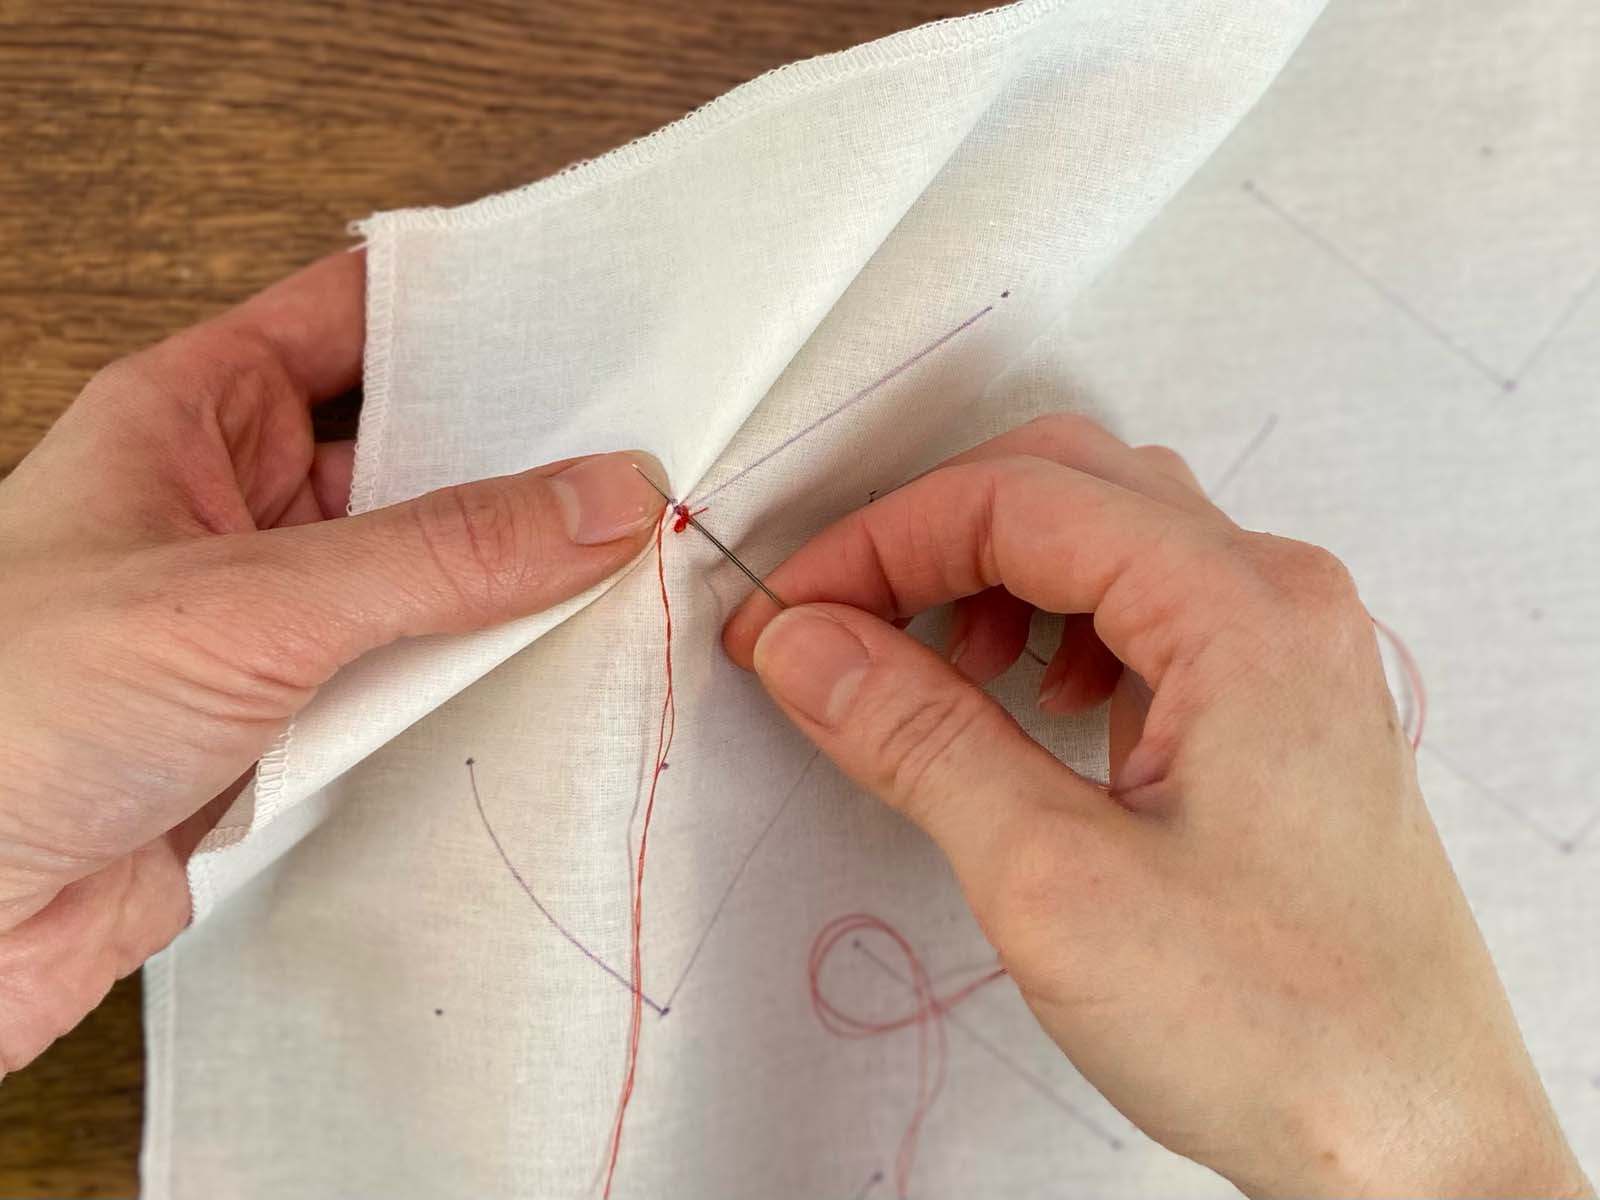
Step Three: Take a third stitch at point C and draw point C to meet point AB. Take another few stitches to hold all three points together. Knot off your thread to keep your stitches tight but do not cut the thread.

Step Four: Move your needle to the bottom of the next “V” and take another small stitch but don’t pull the thread tight. Repeat steps one through three until you have smocked the whole piece of fabric! After the first row of smocking, you’ll be able to see the design form on the right side of the fabric.

After smocking your piece, you can use a steam iron to gently steam the design into shape. You can hard press the piece but make sure that’s the look you’re going for- there’s no going back after hard pressing! The smocked fabric can then be incorporated into your project using an appliqué method or insertion method.
![]()

Author in original Maleficent design; Photo by Alexandra Lee Studios
I hope that everyone is inspired to check out the book and try out some of these smocking techniques! I’m always amazed how the design forms on the reverse side of the fabric; it’s like magic! Happy stitching!
Smocking Secrets Tour Schedule:
June 19: @funhilde on Instagram
June 21:@seams.come.true on Instagram
June 22: @downen_creative_studios on Instagram
June 23: @thewizardtailor on Instagram
June 24: @tockcustom on Instagram and YouTube
June 25: @vicious.frockery on Instagram
June 26: @ladykitzcosplay on Instagram
Comment a cosplay project you would create with Maggie's smocking techniques below for a chance to win an ebook copy of Smocking Secrets! We will announce the winner on this post on June 27, so make sure to check back in!
...
WANT MORE CREATIVE CONTENT? SIGN UP AND RECEIVE 30% OFF YOUR FIRST ORDER.


