
Quilting Tips: Nesting Seams in Quilt Blocks
Posted by The Tech Editors on Apr 20th 2009

Some quilt blocks require that small, pieced units be joined together to make a larger block. Oftentimes, there are individual seams that should be aligned and straight within the larger block. These continuous seam lines that need to be lined up will look better if you plan ahead and press them in opposite directions, so their seam allowances fall on alternate sides of the crossing seamline.
Follow these steps to join 2 such units.
Place the 2 units with their right sides together, matching the seam lines. Note that in the photo, the seam allowances are pressed in opposite directions, so that the 2 units to be joined “nest together”.
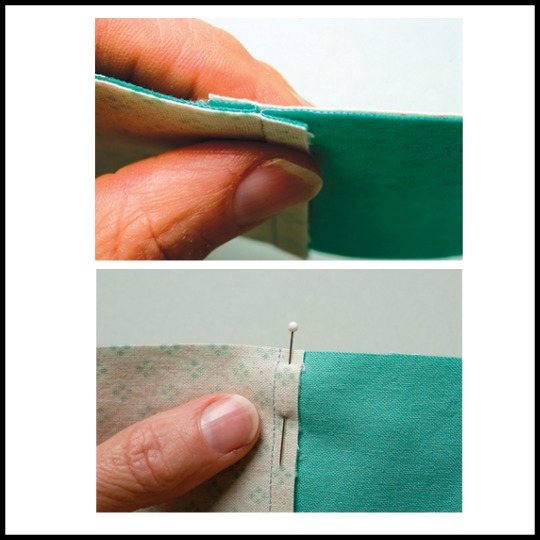
To keep the 2 units nested, follow this suggestion before you start stitching:
As you stitch, you will approach the cross seam and your presser foot will move onto the thicker area. At this point, the top fabric can be pushed forward, out of position. To prevent this, place a pin on the far side of the seam, close to the seam line. This pin keeps the cross seams aligned and prevents them from separating.
Sew up to, and just beyond, the seamline before you remove the pin.
Finish stitching to join the 2 units.
This is the method described in Piecing the Piece O’ Cake Way by Becky Goldsmith and Linda Jenkins.


