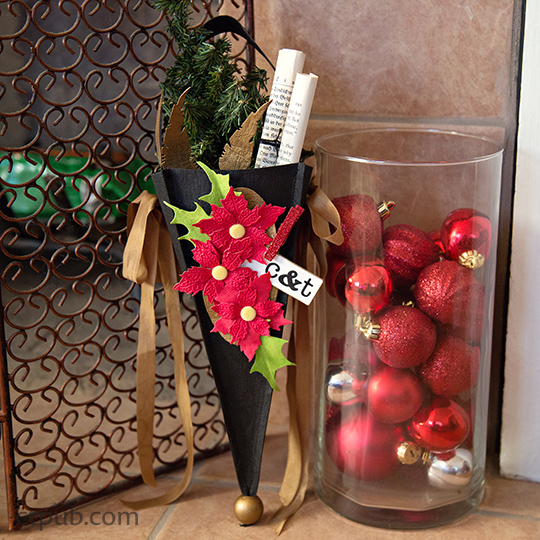
kraft-tex Gift Cones
Posted by Sue Astroth on Dec 15th 2016

Adapt a versatile kraft-tex cone into unlimited festive gift bags!
Supplies:
- 17" x 4" rectangle of festive fabric
- Coordinating thread
- 1–1 1/4 yard of 1/8" or 1/4" wide satin ribbon or cord for drawstring
- Assorted trims/lace/tulle for decorating cone
- Lightweight craft or floral wire
- 1" painted wood bead with 3/8" hole
- Large-eyed tapestry needle for threading ribbon through casing
- Optional: sewing clips, screw punch
To Make a Gift Cone:
1. To make the cone, see instructions for the kraft-tex Reindeer Cone in our previous post.
2. Sew the 2 short ends of the fabric rectangle together, right sides facing, to make a tube. Use a 1/4" seam allowance. Leave a small opening in the seam 3/8" long, 3/8" before the fabric’s raw edge. Backstitch before and after the opening. Press seam open.
3. Make a casing for your ribbon. Fold over the edge nearest the opening 1/4" to the wrong side and press. Fold it over again 1/2". Press and topstitch just along the folded edge.
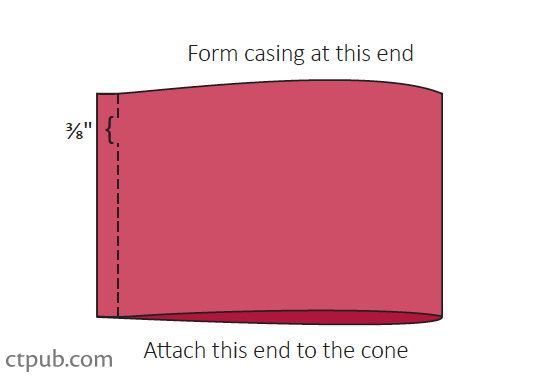
4. Using a 1/4" seam, sew the fabric tube to the kraft-tex cone, right sides together. Sewing clips make this job easier.
5. If your fabric tube is too big for the cone, taper the tube’s seam until it fits, then stitch it into place.
6. Thread ribbon through the casing and tie into a bow.
Options: Decorate with additional trims, ribbons, die cuts, and buttons. Use craft wire to hold holiday floral elements in place by drilling holes on the front of the cone with a screw punch, then twisting the wire ends inside the cone to secure them.