

How to Create the Color Study Quilt
Jul 14th 2021
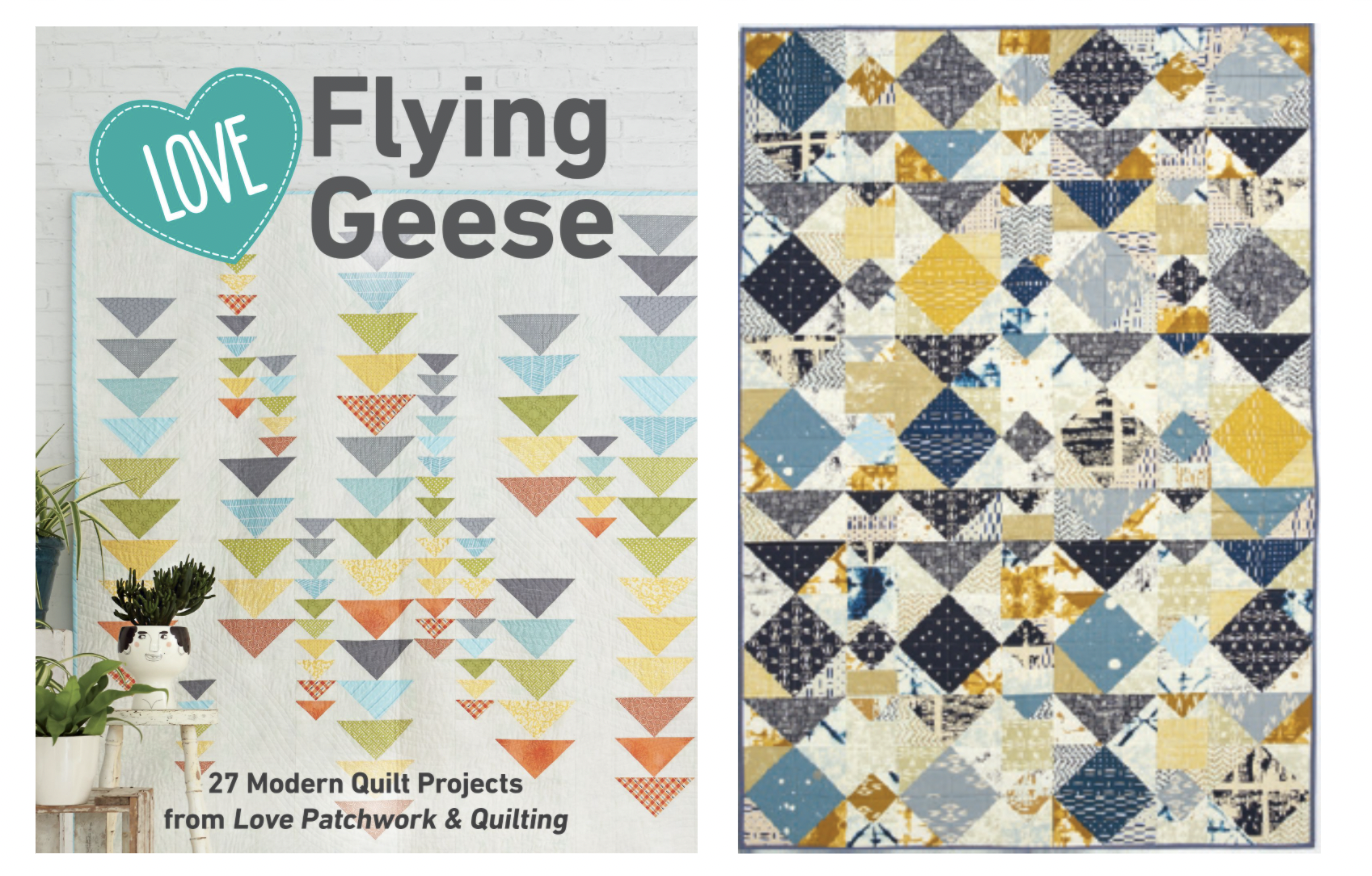
The following information is from Love Flying Geese.
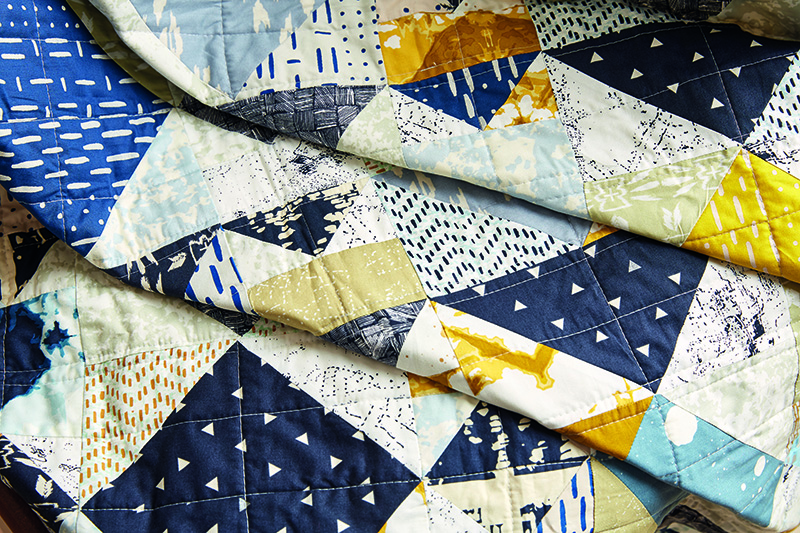
Create this dynamic quilt using your favorite colors. Expand your knowledge of color and color combinations by experimenting with tonal shades and print movement in this quilt. With the right complimentary colors, you'll be turning simple blocks into a graphic diamond design. This quilt features cool greys with sunny springtime yellow and blues. Need help selecting your color combinations? Bring the Take-Along Mini Color Wheel to your local fabric store for perfect color choices every time.
Color Study 1 by Karen Lewis
QUILT
Finished quilt:
44 in × 64 in approx.
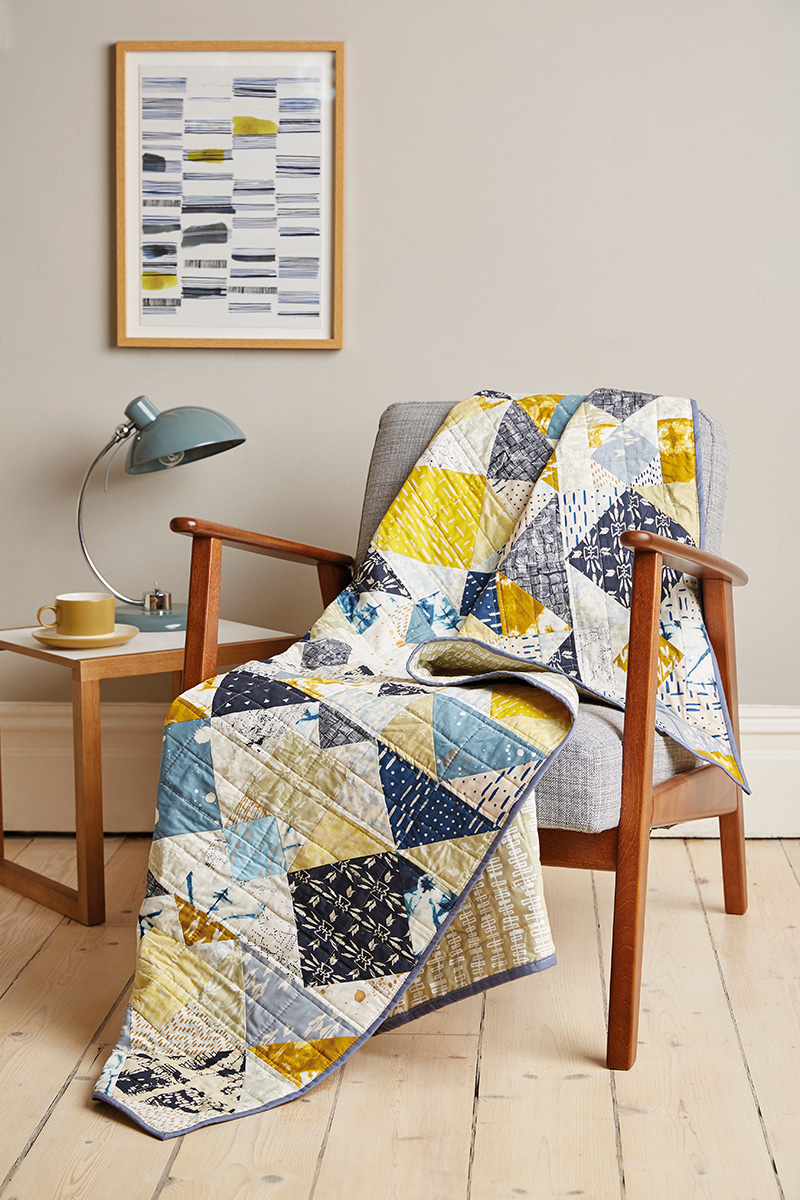
Fabrics used: Print fabrics are from the Observer collection by April Rhodes for Art Gallery Fabrics, along with solids from the Pure Elements Solids collection, also by Art Gallery Fabrics, that Karen screen-printed.

You Will Need:
Print fabrics: 1½ yds
Background fabrics: 2yds
Backing fabric: 2¾ yds
Batting: 50in × 70in
Binding fabric: ½ yd
Cutting Out
1. From the print fabrics cut a total of sixteen (16) 9 1/4in squares and twelve (12) 5 1/4in squares.
2. From the background fabrics cut a total of:
3. From the binding fabric cut six (6) 2 1/2in × WOF strips.
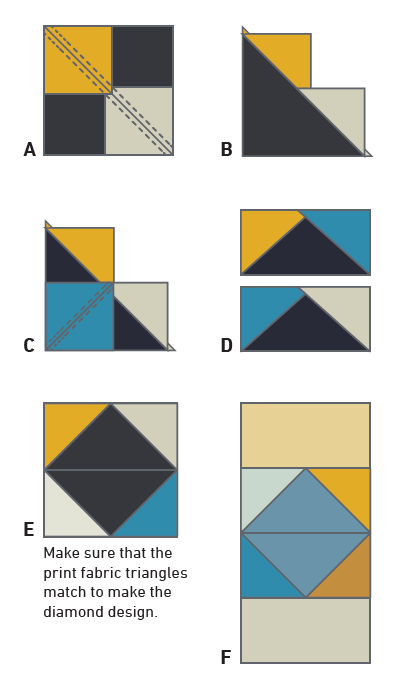
Making the FG Units
4.Take four 4 7/8in background fabric squares and on the wrong side of each one mark a diagonal line from corner to corner. Take one 9 1/4in print square and, RST, place a background square on two opposite corners, with the marked lines running from the corners towards the centre of the print square. The background squares will overlap in the centre. Sew 1/4in either side of the marked lines. Fig. A
5.Cut the unit apart on the marked lines and press the two units open. Fig. B
6.Take one of the units from Step 5 and, RST, place a background square on the remaining print corner, with the marked line running from the print corner. Sew 1/4in either side of the marked line. Fig. C
7. Cut the units apart on the marked line and press them open to complete two Large FG units, which should each measure 8 1/2in × 4 1/2in. Fig. D
Repeat with the remaining unit from Step 5 to make a total of four Large FG units.
8. Repeat Steps 4–7 with the remaining 9 1/4in print squares to make a total of sixty-four Large FG units.
9. Repeat Steps 4–7 with the background squares and 5 1/4in print squares to make a total of forty-eight Small FG Units.
Piecing the Diamond Units
10. Take two Large FG units of matching print fabrics and join to make one Large Diamond unit. Fig. E
11. Repeat Step 10 to make a total of twenty Large Diamond units.
12. Repeat Step 10 with two small FG units of matching print fabrics. Join a 4 1/2in × 2 1/2in background rectangle to the top edge and to the bottom edge of the unit to make one Small Diamond unit. Fig. F
13. Repeat Step 12 to make a total of fifteen Small Diamond units.
Assembling the Quilt Top
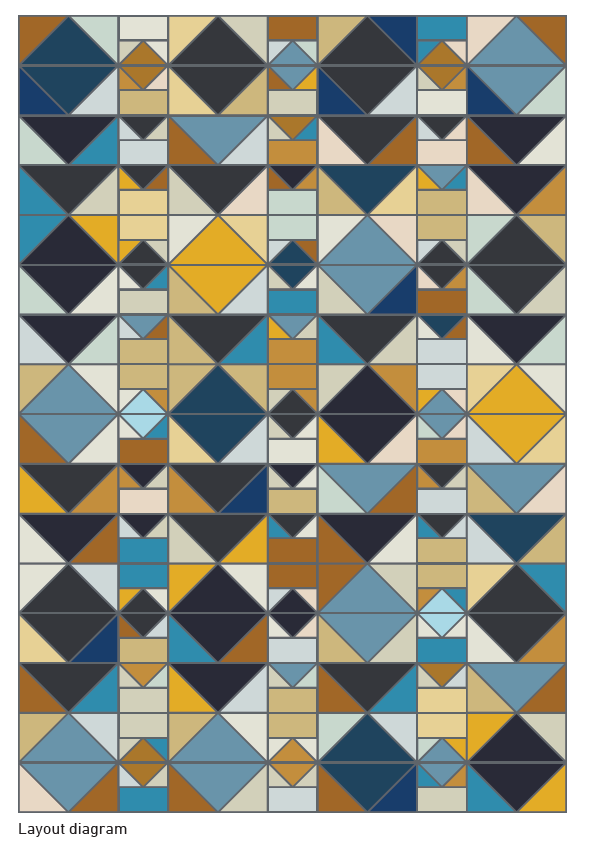
14. Arrange the Large and Small Diamond units, the Large and Small FG units and the remaining 4 1/2in × 2 1/2in background rectangles into rows, experimenting with colour placement (layout diagram).
15. Join the 4 1/2in × 2 1/2in background rectangles to the bottom edges of the Small FG units. Join the units into rows, then join the rows to complete the quilt top.
Quilting and Finishing
16. Cut the backing fabric in half across the width. Remove the selvedges and re-join the pieces along the length with a 1/2 in seam. Press the seam open.
17. Press the quilt top and backing well. Make a quilt sandwich by placing the backing fabric right side down, the batting on top, then the quilt top centrally and right side up. The backing and batting are slightly larger than the quilt top. Baste the layers together using your preferred method.
18. Quilt as desired. Karen quilted a grid of rectangles across the quilt.
19. Trim off excess batting and backing fabric and square up the quilt.
20. Sew the binding strips together end-to-end using diagonal seams. Press the seams open and trim away the dog-ears. Fold in half lengthwise, WST, and press.
21. Sew the binding to the right side of the quilt, folding a mitre at each corner, then fold the binding over to the back of the quilt and hand stitch in place to finish.

-


