Free Project: Water Lily Brooches
Mar 18th 2022
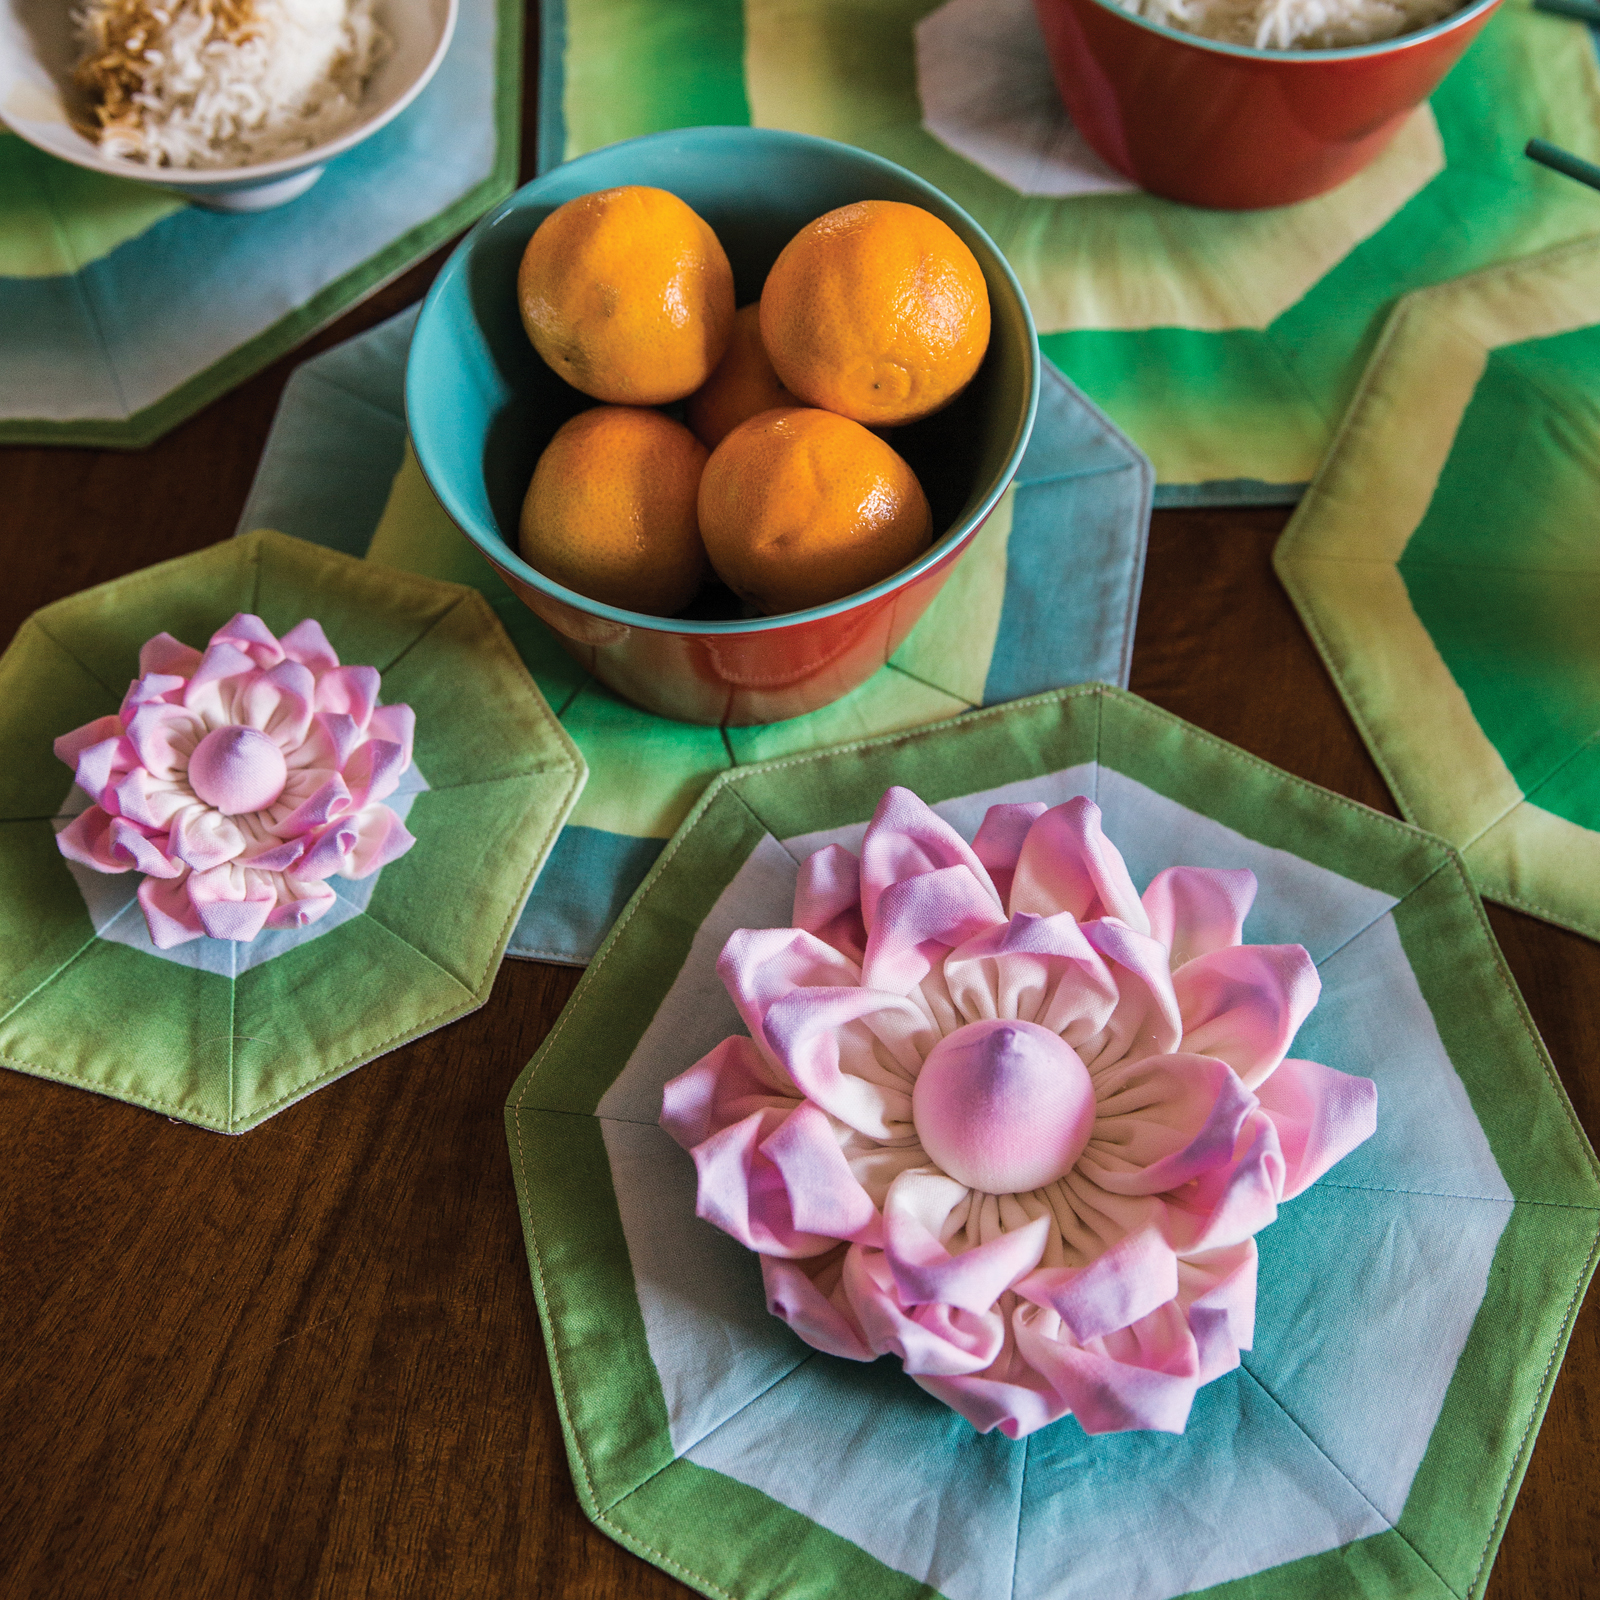
Water lily brooches make for stunning spring and summer accessories. Water Lily Brooches is a project from Adventures in Fabric La Todera Style by Julie M. Creus

FINISHED SIZES: Large: 51/2˝ diameter × 2˝ thick; Medium: 41/2˝ × 2˝ thick; Small: 31/2˝ × 2˝ thick
CONSTRUCTION OVERVIEW: Cut 25 circles from fabric. Fold and press each petal, then string onto extra-strong thread lengths to form two petal rings. Create a fabric cone for the center bud, then glue all elements together and add a pin.
Materials Requirements and Cutting Instructions
Large brooch
Fabric:
3/4 yard white PFD (prepared-for-dyeing) fabric
Cutting:
Cut 4 strips 5˝ × width of fabric.
Cut 25 circles using template A.
Medium brooch
Fabric:
1/2 yard
Cutting:
Cut 3 strips 4˝ × width of fabric.
Cut 25 circles using template B.
Small brooch
Fabric:
1/4 yard
Cutting:
Cut 2 strips 3˝ × width of fabric.
Cut 25 circles using template C.
All brooches and Brooch backing and bar pin backing
Fabric:
4˝ × 10˝ rectangle of felt (to make all 3 brooches)
4˝ × 4˝ square of felt (for 1 brooch)
Cutting:
Use pinking shears to cut the following:
Cut 1 piece using template D.
Cut 1 piece using template E.
Cut 1 piece using template F.
Cut 1 piece using template G.
FINDINGS: Strong thread such as Gütermann’s Extra-Strong Thread in white, 11/4˝ bar pin for each brooch
TOOLS: Clear template plastic, hot-glue gun and sticks, nonstick gluing sheet, pinking shears,
Ranger alcohol inks in Wild Plum and Stream, rubbing alcohol, spray bottle, paintbrush
Find Water Lily Brooches Patterns A, B, C, D, E, F, and G. Trace onto clear template plastic and cut out to create templates A, B, C, D, E, F, and G.
Getting It Together
PETAL RINGS
Note: Follow instructions for all sizes.
1. Press all circles in half. Fold both corners in to meet at the center of the curve. Press.

Fold the circle in half and bring the corners to the center.
2. Thread a needle with a 24˝ length of strong thread. Knot the thread, leaving a 6˝ tail. With a 1/4˝ stitch, stitch 1/8˝ from the raw edge of the curve, starting and stopping on the folded side of the circle. Do not backstitch or knot.

Add the first petal to the gathering thread. Use matching thread; dark thread used here for contrast only. (Medium petal shown.)
3. Continue to add petals to the gathering thread until you have added 16 petals.
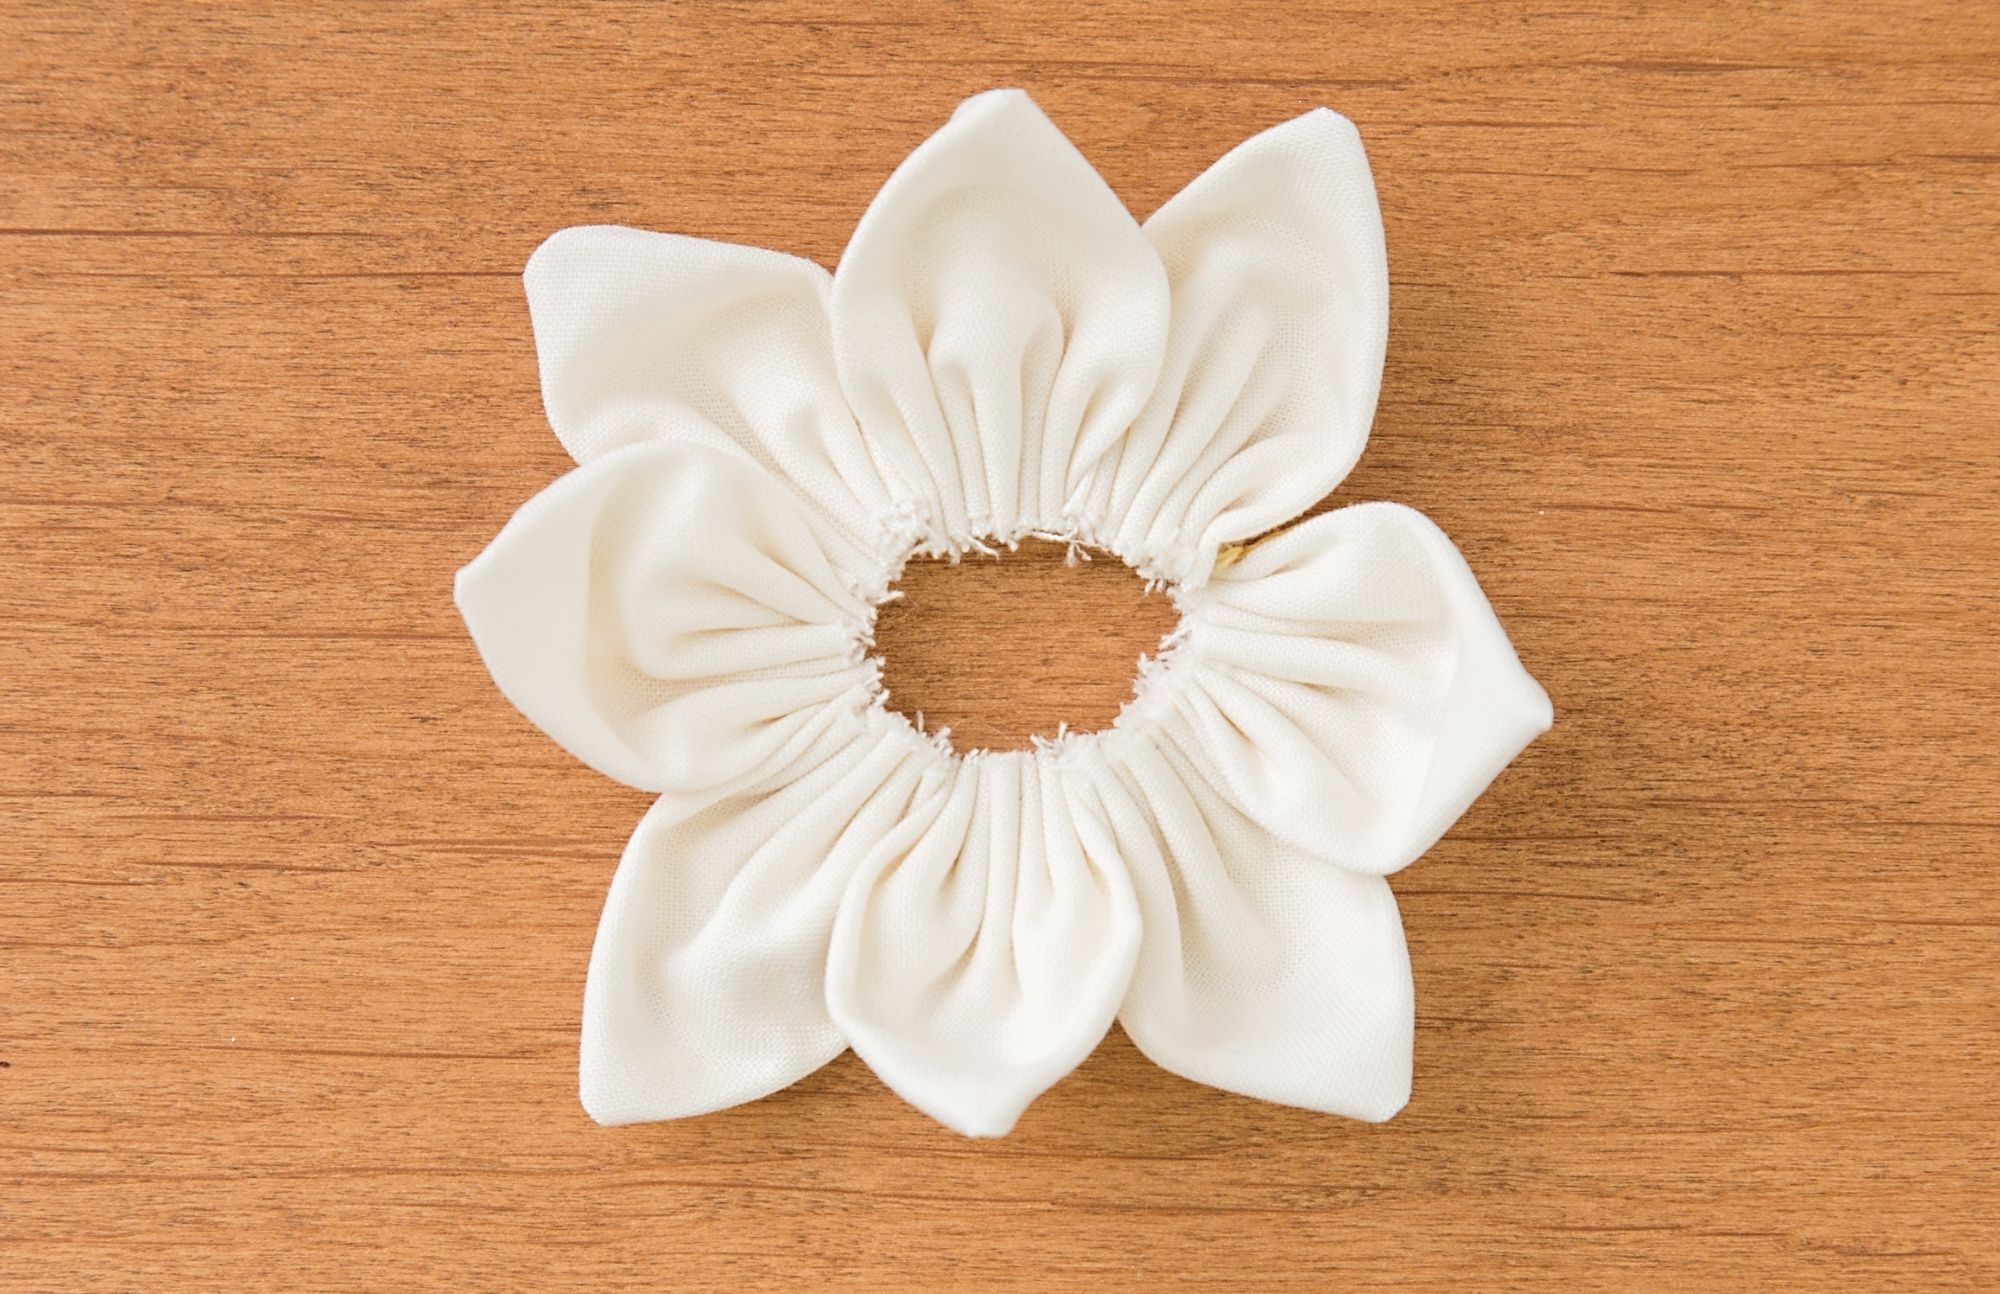
4. From the knot, measure 8˝ for a large petal ring, 6˝ for a medium, and 43/4˝ for a small and mark the thread. Gather the petals along the thread until all the petals fit between the knot and the mark on the thread. Backstitch, then knot to secure the last petal in this ring. Trim the threads. Distribute the fullness of the petals, adjusting gathers.

TIP: Contrary to one’s “sewing intuition,” it’s important not to make your stitches too small when threading the petals, or they will not scrunch up enough for Step 4. For small petals, take three in-and-out stitches. For medium petals (above right), take four stitches. For large petals, take six stitches.
5. Use the same method to make the small petal ring, except thread a needle with an 18˝ length of strong thread and knot it, leaving a 6˝ tail. Add 8 petals to the thread. To gather the small petal ring, measure from the knot 41/2˝ for a large brooch, 33/4˝ for a medium, and 21/4˝ for a small.

BUD CONE
1. Fold the remaining circle in half. Finger-press. Fold the circle again (into quarters), matching creases and raw edges. Finger-press. Open the last fold. You will have a half-circle with a bisecting crease.
2. Using white thread and a short stitch length (2.0), sew along the creased line, backstitching at the beginning and end. Cut the threads and trim.

Stitch directly on the crease lines of the semicircle. Black thread used for contrast only.
3. Invert half of the circle over the other half to form a 2-layer fabric cone, right side out.

Double-walled center bud cone
4. Thread a needle with at least a 12˝ length of strong thread. Backstitch (page 12), then stitch around the perimeter 1/8˝ from the raw edge through both layers of the fabric cone using a 1/4˝ stitch length.
5. Draw the thread up slightly and stuff firmly with polyester fiberfill. Stuff the cone very firmly; think the firmness of a grape!
6. Draw up the thread to close the opening completely. Backstitch, knot, and trim the thread.

Stuffed center bud cone
BROOCH ASSEMBLY
1. Shape each petal by pressing the center gently with your thumb. Pull every other petal up and forward, toward the center of the ring, to add dimension to the petal layer.

Finesse the petals to make the look more realistic.
2. For fabric dyeing, be sure to wear safety glasses and a mask and work in a well-ventilated area. To tint petals, mist petal rings thoroughly with rubbing alcohol. Dilute a few drops of Ranger alcohol inks with rubbing alcohol—3 drops Wild Plum and 1 drop Stream per teaspoon of alcohol. Apply sparingly to the tips of the petals and the center bud with a paintbrush. Add a bit more color to the center portions of the flower for a more realistic effect. Let dry.
3. Arrange the large petal circle on a nonstick gluing surface. Apply hot glue to the inner edges of the ring.
4. Center the small petal ring on top of the large petal ring. Press into place until the glue is cool.
5. Glue the fabric cone to the center.
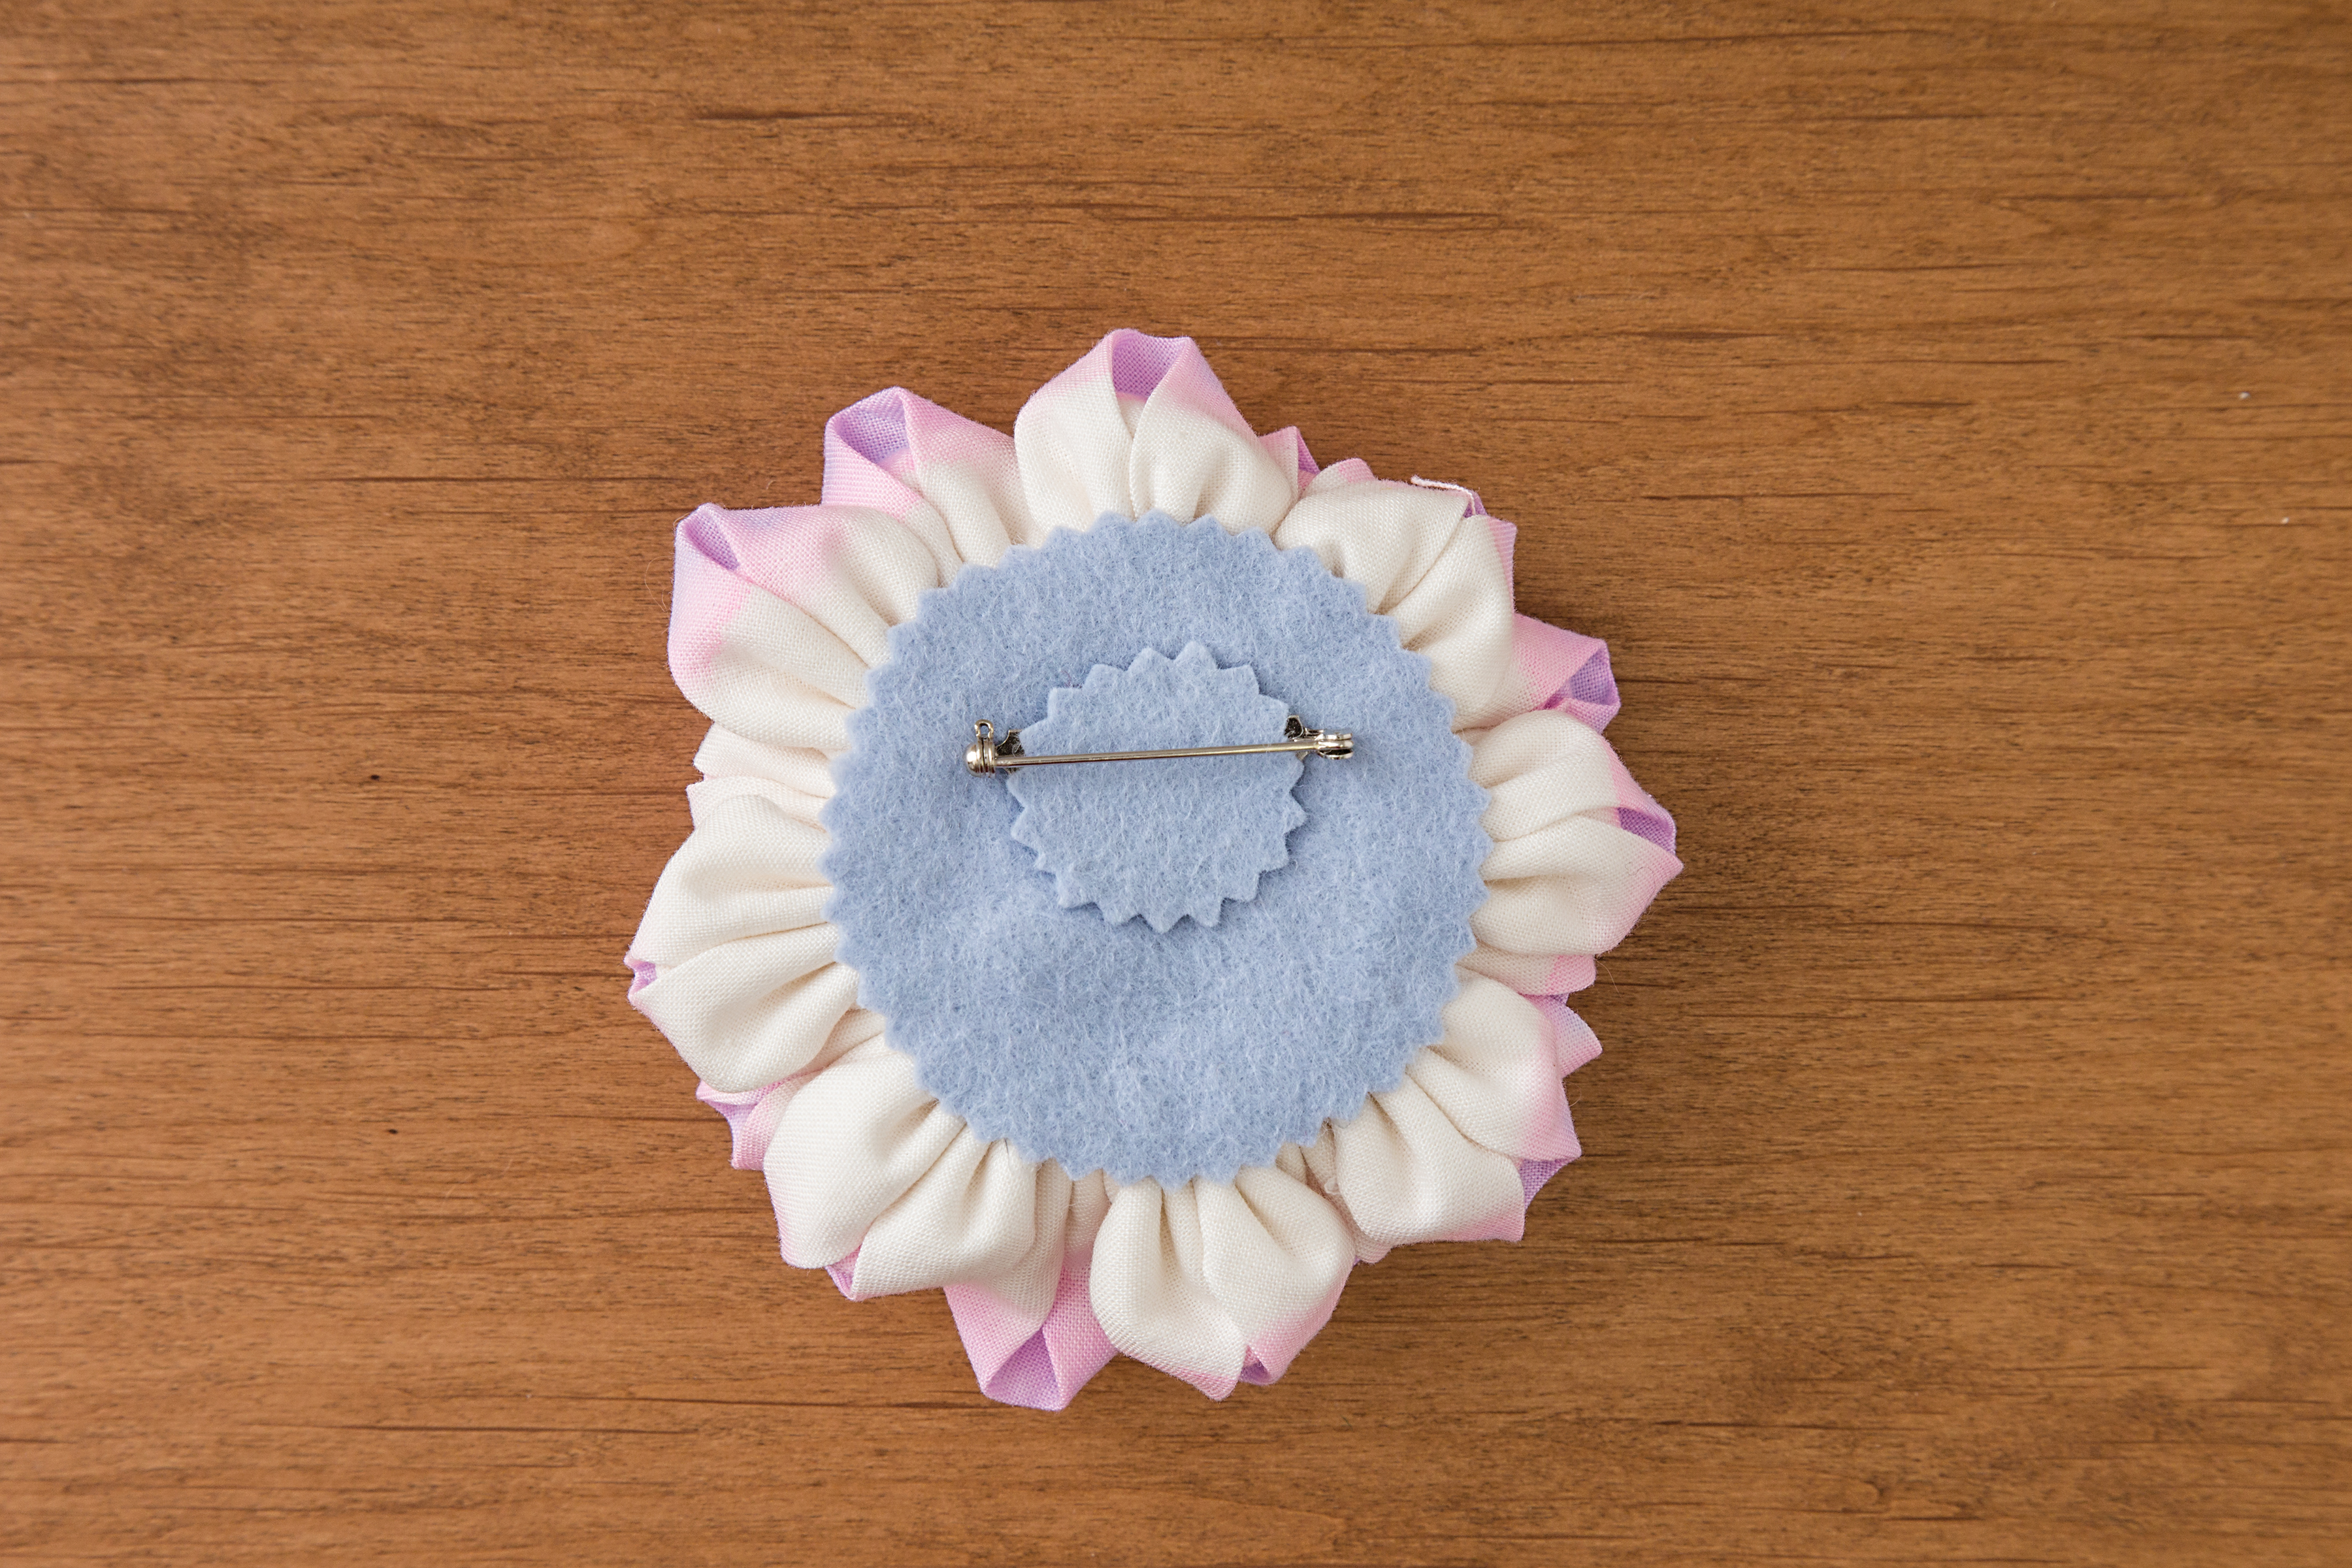
6. Use hot glue to attach the felt circle onto the back of the brooch.
7. Open the bar pin and spread a scant amount of hot glue onto the section with the holes. Immediately press the smaller circle of felt onto the pin, centering the pin.
8. Apply more glue to the back side of the small circle covering the pin. Center 1˝ from the border onto the large felt circle on the back of the flower.

Glue a small circle of felt over the bar pin for a neat finish.
Shop Adventures in Fabric La Todera Style
Want more creative content? Sign up and receive 30% off your first order.


