
Free Pattern: Hip Zip Bags
Posted by Lynn Merrill on Sep 15th 2014
...Continuing #NationalSewingMonth with a guest post from our super talented author, Erin Hentzel! Erin is here to share a free pattern for 18" dolls. Take it away, Erin!
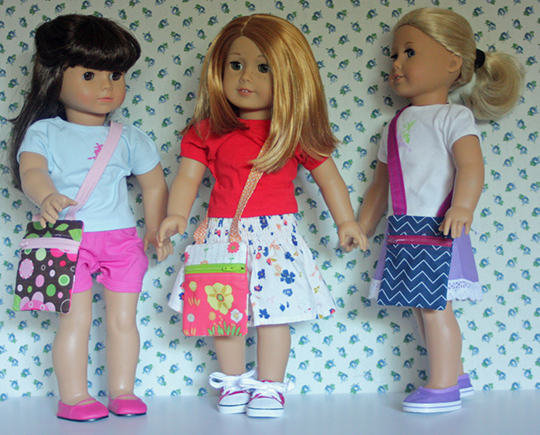
Hip bags are so trendy right now, which means it's only fitting that your child's doll should have one, too. Accessories complete any ensemble and always make play time much more fun! These sew up so quickly and make great gifts for the young doll collectors in your life. If the zipper makes you nervous, don't be. This technique for inserting zippers is super easy to do and looks great!
Hip Zip Bag for 18 inch Dolls
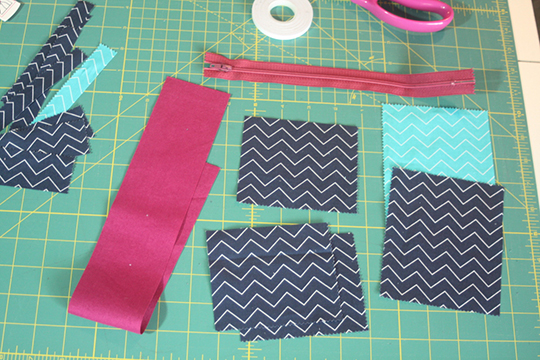
Here's what you need:
5 charm squares (5 inch squares) or you can cut pieces from scraps
A nylon zipper at least 6 inches long (longer zippers can be easier to work with)
Fat quarter for handle
Wonder tape (optional
Zipper presser foot for sewing machine
Note if using scraps, you will need:
3 - 3 ½" x 4 ¼"
2 - 5 x 4 ¼"
1 - 2 ¼" x 17"
Here's what to do:
Step 1
Cut all the charm squares to 4 1/4 inches by 5 inches.
Set 2 pieces aside
Cut the remaining 3 pieces to 3 1/2" by 4 1/4"
From the fat quarter, cut a piece that measures 2 1/4" by 17 inches long
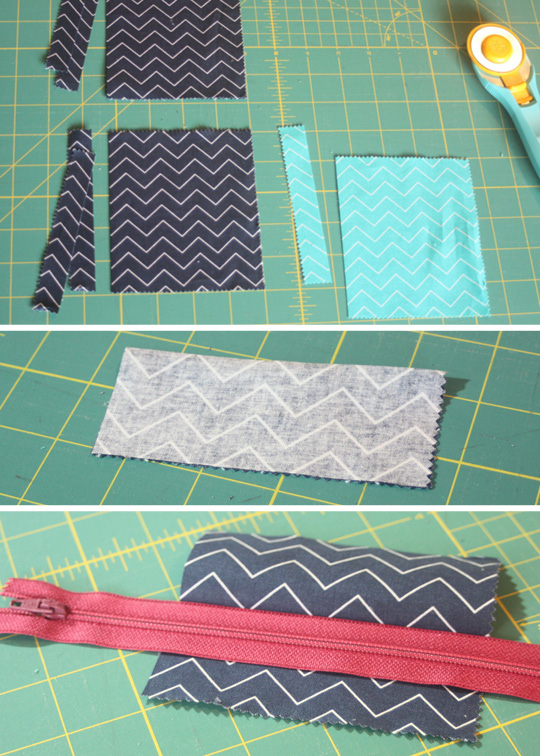
Step 2
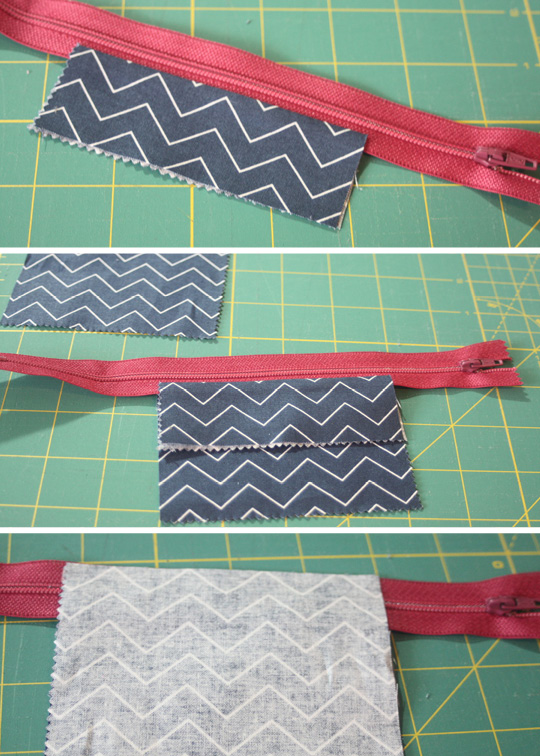
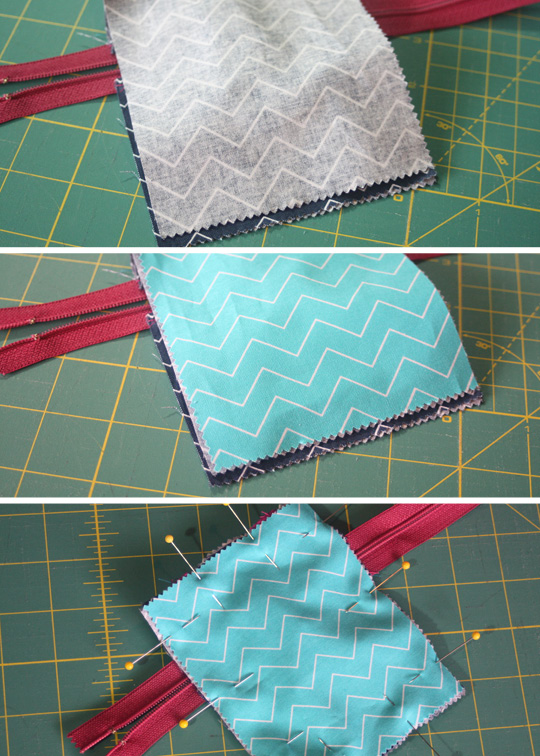
Fold 1 of the 3 ½" X 4 ¼ pieces in half, right sides together, keeping the width at 4 ¼".
Press it with an iron.
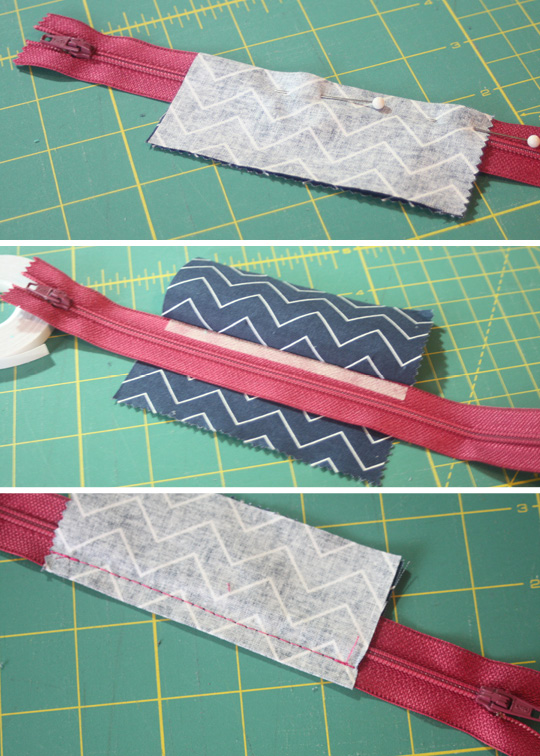
Place the zipper inside the folded edge, so the edge of the zipper is in the crease. Pin it in place.
I like to use wonder tape instead of pins.
Using a zipper presser foot on your sewing machine, sew one side of the zipper.
Open the fabric up to expose the right sides of the fabric and press it.
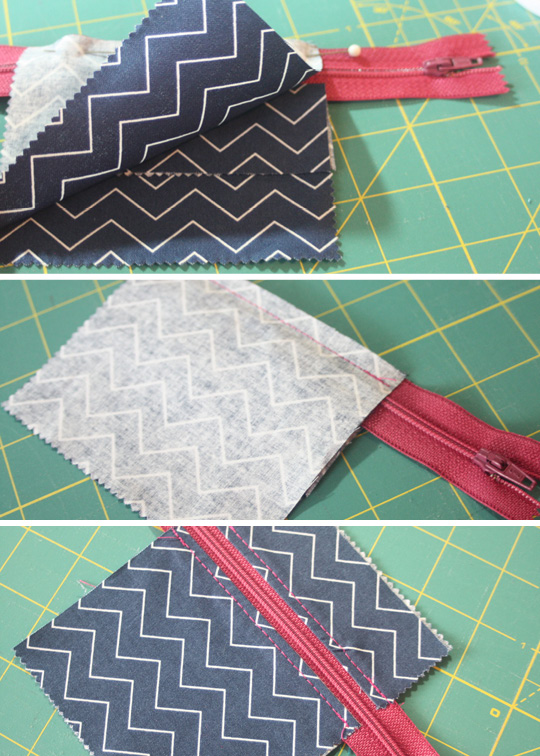
Step 3
Place another 3 ½"x 4 ¼ " piece on the work table with its right side facing up. Place the zipper onto the fabric, matching the un-sewn zipper edge even with the raw edge of the fabric. It's important to line up the side edges of the fabrics together.
Place the last 3 1/2 " x 4 ¼" piece of fabric on top of the fabric with its right side facing down. Line up all the fabric edges together and the top edge of both fabric pieces with the edge of the zipper.
Pin all three together or use wonder tape. Sew across the top edge.
Fold the fabrics open and press.
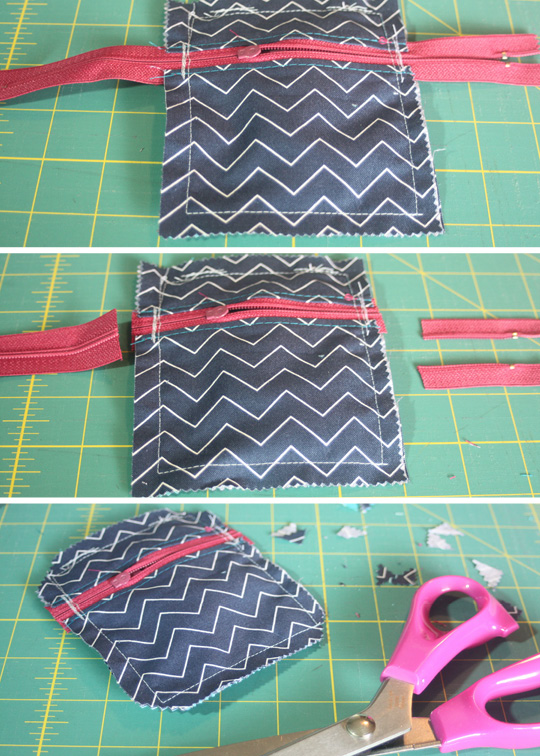
Top stitch along the folded edges. This is the front bag piece.
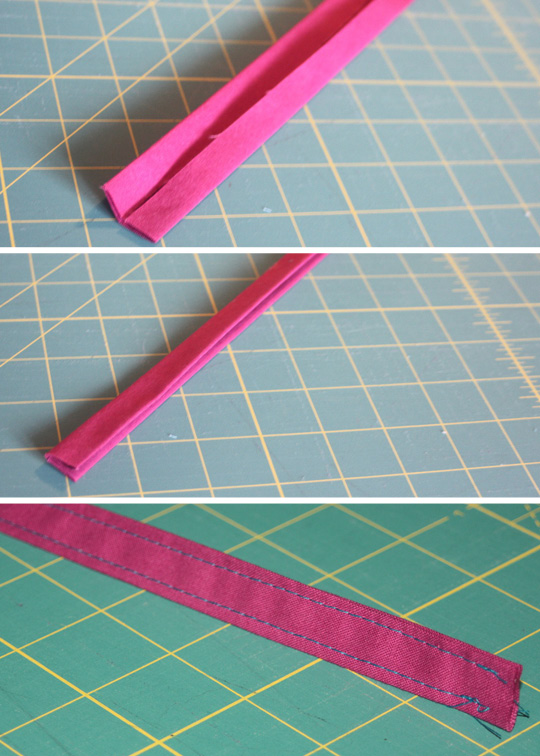
Step 4
Make the strap by folding the raw edges of the 2 ¼" x 17" piece toward the center and press with an iron.
Fold it in half lengthwise and press with an iron.
Stitch along the length of the strap to finish it.
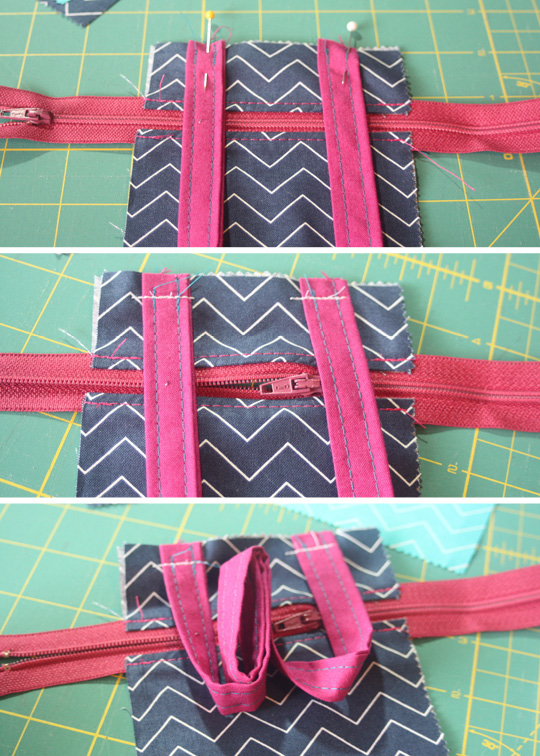
Step 5
Baste the handle in place along the top edge of the front bag piece, onto the right side. Make sure it's placed 1/2"-3/4" from the sides.
Step 6
Open the zipper to the middle of the front bag piece. Fold the strap and place it in the center of the front bag piece to keep it out of the way.
Place the 5"x4 ¼" piece that you want to have showing on the outside onto the front bag piece with its right side facing down. The right side of the zipper/zipper pull should be facing the right side of the outside bag piece.
Place the remaining 5"x4 ¼" piece on top of the outside bag piece with its right side facing up. Match up all 4 edges together on all pieces and pin them all together. Make sure the strap is still out of the way.
Sew around all 4 sides, using a 3/8" seam allowance.
Reinforce the zipper edges by sewing across the zipper several times, or sew zipper stops just inside the seam allowances.
Clip corners and trim away extra zipper.
Optional: finish the seam allowances with a zigzag stitch or trim any unpinked edges with pinking shears.
Step 7
Reach inside the zipper and carefully pull the bag and strap right side out. Use a corner turning tool to poke out the corners.
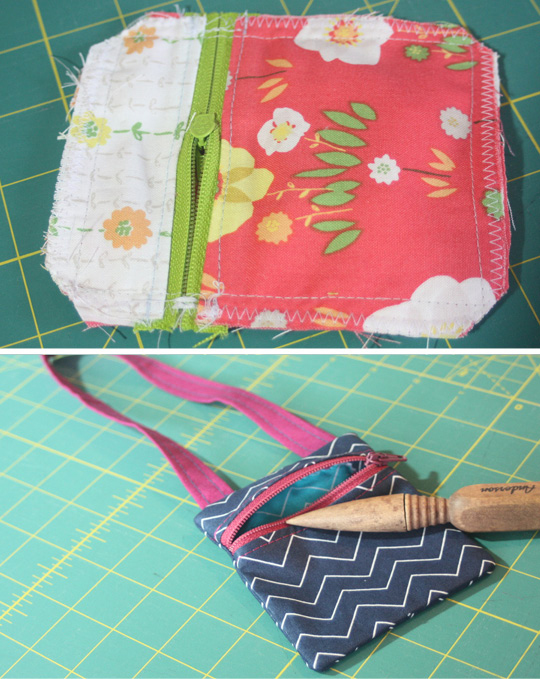
Your doll's Hip Zip Bag is finished.

These go together so quickly and are so much fun to make...I made a bunch to give away as party favors!
GIVEAWAY TIME!
Enter to win a copy of Erin's book, Sew In Style -- Make Your Own Doll Clothes AND a Michael Miller Fabrics "Happy Tones" Jelly Roll here: a Rafflecopter giveaway


