

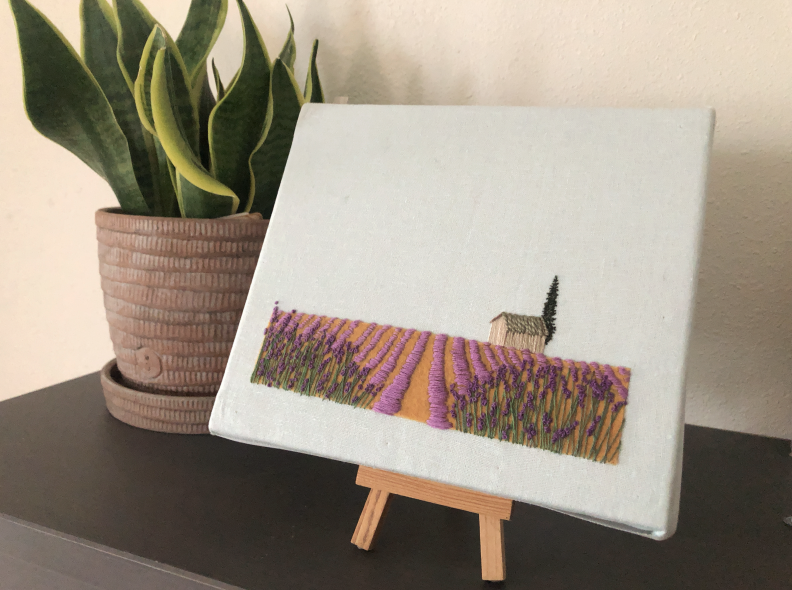
Embroidered Lavender Field: Additional Project!
Posted by Theresa M. Lawson on Apr 5th 2024
Hi, fellow stitching enthusiasts! If you loved the creativity in my book, Hand-Stitched Oasis, get ready to be dazzled by this delightful new, additional project! Picture yourself amidst a blooming lavender field—this stitching venture is tailor-made for the spring season, sure to add a splash of charm to any landscape you choose. Let's dive in and enjoy the artistry together!
Materials
- 10” x 12” Light blue linen
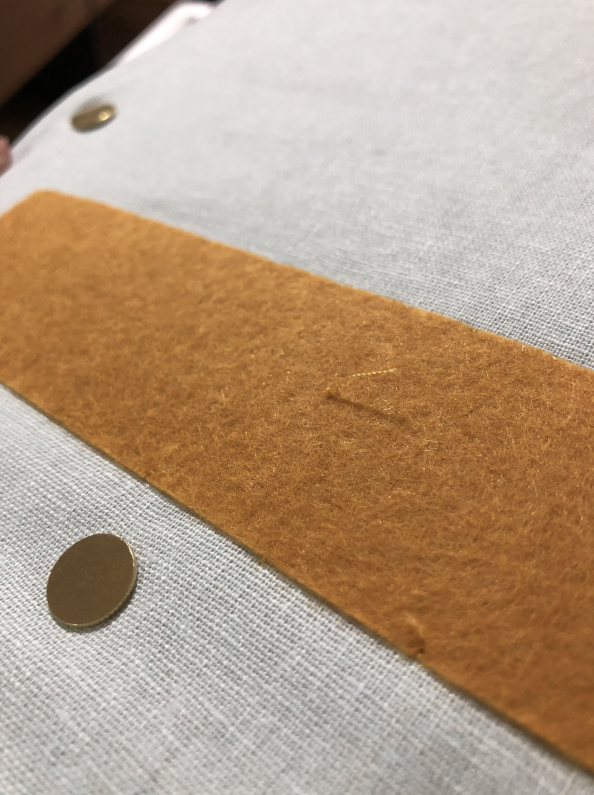
- 8” x 2” rectangle of turmeric-colored felt
- DMC Embroidery Floss in the following colors:
- 934 Dark Green Embroidery Floss
- 553 Lilac Embroidery Floss
- 3834 Purple Embroidery Floss
- 905 Green Embroidery Floss
- 613 Taupe Embroidery Floss
- 612 Dark Taupe Embroidery Floss
- 640 Perle Cotton Size 3
Instructions
1. Appliqué your rectangle of felt to the bottom of your canvas, this will serve as the base of your lavender field and depict the sandy earth beneath your flowers.
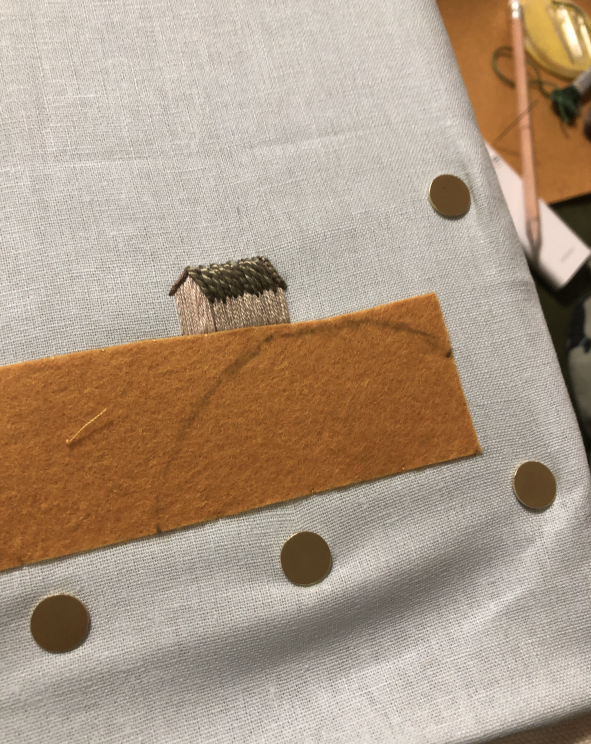
2. Embroider your lavender harvest shed using your two taupe threads for the walls and your Perle cotton for your roof. Place your shed so it sits just above your felt.
- Walls: Start with your light taupe. Using 1 strand of floss, satin stitch one side of your wall. It can be either side, the light taupe will simply depict which side of your wall faces the afternoon sun.
- Finish your shed walls by satin stitching the remaining wall with your darker taupe floss.
- Roof: Using your Perle cotton, satin stitch your roof tiles. You are depicting a tiled roof seen from a distance, so there’s no need to be neat with your stitches.

3. Swap to 2 strands of your dark green floss. Using seed stitches placed tightly together, embroider your Cyprus tree behind your harvest shed.

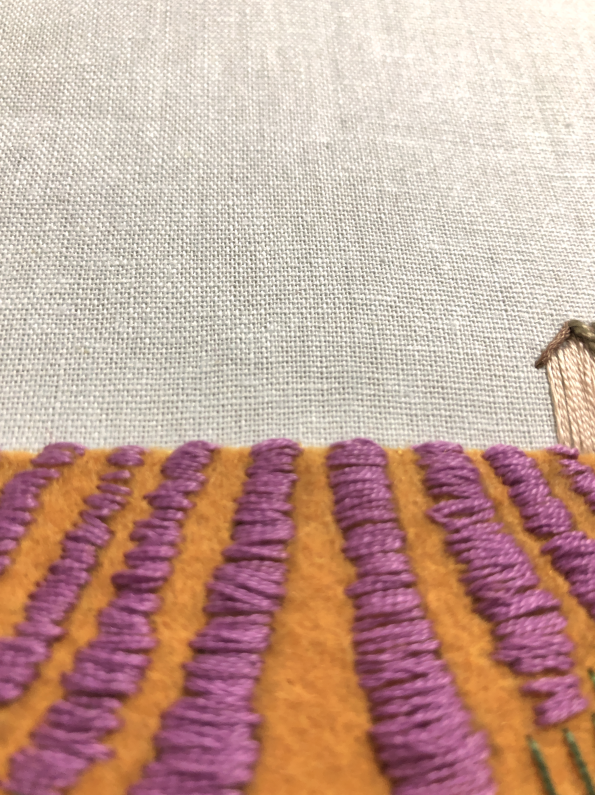
4. Now for your lavender flowers. Start by drawing some guiding lines using an embroidery or lead pencil. To capture perspective and depth, make your middle lavender rows slightly larger than those on either side. Make sure your rows move a little diagonally to the right on the right-hand side and vice versa on the left.
5. On either side of your field, you will be embroidering close-up lavender flowers. Draw a rough semi-circle on both sides to guide you.
6. Embroider your distant lavender flowers. Follow your guiding row lines and satin stitch each row using 2 strands of your lilac floss. You can stitch slightly over your felt patch.
7. Next, within the semi-circles you drew earlier, use 1 strand of your green floss to haphazardly fill the semi-circles with straight stitches of different lengths.
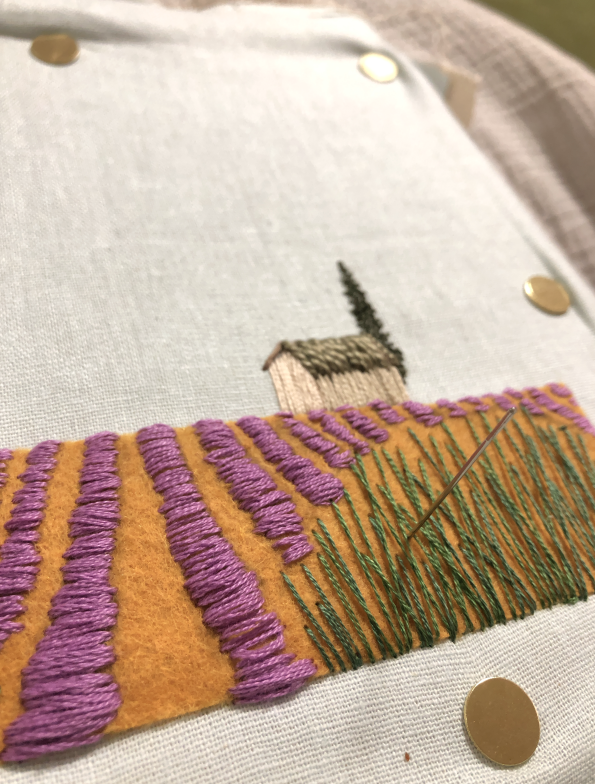
8. Over these straight stitches, use 2 strands of your purple thread to create short vertical rows of French knots. These are your lavender flowers. Try varying the direction of your flower rows to give a natural look to your lavender patches.
9. And there you have it! Your beautiful lavender field. Frame your piece using your favorite technique and place where you can enjoy it daily.
...
Shop Hand-Stitched Oasis at C&T Publishing!
Theresa M. Lawson found a creative outlet through fiber arts after working many years in an office. When her hand-embroidered portraits became popular, Theresa authored her first book Hand-Stitched House: a Guide to Designing and Embroidering a Portrait of Your Home. Theresa is currently living in the Pacific Northwest of the United States with her husband and cat, Nigel. themonsterslounge.com.


