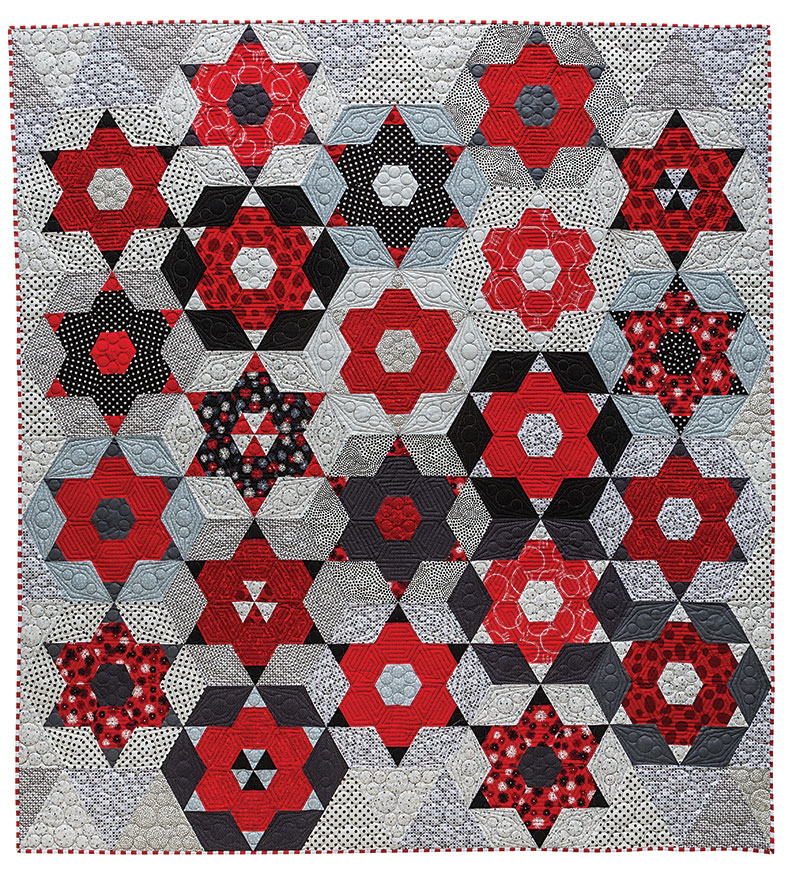
Bliss Quilt

From Quilts with an Angle
Class Description:
This is a class for the confident beginner. No triangle sewing experience needed! Students will learn about fabric selection, cutting triangles and hexagons with a triangle ruler, sewing 60° shapes, and seam matching. Students will be able to make a selection of blocks that they can use as the beginnings of a quilt. This is a great class for playing with your stash and combining fabrics to create fun effects.
Class Length:
6 hours (one day). It can also work as a two-day class, with a second class on arranging and joining the blocks occurring a week or so after the first (giving students time to complete their blocks).
Class Supply List:
- Required text: Quilts with an Angle by Sheila Christensen
- Fabrics: See book for requirements (this is a great opportunity for students to add to their stash as they work and make blocks)
- Triangle ruler (see p. 15 for a discussion of suitable rulers)
- Straight ruler 6" x 24"
- Rotary cutter with sharp blade
- Cutting mat
- Sewing machine: cleaned and with a new needle
- Seam ripper
- Neutral, good-quality thread (I recommend Aurifil)
- Clover roll and press (optional but desirable)
- Fine glass-head or flower-head patchwork pins
- Small, sharp scissors
- C&T Corner Cut tool
- Fabric marker
- Starch equivalent (e.g. Mary Ellen's Best Press or Flatter)
- A small plastic box (useful for catching the many tiny snippings that will be produced)
Classroom Preparation:
A design wall for teaching is useful, and wall space for students to view and share their work is a bonus.
Be sure to have plenty of irons and ironing boards, but blocks can be pressed with the roll and press as they are being constructed, and then pressed with the iron once complete.
Each student needs a workspace for cutting and for sewing with their machine.
Class Agenda:
1. Introduction. Show a selection of different blocks from the quilt, and explain to students how they can use fabrics in different combinations of light, medium, and dark and different hues and patterns to create varied blocks (refer to p. 130 for ideas).
2. Let students have time (20 min) to organize their fabrics and think about how they will combine them in their blocks.
3. Demonstrate cutting triangles for the blocks (see p. 29 for cutting basics).
4. Students cut triangle for one Tri-Hex unit (15 min).
5. Demonstrate cutting hexagons, including fussy cutting (see p. 115).
6. Students cut hexagons for oneTri-Hex unit (10 min).
7. Demonstrate assembling a unit and joining units together (p. 121).
8. Students go ahead and make six identical units and see the effects of their fabrics.
9. Continue to make a variety of blocks through the class.
10. Demonstrate cutting setting triangles and half triangles.
11. Explain how blocks will be joined together to make the finished quilt top.
If the class comes back for a second day, the teacher can spend time with students helping to arrange their blocks for a balanced and pleasing effect and can then demonstrate assembling the quilt top.
TIP: Have a sample block made into a quilt sandwich that you can use to demonstrate quilting strategies for 60° blocks.


