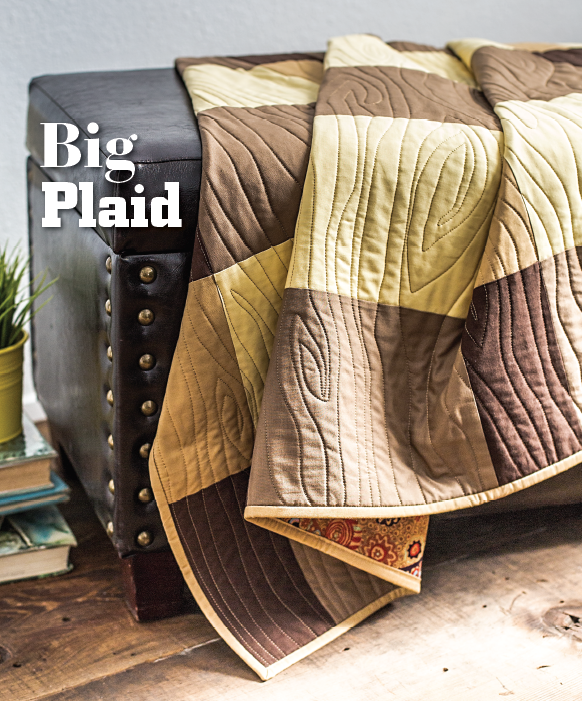
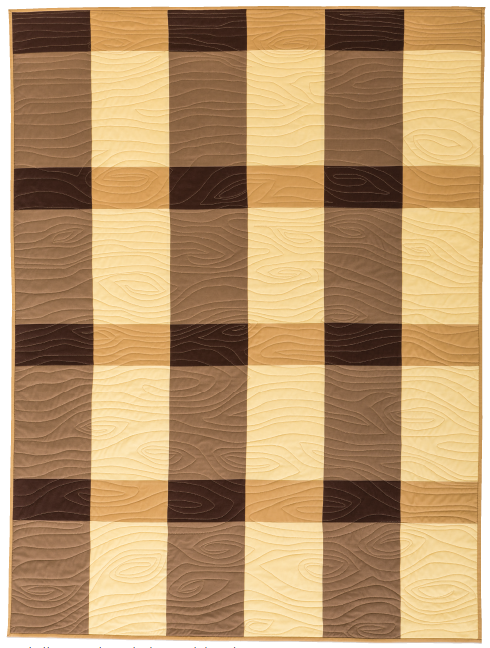
Big Plaid Lap Size Quilt


From Go Big, Go Bold–Large-Scale Modern Quilts
By Barbara Cain
Class Description:
Learn elementary quiltmaking techniques while constructing a simple, modern, lap-sized Big Plaid quilt. Understand the importance of pattern, scale, color, and contrasting values when making fabric selections.
This class is great for beginners and up and excellent for learning rotary cutting and simple piecing skills, including the importance of accurate ¼˝ seams and the benefits of nested seams.
Students should finish the class with one completed lap-sized quilt.
Class Length:
Six class sessions, approximately 3 hours each, typically at one-week intervals. A two-week interval between Classes five and six may be required to accommodate hand quilters.
Class Supply List:
Required text: Go Big, Go Bold–Large-Scale Modern Quilts by Barbara Cain
Fabrics:
- Fabric 1 - dark value of first color choice for top and back feature strip, ¾ yard
- Fabric 2 - light value of first color choice for top and back feature strip, 1 ½ yards
- Fabric 3 - dark value of second color choice for top and back feature strip, ¾ yard
- Fabric 4 - light value of second color choice for top and back feature strip, 1 ½ yards
- Fabric 5 - multicolored print for the back panels, 2 yards
- Fabric 6 - binding, ½ yard
Batting - 53˝ x 68˝
Tools and materials:
- Thread for piecing - a color that blends with fabric selections
- Thread for quilting - a type that is compatible with quilting technique
- Thread for binding - a color that matches the binding
- Fabric scissors
- Rotary cutter, ruler, and mat
- Basic sewing kit including seam ripper, pins, etc.
- Sewing machine
- Steam iron
Classroom Preparation:
Provide table space and access to an electrical outlet for each student. Provide one pressing station for every three students.
Class One Agenda:
Student Preparation: No preparation is required.
1.Teacher describes the basic components of the Big Plaid quilt:
- Top - Discuss the importance of color, value, contrast, and pattern scale when making fabric selections for a successful plaid effect. Refer to examples on pages 96-97 for an explanation of these factors. Refer to page 64 for palette suggestions.
- Backing - Demonstrate how the print fabric flanks the plaid feature strip, making this quilt essentially reversible.
- Batting - Describe differences between batting selections, including loft and fiber composition and the quilted results of each.
- Quilting - Describe various quilting techniques including hand, domestic machine, tying and tacking. Show supporting examples. Note that longarm quilting is not addressed in this class plan.
- Binding - discuss the various binding methods including bias vs. straight grain and machine sewn vs. hand sewn techniques.
2.Teacher reviews the class supply list of items required for future classes.
3.Teacher discusses pros and cons for fabric and batting preparation, including prewashing and starching.
4.Students choose and purchase fabrics and materials.
Class Two Agenda:
Student Preparation: Bring to class fabrics, batting, and the tools and materials required for the project.
1.Teacher demonstrates general techniques for rotary cutting, referring to pages 100-101:
- Square up fabric
- Trim raw edges
- Cut strips
- Subcut rectangles
2.Students practice rotary-cutting skills on shop-provided scrap fabrics.
3.Teacher and students rotary cut fabrics required for the project, referring to the Cutting Chart on page 61. Refer to Staying Organized tips on page 5 for keeping track of cut fabric. Cut batting to required size.
Class Three Agenda:
Student Preparation: Bring to class cut fabrics (if not completed during class two) and the tools and materials required for the project.
1.Teacher demonstrates general techniques for patchwork sewing:
- To pin or not to pin
- Sewing straight, accurate ¼˝ seams
- Backspacing or other machine-specific methods for fixing threads
- Chain piecing
- Pressing direction
- Nesting seams
2.Teacher and students assemble and press their quilt tops, referring to diagram on page 62.
Class Four Agenda:
Student Preparation: Bring to class cut fabrics for back, cut batting, completed quilt top (if not finished during class three), and the tools and materials required for the project.
1.Teacher and students assemble and press their quilt backs, referring to diagram on page 63.
2. Teacherdemonstrates general techniques for quilt sandwiching and basting, referring to page 103.
3. Teacher and students make and baste the quilt sandwiches.
Class Five Agenda:
Student Preparation: Bring to class basted quilt sandwich (if not finished during class four) and the tools and materials required for the project.
1. Teacherdemonstrates general techniques for quilting by hand and on a domestic machine, covering both straight-line and free-motion patterns. Refer to diagrams on pages 104-105. Also demonstrate tying and tacking techniques.
2. Studentsdetermine their preferred quilting methods and patterns and begin quilting their sandwiches.
3.Teacher supervises and guides students as needed.
Class Six Agenda:
Student Preparation: Bring to class the quilted sandwich (if not finished during class five), binding strips, and the tools and materials required for the project.
1. Teacher demonstrates general techniques for making and applying double-fold, straight grain binding. Refer to pages 106-107.
2. Students bind their quilts.
3. Teacher supervises and guides students as needed.


