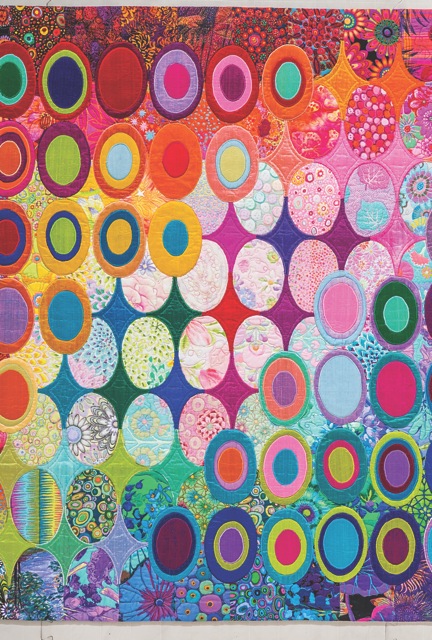
Class Description:
Explore Double Vision! Whether you prefer traditional quilting, art quilting, or modern quilting, there will be different methods for your style of quiltmaking. To fuse or NOT to fuse: your choice! Emphasis in class will be on the use of color, pattern, and textures and the effects they have on one another. You will explore the many different techniques and options for style, scale, and construction. Each student will create a unique and one-of-a-kind quilt. Check out the book Double Vision Quilts and the website quiltescapes.com and view the gallery. For everyone from confident beginners to intermediate quilters.
Class Length:
Three nights or days, at least 3 hours each. You could also do a two-day class, with a 6-hour session on each day.
Class Supply List:
Required text: Double Vision Quilts by Louisa L. Smith
Fabrics for first layer can be: (this depends on your choice of method)
• Many colorful squares or rectangles (Method 1, p. 11, or Method 2A, p. 13)
• ½ yard of 5 different color-coordinating fabrics (Method 2B, p. 14, for a curved first layer)
• 1 yard of 2 color-coordinating fabrics for a large four-patch (Method 2B, p. 14)
• Large print or interesting fabric for a wholecloth first layer; can be a hand-dyed piece (Method 2B, p. 14)
• Supplies for modern quilts (Method 3, p. 16): see p. 82 or 86
• At least 3 yards of background fabric, if designing your own
Fabrics for second layer can be:
• Your choice of Kona cotton or any other solid-color cottons, dupioni silks, or other solid-reading fabrics
• Many colors of fabric in small quantities, such as fat quarters (see p. 95 for resources)
If in doubt bring lots of fabrics. J
Other supplies:
• Piece of cotton batting or a flannel-backed tablecloth for a large design wall
• 5 yards SoftFuse (my favorite!), Lite Steam-A-Seam 2, or Wonder-Under (not needed for the modern or traditional quilts as they are pieced!)
• 6 to 10 sheets of 8 ½˝´ 11˝ paper, maybe recycled paper, printed on one side!
• Optional: Teflon pressing sheet and appliqué scissors
• Sheet of template plastic to create your shapes
• Any threads you may like to use for the stitching around the shapes (I use a lot of different threads—plain colors and variegated ones—and I like rayon 30 or 40 weight)
• Optional: appliqué foot
Classroom Preparation:
Mats, cutters, and rulers, and maybe two ironing stations. Wall space for students is very helpful.
Class Agenda:
Class 1
- Explain the three different methods with samples (teachers use pp. 11–16 for making your class samples).
- After the demonstration, help each student with the creation of the first layer of their chosen design. If the first layer is completed in the first class, help them make their templates for the HUGs and KISSes of their choice. Most students will need more time for this first layer.
- Have students bring 8 ½˝´ 11˝ pieces of fabric and have students fuse on some KISSes and HUGs for the next class, where they will practice the machine appliqué stitches. They will need to bring nice threads for this.
Class 2
- Make sure everyone has help making their HUGs and KISSes templates.
- Demonstrate the use of the fusibles and the correct way to mark and iron (p. 13).
- Have students start playing on the design walls with the HUGs and KISSes on their first layers. Talk about composition, placement, color, and size.
- During the last hour of class, have them practice machine appliqué using the fancy stitches on their machines, making sure they have paper under the fabric samples. Suggest they try many different stitches and see which one they prefer.
Class 3
- Start by going around the class asking each student how they are doing and what questions they have. Answer each student’s questions and look at and critique each student’s work with the whole class.
- Depending on their composition, suggest to each student how to attach or appliqué the HUGs and KISSes, either using many colors or one color of thread for all. This depends on their use of fabrics!!
(If a two-day class is preferred, start the second day with the practice of machine appliqué.)
Shop Opportunity! You may prefer to have one evening of fabric selection prior to the class. This means one evening (or day) where the teacher meets with the students to help them with their fabric selections. Students can bring to class fabrics they may want to use, and the teacher and/or staff can suggest the correct color additions they may need for their chosen project.


