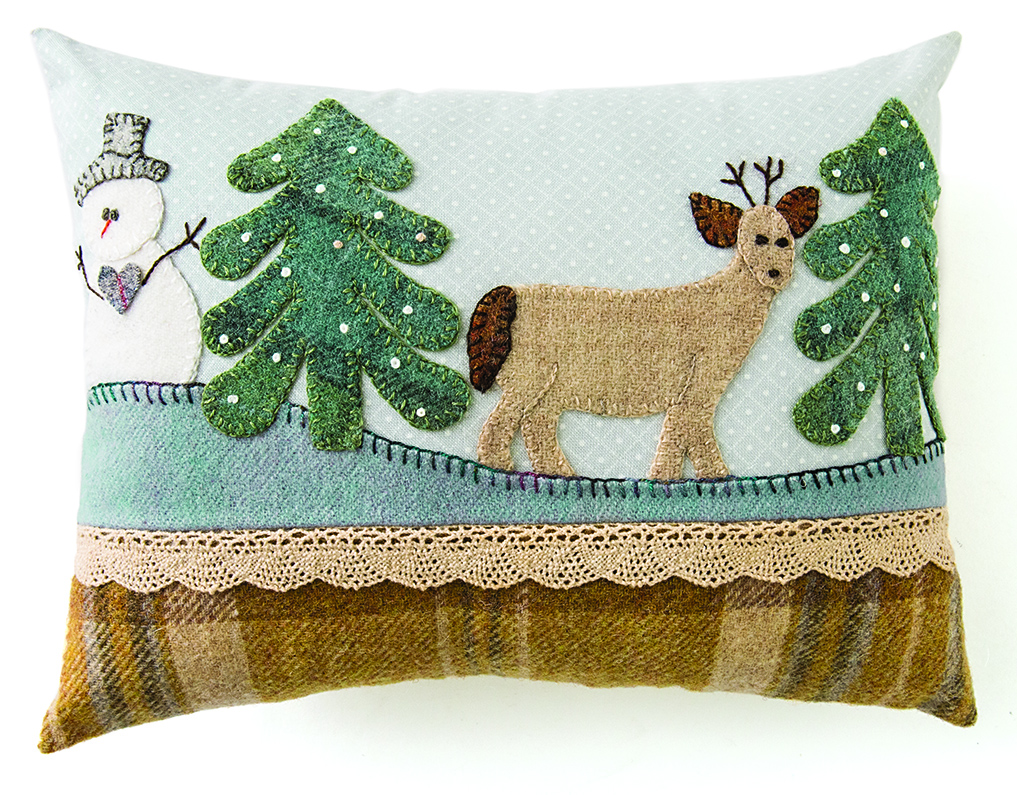
Let it Snow Pillow

From Cozy Wool Appliqué
Class Description:
A fun project for all skill levels. Embroider a small pillow to use for your winter decorating. In this class, students will use a few basic embroidery stitches to do the wool appliqué on a cotton fabric background. They will learn how to fuse the prepared wool pieces onto the background and embroider each piece with the correct embroidery stitch. Each embroidery stitch will be shown, and each student will be given help if needed to complete the stitches correctly. Once the embroidery is completed, instructions will be given on how to finish the pillow.
Class Length:
Six hours.
Class Supply List:
• Required text: Cozy Wool Appliqué
• Cotton fabric and wools (see p. 30)
• Threads (see p. 30)
• Embroidery needles
• Sharp scissors
Classroom Preparation:
• Tables for students to sit and sew
• Iron and ironing board with a soft towel.
Class Agenda:
Before class agenda for students:
- Collect cotton fabrics and wool pieces listed in your book.
- Make a copy of p. 46.
- Cut the pattern pieces apart and place upside down on fusible interfacing.
- Trace the pattern pieces onto the interfacing, then cut out.
- Place pattern pieces onto the wool and iron on. Wool doesn't have a wrong or right side, but if you prefer one side, iron the pattern onto the ‘wrong’ side. If you prefer to use a glue stick on the smaller pieces, place the pattern directly onto the wool and cut out.
- Collect your threads, needles, scissors and pins.
6-hour class:
- On the piece of light-gray cotton print, place the wool pieces. Compare placement to the picture in your book. Students will notice that the snowman, deer, and one tree are placed under the hill. Once all the pieces are placed as they students like them, follow the numbers on the pieces and fuse them down. If students prefer to fuse everything at once they may go ahead; I prefer to fuse and sew one item at a time (I find the wool pieces don't get messy this way).
- Students that know the embroidery stitches can go ahead and start the embroidery on the snowman; the students that need to be taught how to do the buttonhole stitch will be helped here. Start and complete the snowman. Buttonhole stitch around the edges first, then go back and do the embroidery stitches called for.
- Fuse and sew the deer. I would suggest temporarily placing the pine tree so that you know where to place the deer. Fuse and sew the last pine tree, then the hill, then the middle pine tree as it sits over the hill. Each embroidery stitch will be shown and taught when needed.
- Once the embroidery is complete, turn the piece upside down, place on soft towel, and stem press. This step is important to show the students how beautiful their work is after a proper pressing.
- This step will be demonstrated only, to show the students how to complete their pillows at home. Place the lace trim upside down on bottom of the finished piece. Place the wool strip on top and sew seam. Press seam open. If your lace has a nice finished edge, you could just hand stitch or lightly glue it on top of the finished seam. My lace had a bad edge that needed to be sewn into the seam allowance and hidden. With the right sides together, sew the pillow front to the backing. Leave an opening on the bottom to turn. Trim corners. Press seams open; this is a little tricky, just use the point of the iron to open the seam up. Turn the pillow inside out, place upside down on your towel and press. To make nice corners, take a large needle and gently pull the corners out. Stuff with fiberfill. Close bottom using a mattress stitch. Press seams.From Cozy Wool Appliqué


