
Princess TAP™ T-shirt Project by Lesley Riley
Posted by Lesley Riley on Jun 3rd 2010
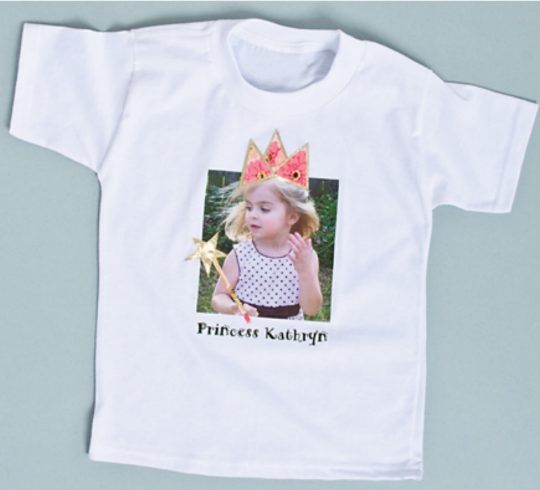
Author and creator of TAP™ Transfer Artist Paper, Lesley Riley, is sharing the “how-to-do” for this adorably embellished t-shirt so you can create one for the princess in your life. With the use of TAP™, this t-shirt project is easy and the image on it will last unchanged through multiple washings. Not that a princess would get dirty…
Read on for project instructions…
Princess TAP™ T-Shirt
Designed by Lesley Riley
Materials:
- TAP™ Transfer Artist Paper
- Iron
- 1 blank white T-shirt
- 6” sq of coordinating fabric
- 6” sq of gold lame fabric
- 2- 6” squares of Wonder Under or similar fusible
- Scissors
- Masking or low-tack painters tape
- 2 sheets of clean copy or parchment paper
- Optional: sewing machine
Instructions:
1. Pre-wash t-shirt to pre-shrink.
2. Inkjet print photo and text (in reverse) onto TAP, cutting each into separate pieces, and trim off excess un-printed TAP.
3. Iron front of t-shirt to smooth transfer area.
4. Insert clean sheet of paper in between t-shirt front & back to prevent any ink transfer.
5. Center TAPed photo on it face down on t-shirt and tape TAP into place. Cover surface with clean paper.
6. Iron TAPed photo on to t-shirt following TAP directions. Peel 0ff TAP backing, ensuring the image has fully bonded to t-shirt to maximize washability (you can’t really use too hot of an iron or apply heat for too long).
7. Iron TAPed text following steps 5 & 6.
8. Iron Wonder Under to wrong side of fabric and lame.
9. Cut 3 triangles from fabric to create crown. Fuse triangles to lame.
10. Cut fabric triangles from lame leaving a slight lame border.
11. Fuse triangles onto photo to create a crown.
12. If hands are showing in your photo, cut a thin strip of fabric for scepter and a star from lame.
13. Fuse fabric strip in position. Fuse star onto tip of strip.
14. Machine stitch fused appliqués in place.
15. Add additional embellishments (optional).


