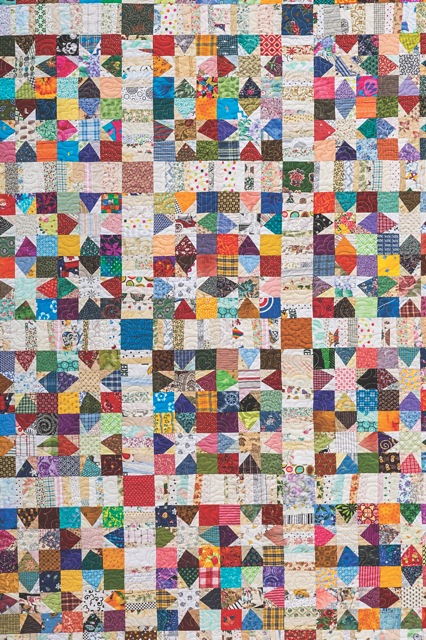
Wonky Wishes Star Quilt

From Wonky Wishes Star-Quilt Pattern
<image source: from Wonky Wishes, Page 2>
Put those precious scraps to work for you with a dazzling quilt pattern from best-selling author Bonnie Hunter.
Class Description:
Sew a field of wonky stars atop colorful scrappy squares and low-volume, string-pieced sashing. Easy rotary cutting and simple patchwork make this pattern ideal for beginners, with pressing tips for perfect results!
Class Length:
One day (6 hours of class time) or 2 half-day sessions.
In the morning (session one), students learn the simple technique of making wonky stars using 2 ½˝ scrap squares in colors (background) and neutrals (star points). Wonky stars are fun, and the students will have a great time combining fabrics and swapping squares with each other up until lunchtime.
After lunch (session two), switch gears into some fun string piecing with neutral strings, also swappable for more variety!
Class Supply List:
Required Text: Wonky Wishes Star-Quilt Pattern
Fabric:
Yardage for the quilt as shown in pattern:
• Assorted dark scraps in a variety of colors: 5 yards total
• Assorted light/neutral fabrics from white to cream to beige: 6 ¾ yards total
NOTE: I always tell my students to bring enough fabric to keep them busy for a six-hour class. There is no need to cut out the whole quilt ahead of time. Many may want to turn their blocks into a pillow, a table runner, a bed runner, a wallhanging, or a baby quilt. Since this quilt is based on blocks and sashings, they can make whatever size they want.
To save class time, have the students come with precut squares for the blocks and strings already cut in widths from ¾˝ up to 2˝ for string piecing the sashings.
Precutting before class:
From dark-colored fabrics, cut 960 squares 2 ½˝ ´ 2 ½˝ for star backgrounds.
Cut 42 squares 3 ½˝ ´ 3 ½˝ for cornerstones (not needed for class time).
From assorted light/neutral fabrics, cut 480 squares 2 ½˝ ´ 2 ½˝, slicing squares in half on the diagonal from corner to corner to yield 960 star-point triangles.
NOTE: Small leftover squares, triangles, rectangles, and other scraps may be used in place of cutting triangles from the 2 ½˝ squares. They do not have to be precisely cut to cover the corner of a base square. Ultimate scrap using!
Again, the students only need to bring enough to keep them busy during class time. If you plan on fabric for 4 12˝ blocks (16 individual 6˝ blocks), that should be enough for the morning session.
Shop Opportunity! Your shop could easily package together 2 ½˝-square packs and random-width string packs as kits to sell to the students so there would be little to no preparation for them to take this class!
Other Supplies:
• Sewing machine in working condition with ¼˝ presser foot
• Rotary cutter with new blade, mat, and ruler (a 6 ½˝ square is helpful!)
• Pins, thread, scissors, and seam ripper
Shop Opportunity! SellCarol Doak’s Legal-Size Foundation Paper from C&T Publishing (8 ½˝ ´ 14˝) as foundation for string piecing.
Classroom Preparation:
Students will need trimming space with rotary cutters and mats, as well as irons and ironing stations.
Class Agenda:
1. Demonstrate how stitch-and-flip star points are made, wonky style, using the 2 ½˝ base squares and neutral triangles (p. 5). Star points can be tall and skinny, short and fat, and everywhere in between. As long as the fabric covers the corner of the base square, it works!
2. Allow students to piece and stockpile the star-point units for about an hour to build up a variety of units at their own pace.
3. About an hour before lunch, demo how to assemble the blocks into individual star-block quarters, and finally into full 12˝ blocks as found on pp. 6–7.
4. After lunch, switch gears to string piecing the sashing.
NOTE: Instruct students to drop the stitch length on their machines to about 1.5 on a digital machine or 14–16 stitches per inch on a vintage machine, as seen on p. 7. Smaller stitches put needle holes through the paper closer together, making the paper much easier to remove.
5. Demonstrate slicing the string-covered papers into sashing widths, and also paper removal.
While this is not a project students can finish in a day, I know they will have a great time with this quilt and will learn all they need to finish it at home.


