

Circle Takes the Square Quilt
Posted by Deirdre Quirk on Sep 19th 2017
Happy National Sewing Month! Please enjoy this free project taken from Double Vision Quilts. You can enter to win your own ebook copy of Double Vision Quilts right here: a Rafflecopter giveaway.

Finished Size: 42" x 42"
Materials and Supplies
FIRST LAYER (BRIGHT COLORS): 49 squares 6 1/2˝ × 6 1/2˝; 25 squares are for the inner quilt and 24 squares are for the borders.You may want to cut a few extra so you can get just the right color in just the right place.
SECOND LAYER:
• White-with-black print(s) for A blocks: 1/2 yard if you use just 1 print, or a variety of prints to total 1/2 yard
• Black-with-white print(s) for B blocks: 1/2 yard if you use just 1 print, or a variety of prints to total 1/2 yard
BATTING: 46˝ × 46˝
BACKING: 2 3/4 yards
BINDING OR FACING AND SLEEVE: 1 yard
THREAD: A variety of rayon threads in colors plus black and white to match the fabrics for appliqué and quilting
Cutting
Make the template using the 1/4-KISS A pattern (download here).
FIRST LAYER: Cut at least 49 squares 6 1/2˝ × 6 1/2˝. I suggest you cut more so you can play with the colors.
WHITE-WITH-BLACK PRINT(S): Cut 24 pairs of 1/4-KISS A. The pairs of KISSes are placed diagonally across from each other on the blocks.
BLACK-WITH-WHITE PRINT(S): Cut 26 pairs of 1/4-KISS A. The pairs of KISSes are placed diagonally across from each other on the blocks.
BINDING OR FACING: Cut strips as needed.
SLEEVE: Cut 2 strips 10˝ × width of fabric.
Construct the Quilt
1. Place the 25 squares for the inner quilt on your design wall, arranging the colors any way you like.
2. Place 4 black-with-white print KISSes (cornerstones) on each of the 13 A blocks; you can use 4 of the same fabric cornerstones or use 2 of the same in opposite corners. Refer to the quilt assembly diagram as needed.
3. Repeat Step 2 for the 12 white-with-black print B blocks.
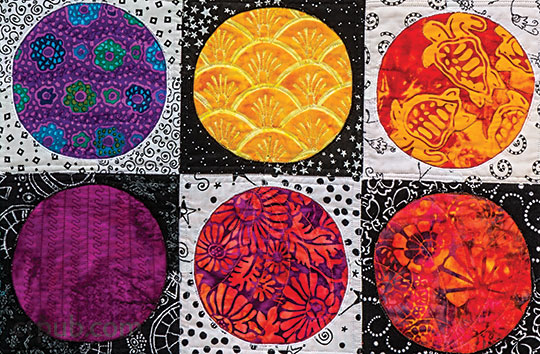
Fabric notes: This quilt is made mostly from Hoffman Batiks. Precut 10˝ × 10˝ squares (Layer Cakes, Bali Crackers, and so on) are great for this quilt. The contrast of colors on the black-and-white prints makes the colors pop.
Tip:
• Enlarge the quilt by adding more squares to make it a baby quilt.
• Transfer photos to fabric to use in the circles.
• Make this an I Spy quilt for toddlers.
4. Baste each block 1⁄8˝ from the outside edge with a large (3.5) stitch; this will keep the cornerstones in place when you sew the blocks to each other. Place the basted blocks back on the design wall.
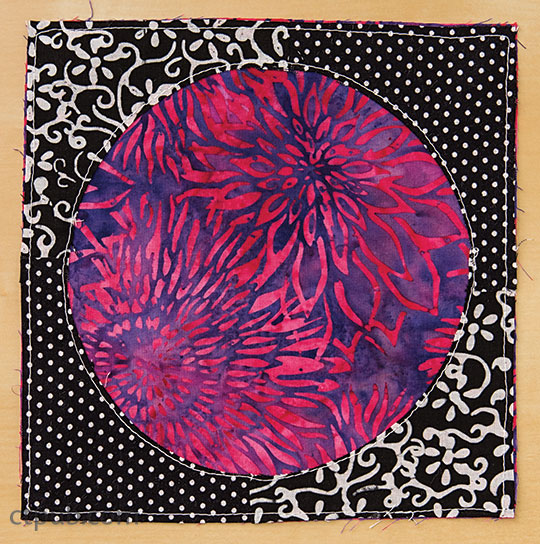
A block
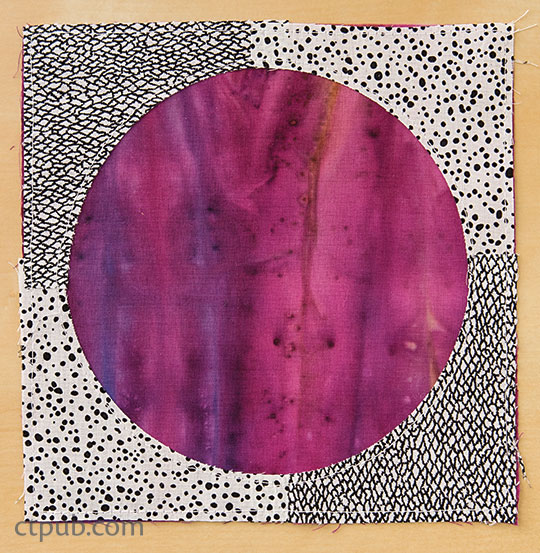
B block
5. Arrange the 24 border blocks on the design wall. Color placement is important here.
6. When you are happy with the border placement, sew all the blocks into rows and sew the rows together. Press the seams open.
Appliqué and Embellish
1. Place stabilizer under the areas you are going to stitch to prevent the fabric from puckering.
2. Stitch all around the circles created by the 1/4-KISSes.
Note: The project quilt is not embellished, but you can embellish your quilt if you like.
Tip: A buttonhole stitch is a lot faster than a satin stitch and it uses a lot less thread—but it’s your choice.
Finishing
1. Piece the backing if needed.
2. Layer the finished quilt top, batting, and backing. Pin baste and quilt as desired. For the quilting, Judith did free-motion quilting or decorative stitching in all the circles and outside blocks, using matching threads. She also stitched 1/16˝ and 1/4˝ inside the block seamlines, with white or black thread, using a walking foot. Very effective and very easy.

Quilt assembly


