


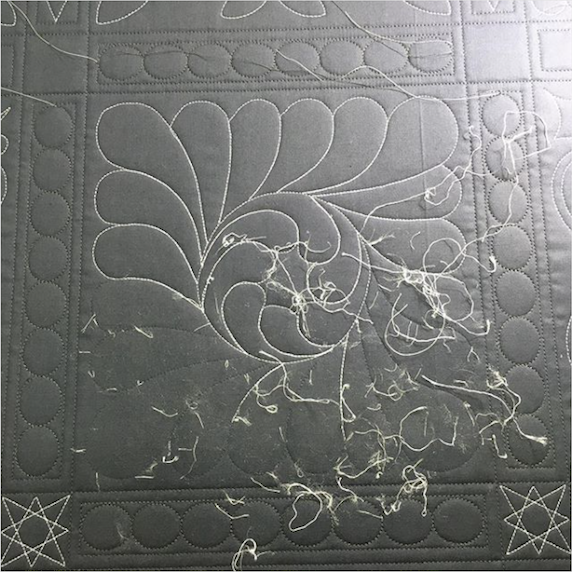
When Machine Quilting Goes Wrong
We've all been there before- when our best isn't good enough and we have to undo our precious projects. Make sure that your machine quilting can never go wrong again (or at least less often!) with these helpful tips and tricks.
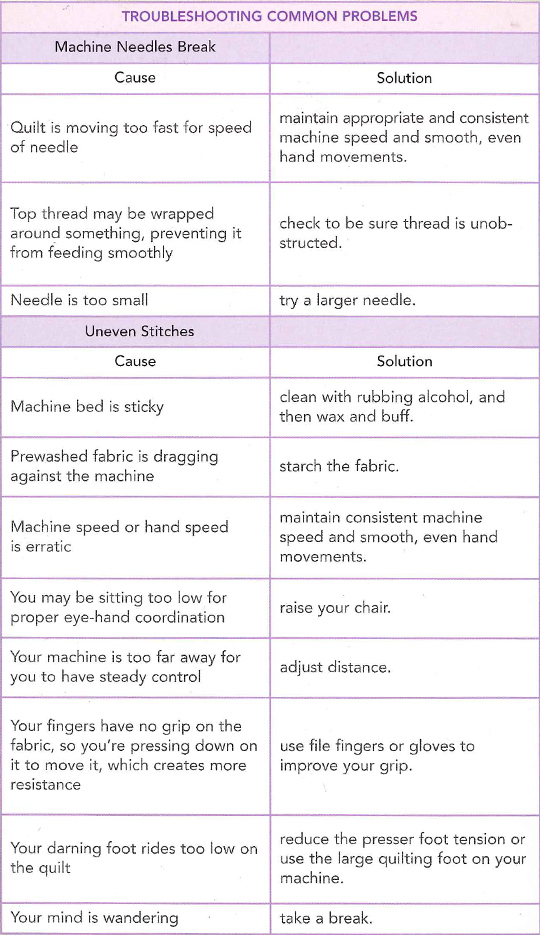
Quickly get answers to all of the most common problems you encounter when machine quilting with this helpful chart from best selling authors Alex Anderson and Harriet Hargrave:
This helpful advice below is an excerpt from The Quilting Manuel.
Potential Problem by Don Linn
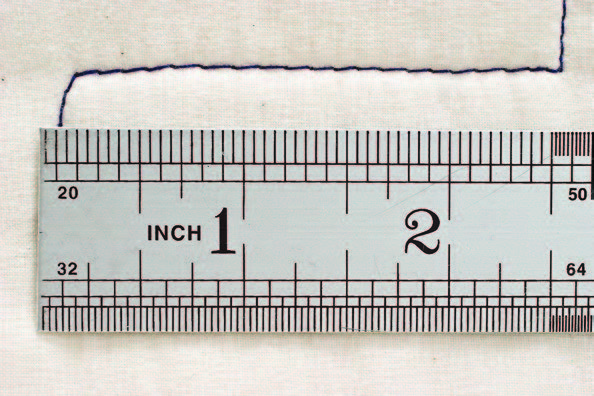
I am commonly asked what the proper stitch length is. Unfortunately, I can’t give you a definitive answer to this question. You are the artist, and you should strive to have a stitch length that is pleasing to you. I will tell you that I like to have my stitches close to the same length as my machine’s default stitch, which I use for piecing.
Concentrate on making your stitches a consistent length all the time. If you can make them all pretty close to the same length, then I can tell you what you need to do to get them to the length that pleases you.
Problem
A very common problem students face when they begin machine quilting is that their stitches are too short.
Cause
Moving your hands too slowly in relation to the speed of the needle going up and down causes small stitches.
Solution
To lengthen your stitches, you have two variables you can adjust. You can either speed up your hands or slow the speed of the needle. All too often, when I tell my students to slow the needle speed, they slow both the speed of their hands and the speed of the needle. This does not lead to any change in the stitch length, because they have changed both variables at the same time. It is almost as if their hands are connected to their feet; move one, and the other follows suit. You must change only one variable at a time to notice any change in the stitch length.
Concentrate on finding a hand speed that you are comfortable with. You should easily figure this out after a very short amount of time spent practicing.

Problem
Rounded points or V’s of designs
Possible Cause
If you are stitching a design with sharp points or V’s, like a star, you may notice that sometimes they are rounded or chopped off. Even though you are following the design exactly, what is probably happening is that as you approach the point or V, the needle is beginning its upward cycle. When the quilt is moved to where the needle will intersect the point or V, the needle is still coming up or just beginning to go down. By the time the needle pierces the fabric, you have moved beyond the point or V and have started down the other side of the design. This causes the chopped-off or rounded look.
Solution
When you come to the sharp change in direction, pause at the point or V and take 2 stitches. That way you can be assured of having a nice, crisp design. Once again, say to yourself, “Stitch, stitch” at the point or V. The 2 stitches in one place will not be at all noticeable. As you get more proficient with your stitching, you will probably be able to cut this down to one stitch, but you must stay alert and not get lazy.
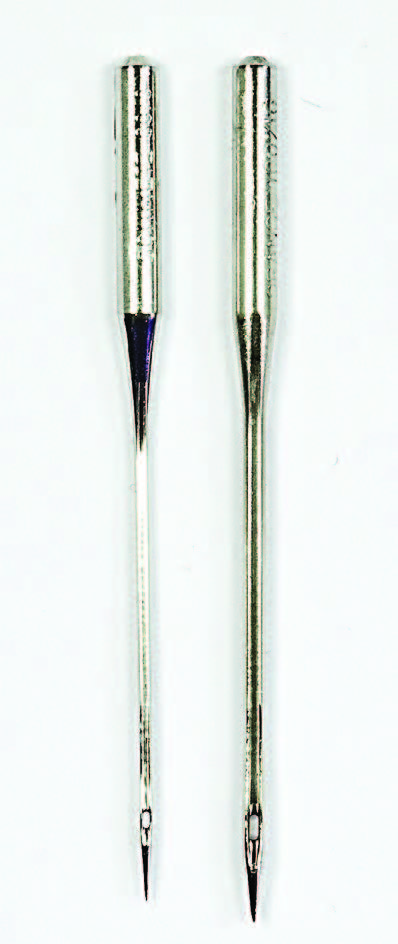
Don't forget that the right needle can make all the difference! More helpful tips below from Bernie Tobisch's You and Your Sewing Machine.
Choosing the right needle
Ballpoint needles True to their name, ballpoint needles have a rounded point. They are used to sew on knits, fleece, and other stretchy fabrics. The rounded point parts the fibers so they are not cut. This prevents runs in the fabric.
Jeans needles Jeans needles used to be very sharp. In the last number of years, some manufacturers have changed this to what they call a modified ballpoint. This may be due to the fact that a lot of denim has become stretchy. It is important to note that if you are using finer jeans needles to do patchwork piecing on quilting cottons, which used to be recommended, you may now hear the needle popping as it pierces more densely wovens, such as batiks. This is because these needles are no longer sharp enough for this application.
Leather needles A flat blade rather than a sharp point is the distinguishing feature of these needles. The sharp blade slices cleanly through leather rather than punching through. This makes it easier on the sewing machine, as there is less resistance.
Metafil or metallic needles Metafil or metallic needles have a large eye and are recommended for metallic threads. They will also do a better job with monofilaments, including the flat, shiny decorative threads.


