


Start Punch Needle with this Fun Project!
Hey guys! My name is Andie Solar and my first ever book Pretty Punch Needle is out this November and I just cannot wait. I wanted to introduce myself and show you a super fun project that didn’t make it into the book. I had so much fun making it I just had to share it with you!

I started doing punch needle rug hooking in 2017 and it’s been such a fun ride so far. I’ve been ready to write a book for a while and it came at just the perfect time of my fiber art career.
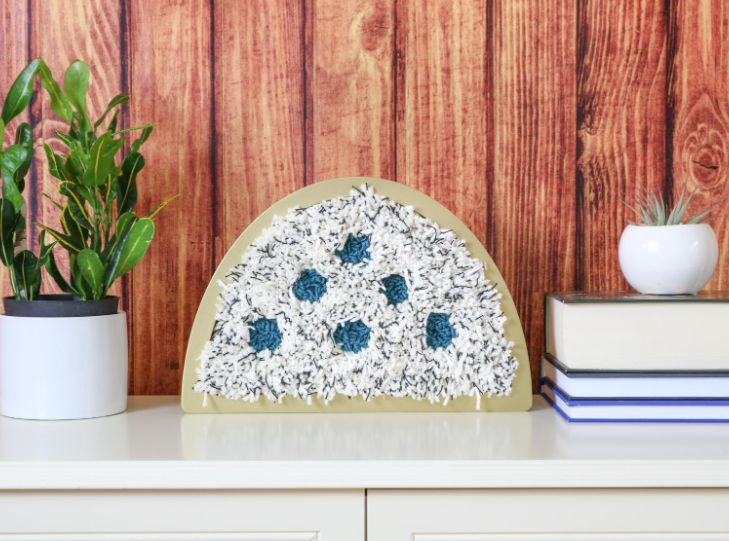
I mean, just look at all the fuzz! And the frame! Gosh, so fun.
The frame is from my friend Allie who makes them by hand. They’re great for punch needle or embroidery and come in a variety of shapes and colors. You can find them at www.stitchframe.co
Now, on to the project: we’ll play with the loop length and texture here. It’s one of my favorite parts of the adjustable punch needle tool - you can change the texture of your project by making loops longer or shorter! Plus, if you know me as an artist you know I LOVE texture.
In this case the circles are punched on a shorter setting and the rest is punched with the longest setting AND the loops are cut so the fuzz is even more prominent and I think we can all agree MORE FUN!
So let me show you how it’s done.

Stretching fabric on stitch frame is very easy. The best part about this is that you're punching into the frame that you will be displaying your work in so you don't have to change anything once you're done. Just punch and hang! :)
First, set your punch needle to setting C or D (2 shortest settings) and punch in all the circles.

I used a cotton medium weight yarn for this.
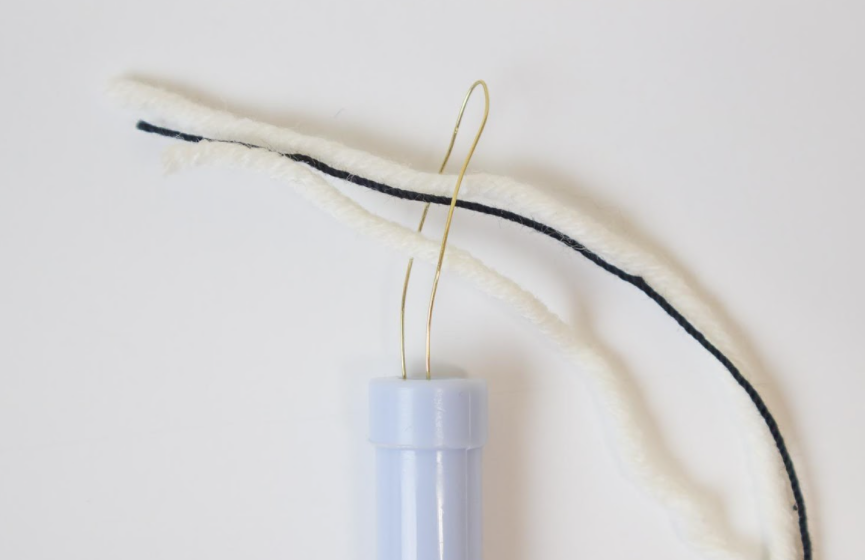
Then thread your needle with 2 strands of cream cotton yarn and one strand of a thinner black cotton thread. This will make the fun background! Set your needle to the longest setting which is actually a secret setting not many people know about! You can simply take the inner part of the needle out and use it that way. Here’s a picture of the punch needle and next I’m showing you the secret setting.
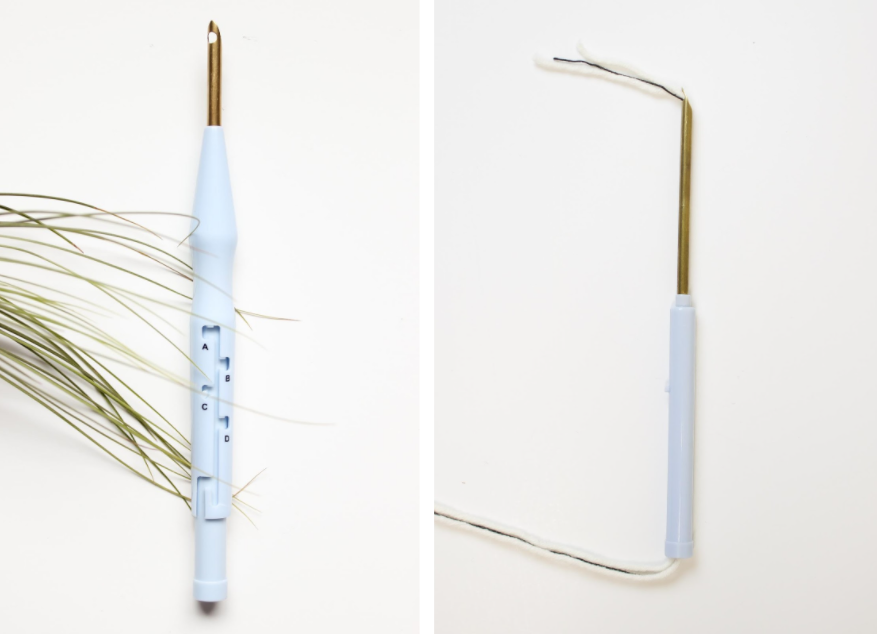
Once you punch the background you’ll see a lot of fluff! If you’d like the fluff a bit shorter, you can use setting A instead - the loops will be about as long as the thickness of the frame.
Now, we want more fluff, correct? Let’s make it! Extra sharp scissors are very helpful here so grab those and get to cutting. I love this part - it relaxed me a lot.
Cut a couple of loops at a time by inserting one blade of the scissors into them and cut at their highest point.

You’ll end up with a bit of a mess, but that’s ok - art is about mess sometimes (most of the time)!

Look how fluffy!

And here it is! You can use this technique in any of your punch needle projects! I would love to see them so please share on social media by tagging me @myraandjean.

You can find more information on punch needle on:
- my website:
- social media: @myraandjean (Instagram, Facebook, Pinterest, Youtube)
If you need help I’m just an email away at hello@myraandjean.com
-


