

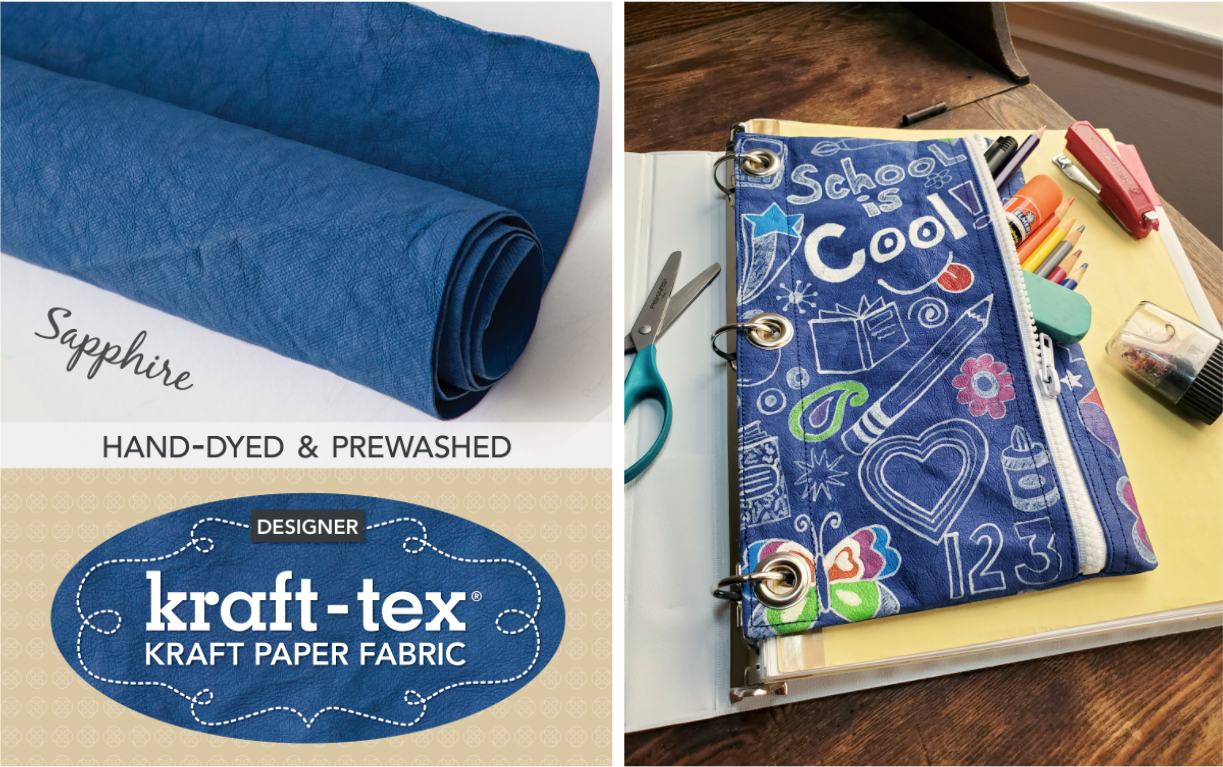
kraft-tex Color of the Month: Sapphire
Oct 5th 2020
The kraft-tex color of the month for September is Sapphire!
Have fun customizing this easy kraft-tex binder pencil pouch!
We invite you to join the fun and make your own kraft-tex projects each month along with us. If you create something with kraft-tex, please snap a photo of your creation and tag us on Instagram @ctpublishing and with the hashtags, #krafttex and #ctpublishing. If you make this specific project don't forget to tag it with #krafttexbinderpouch.
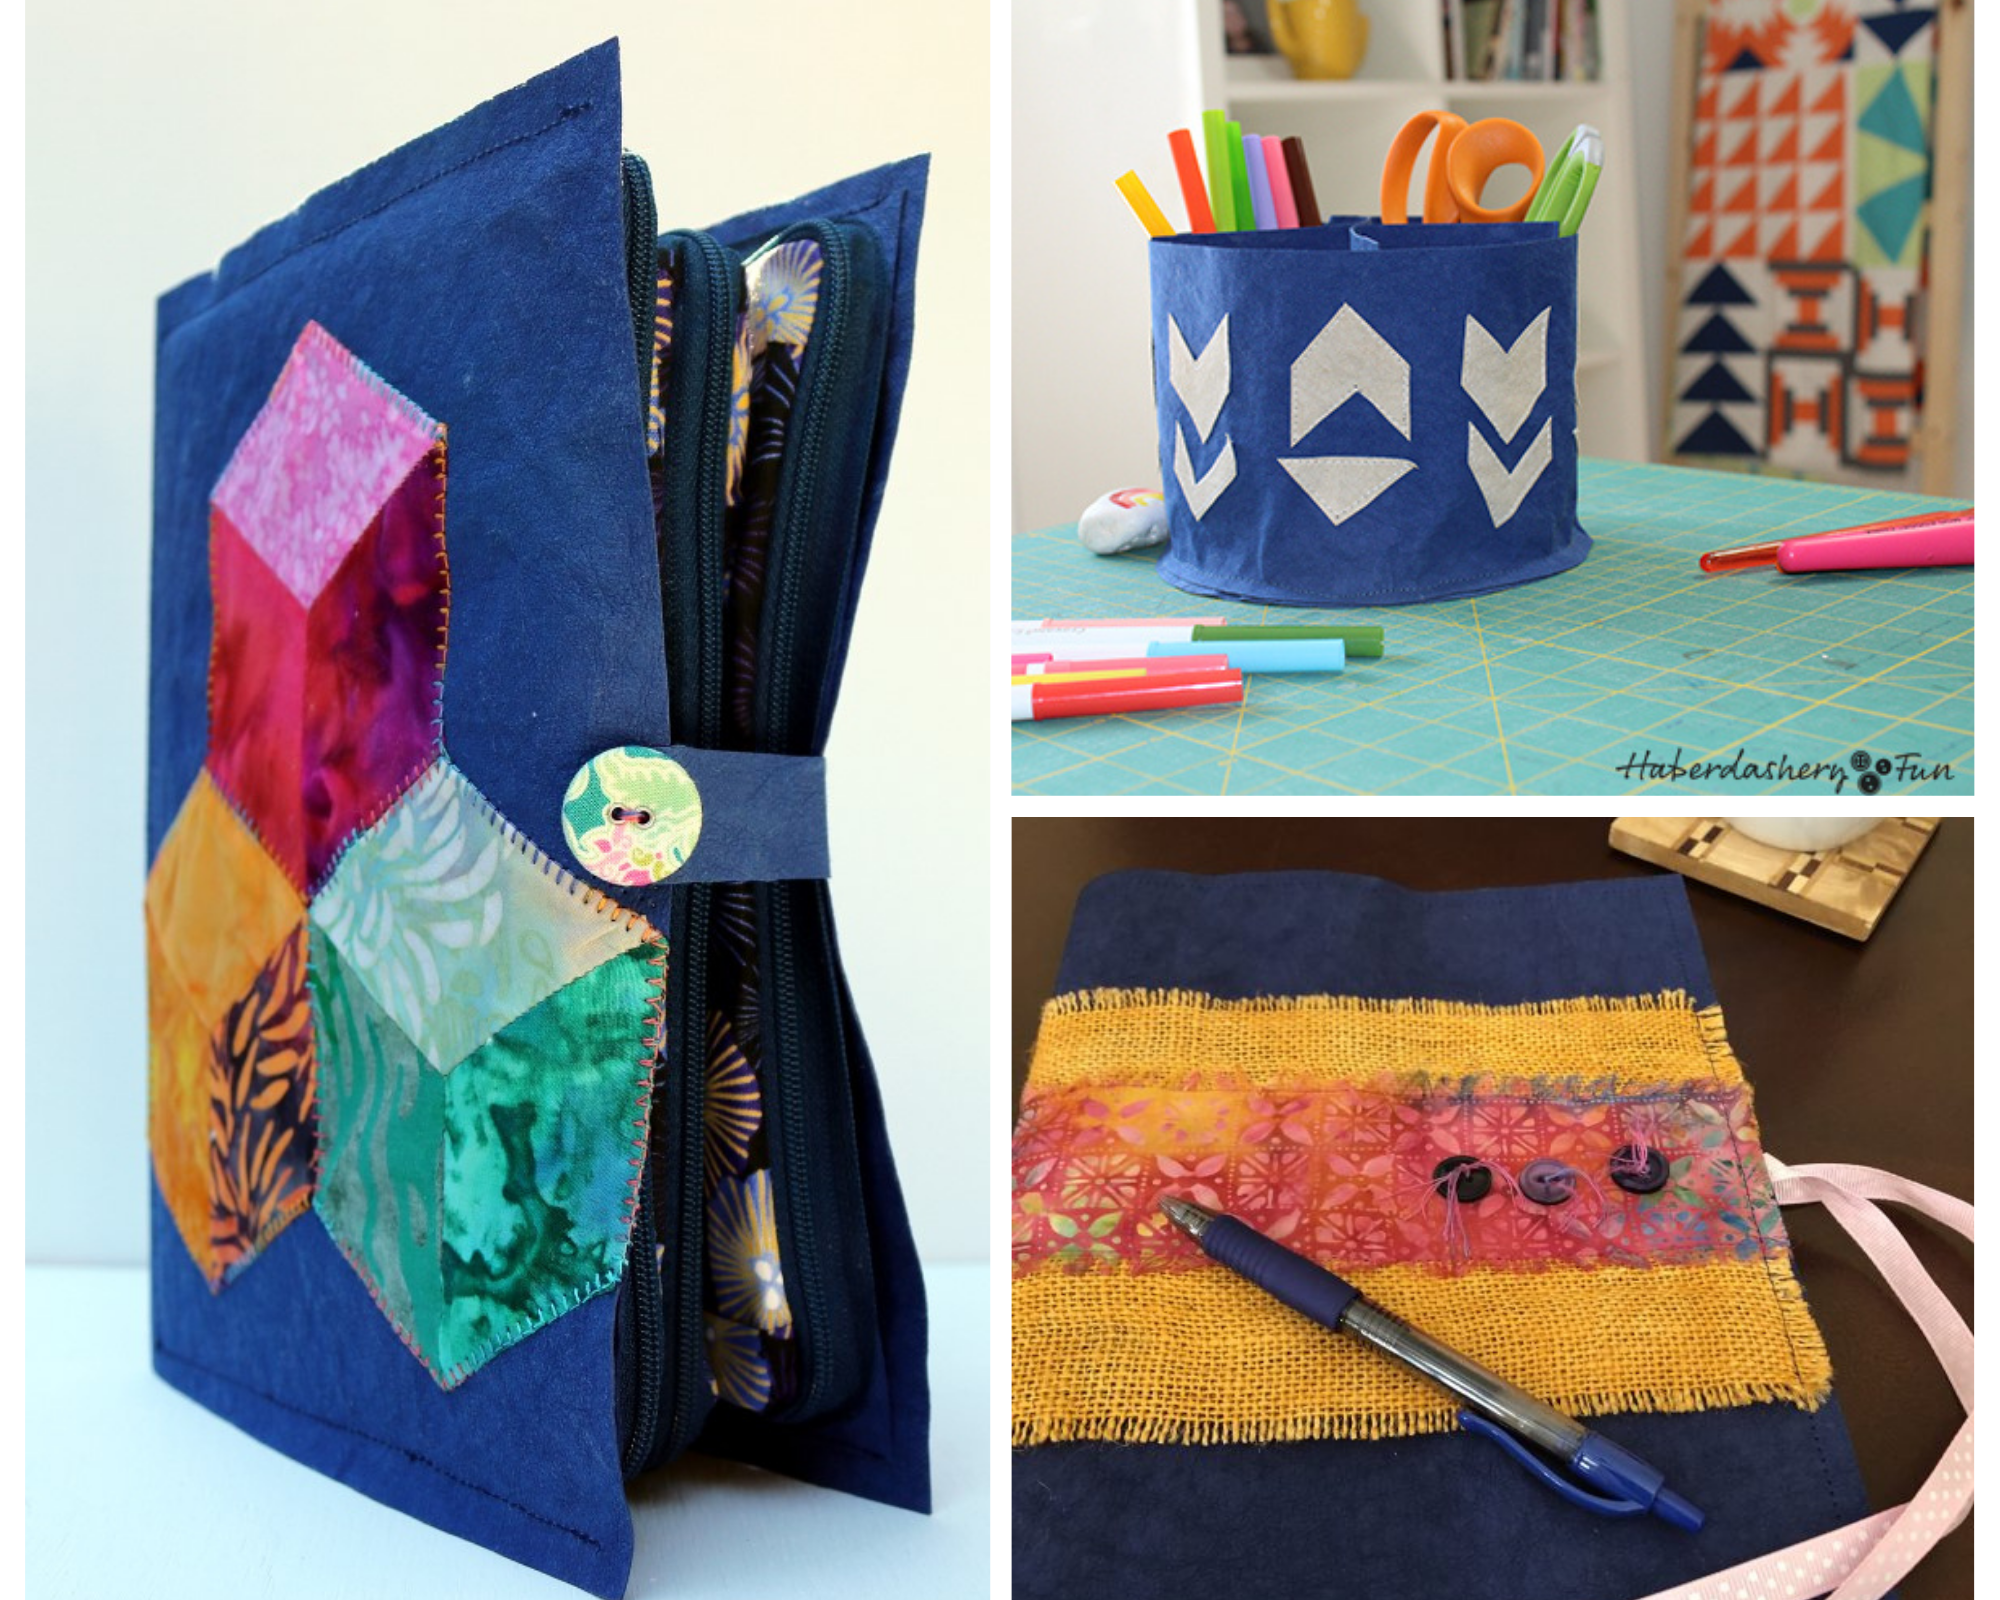
Kraft-tex Binder Pouch
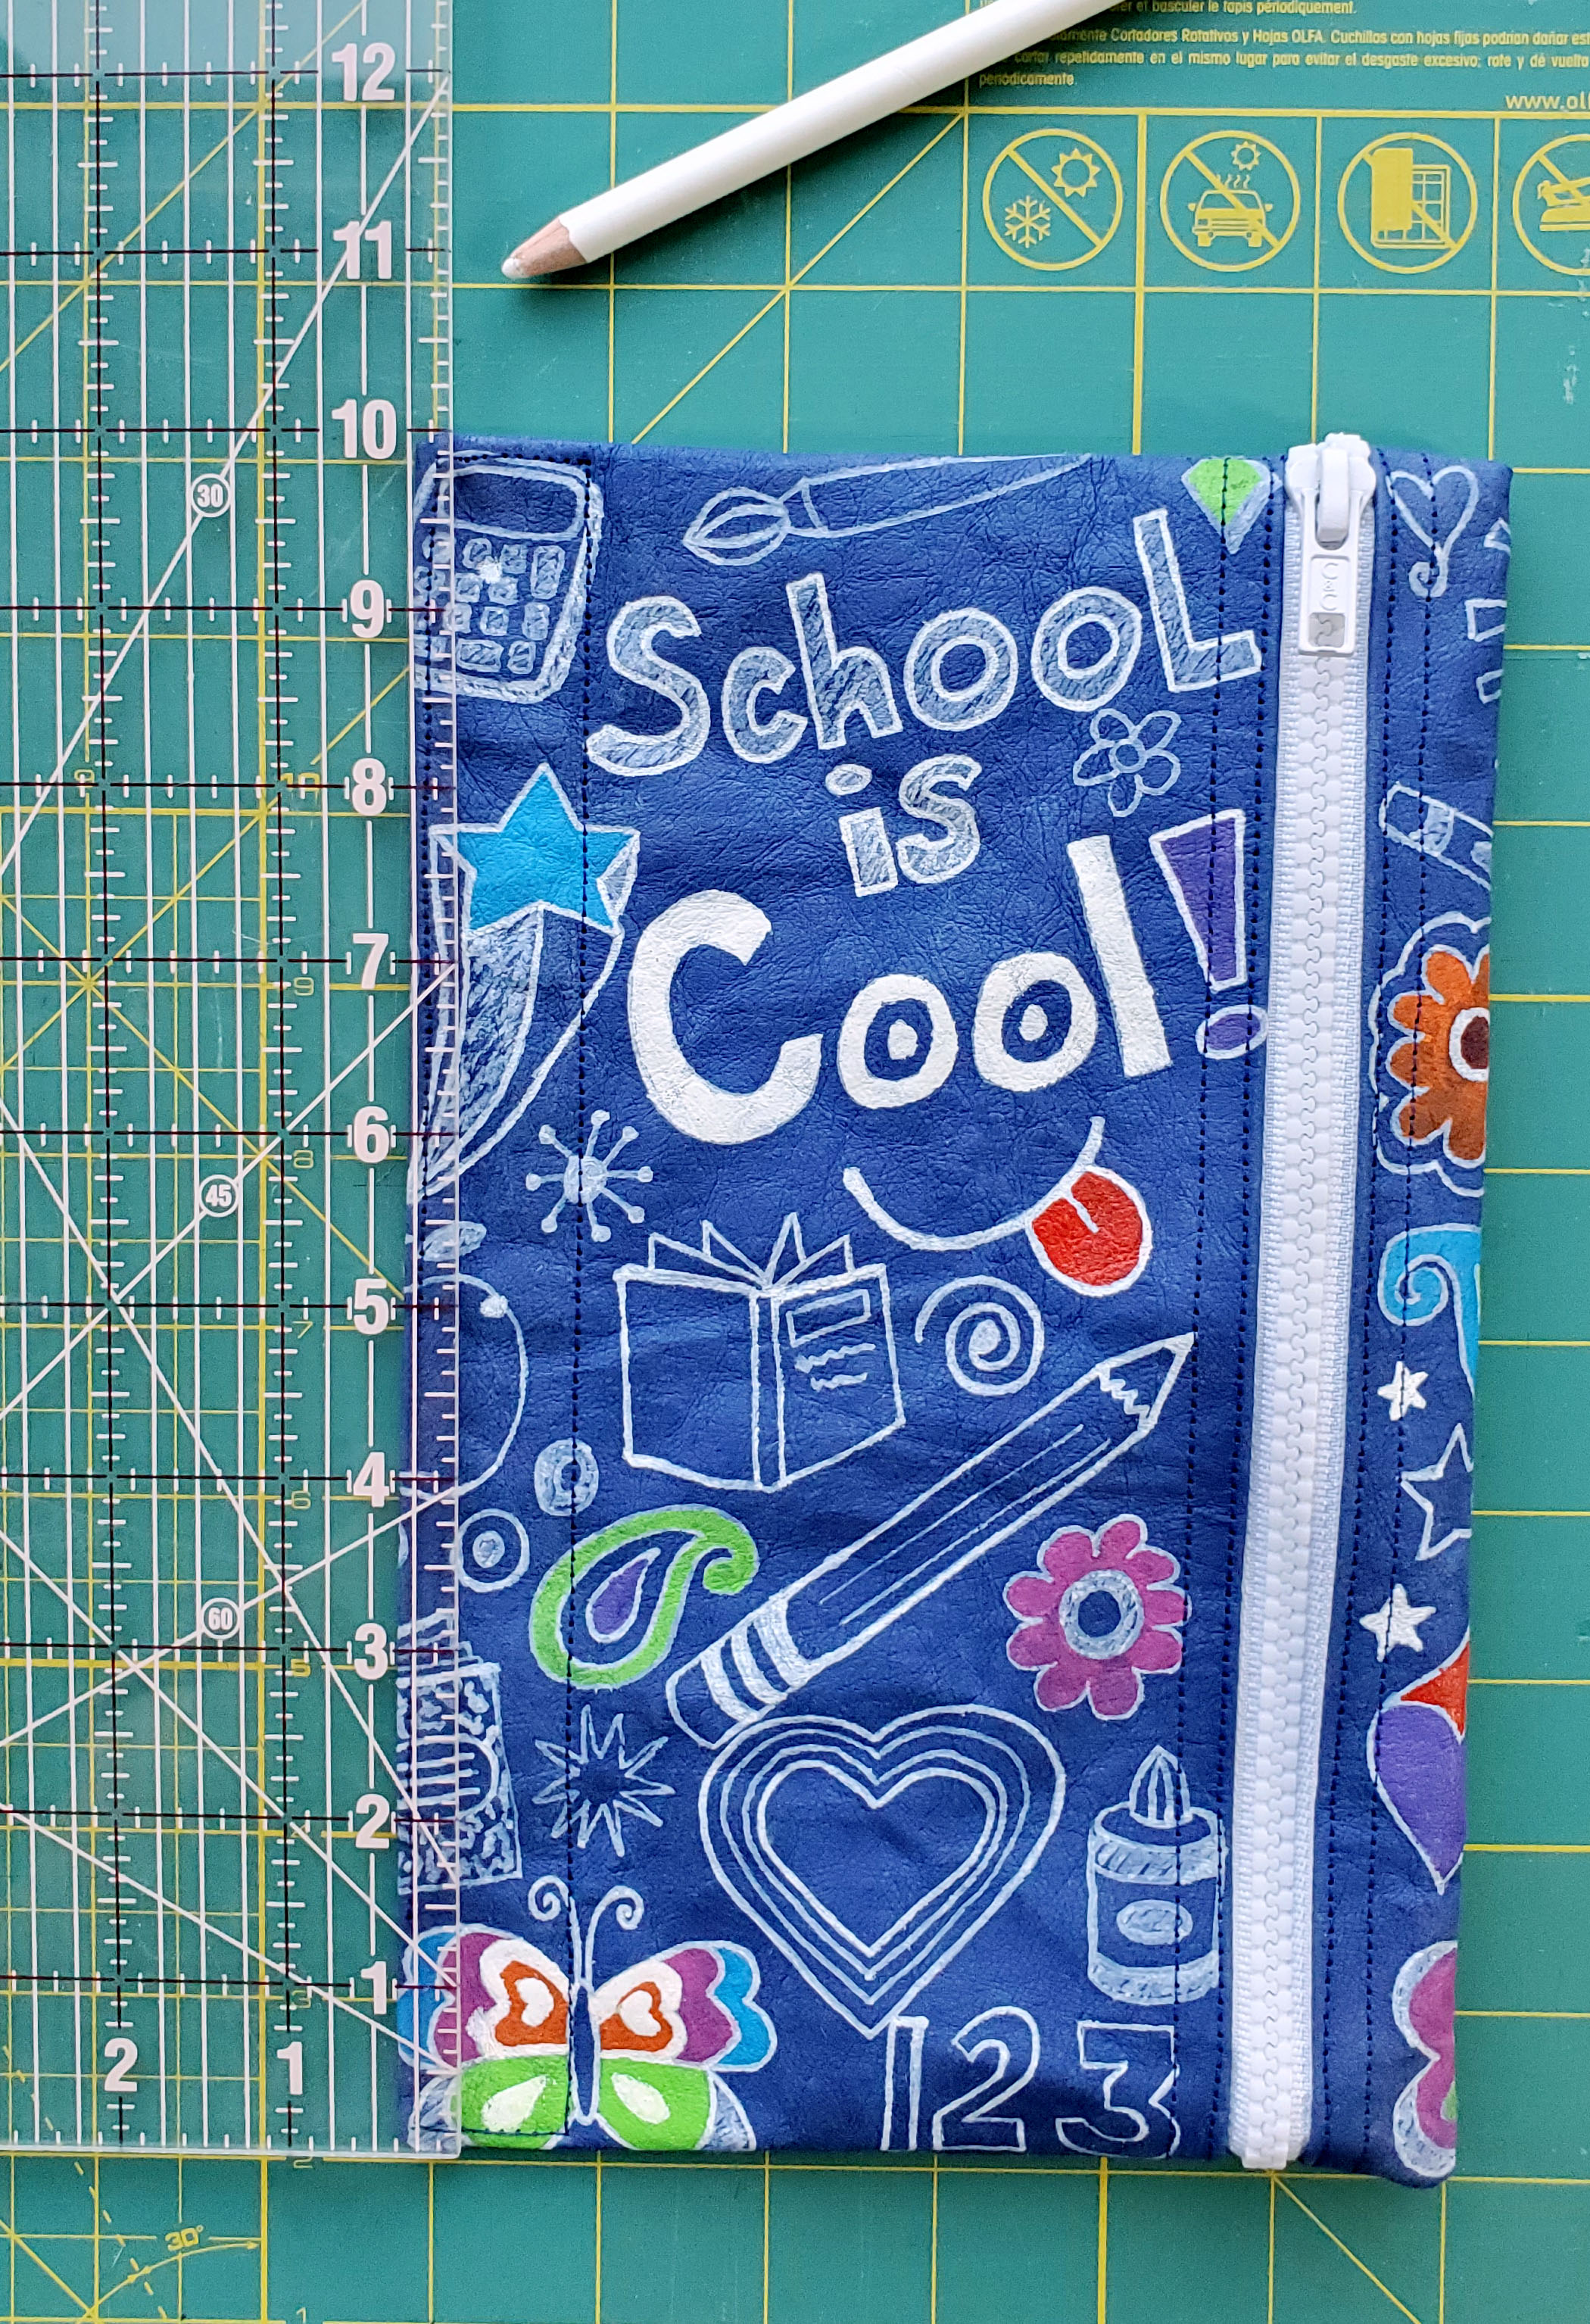
Finished Size: 6” x 10”
By: Lauren Herberg
Whether you’re back to school at home or braving the classroom, this handmade kraft-tex binder pouch is the best way to keep all your school essentials right where you need them. The best part of making this pouch is all the ways that you can decorate and customize the kraft-tex to make a truly unique and handy device. Kraft-tex is such an amazing material to use for a binder pouch because it is so tough that you don’t even need to put in grommets to stabilize the holes! Start a new beginning and a new school year right, and don’t lose your pencils!
Supplies:
1 roll Sapphire kraft-tex (or your favorite color)
12” or longer zipper (I recommend a separating type zipper)
Matching thread for topstitching
Hole Punch
Three 3/8” grommet sets (optional)
Directions:
Decorate:
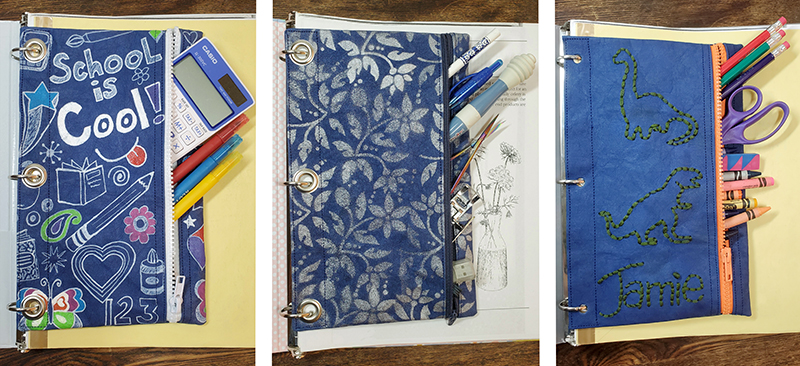
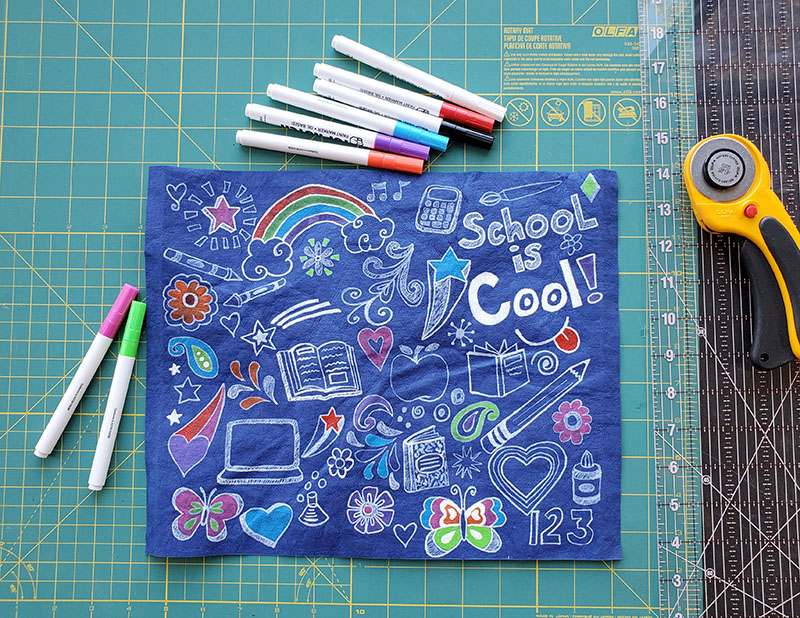
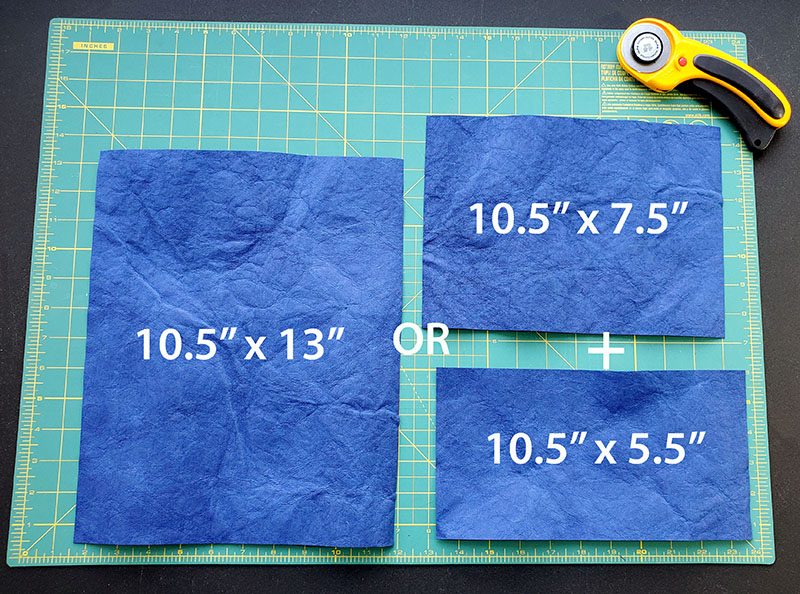
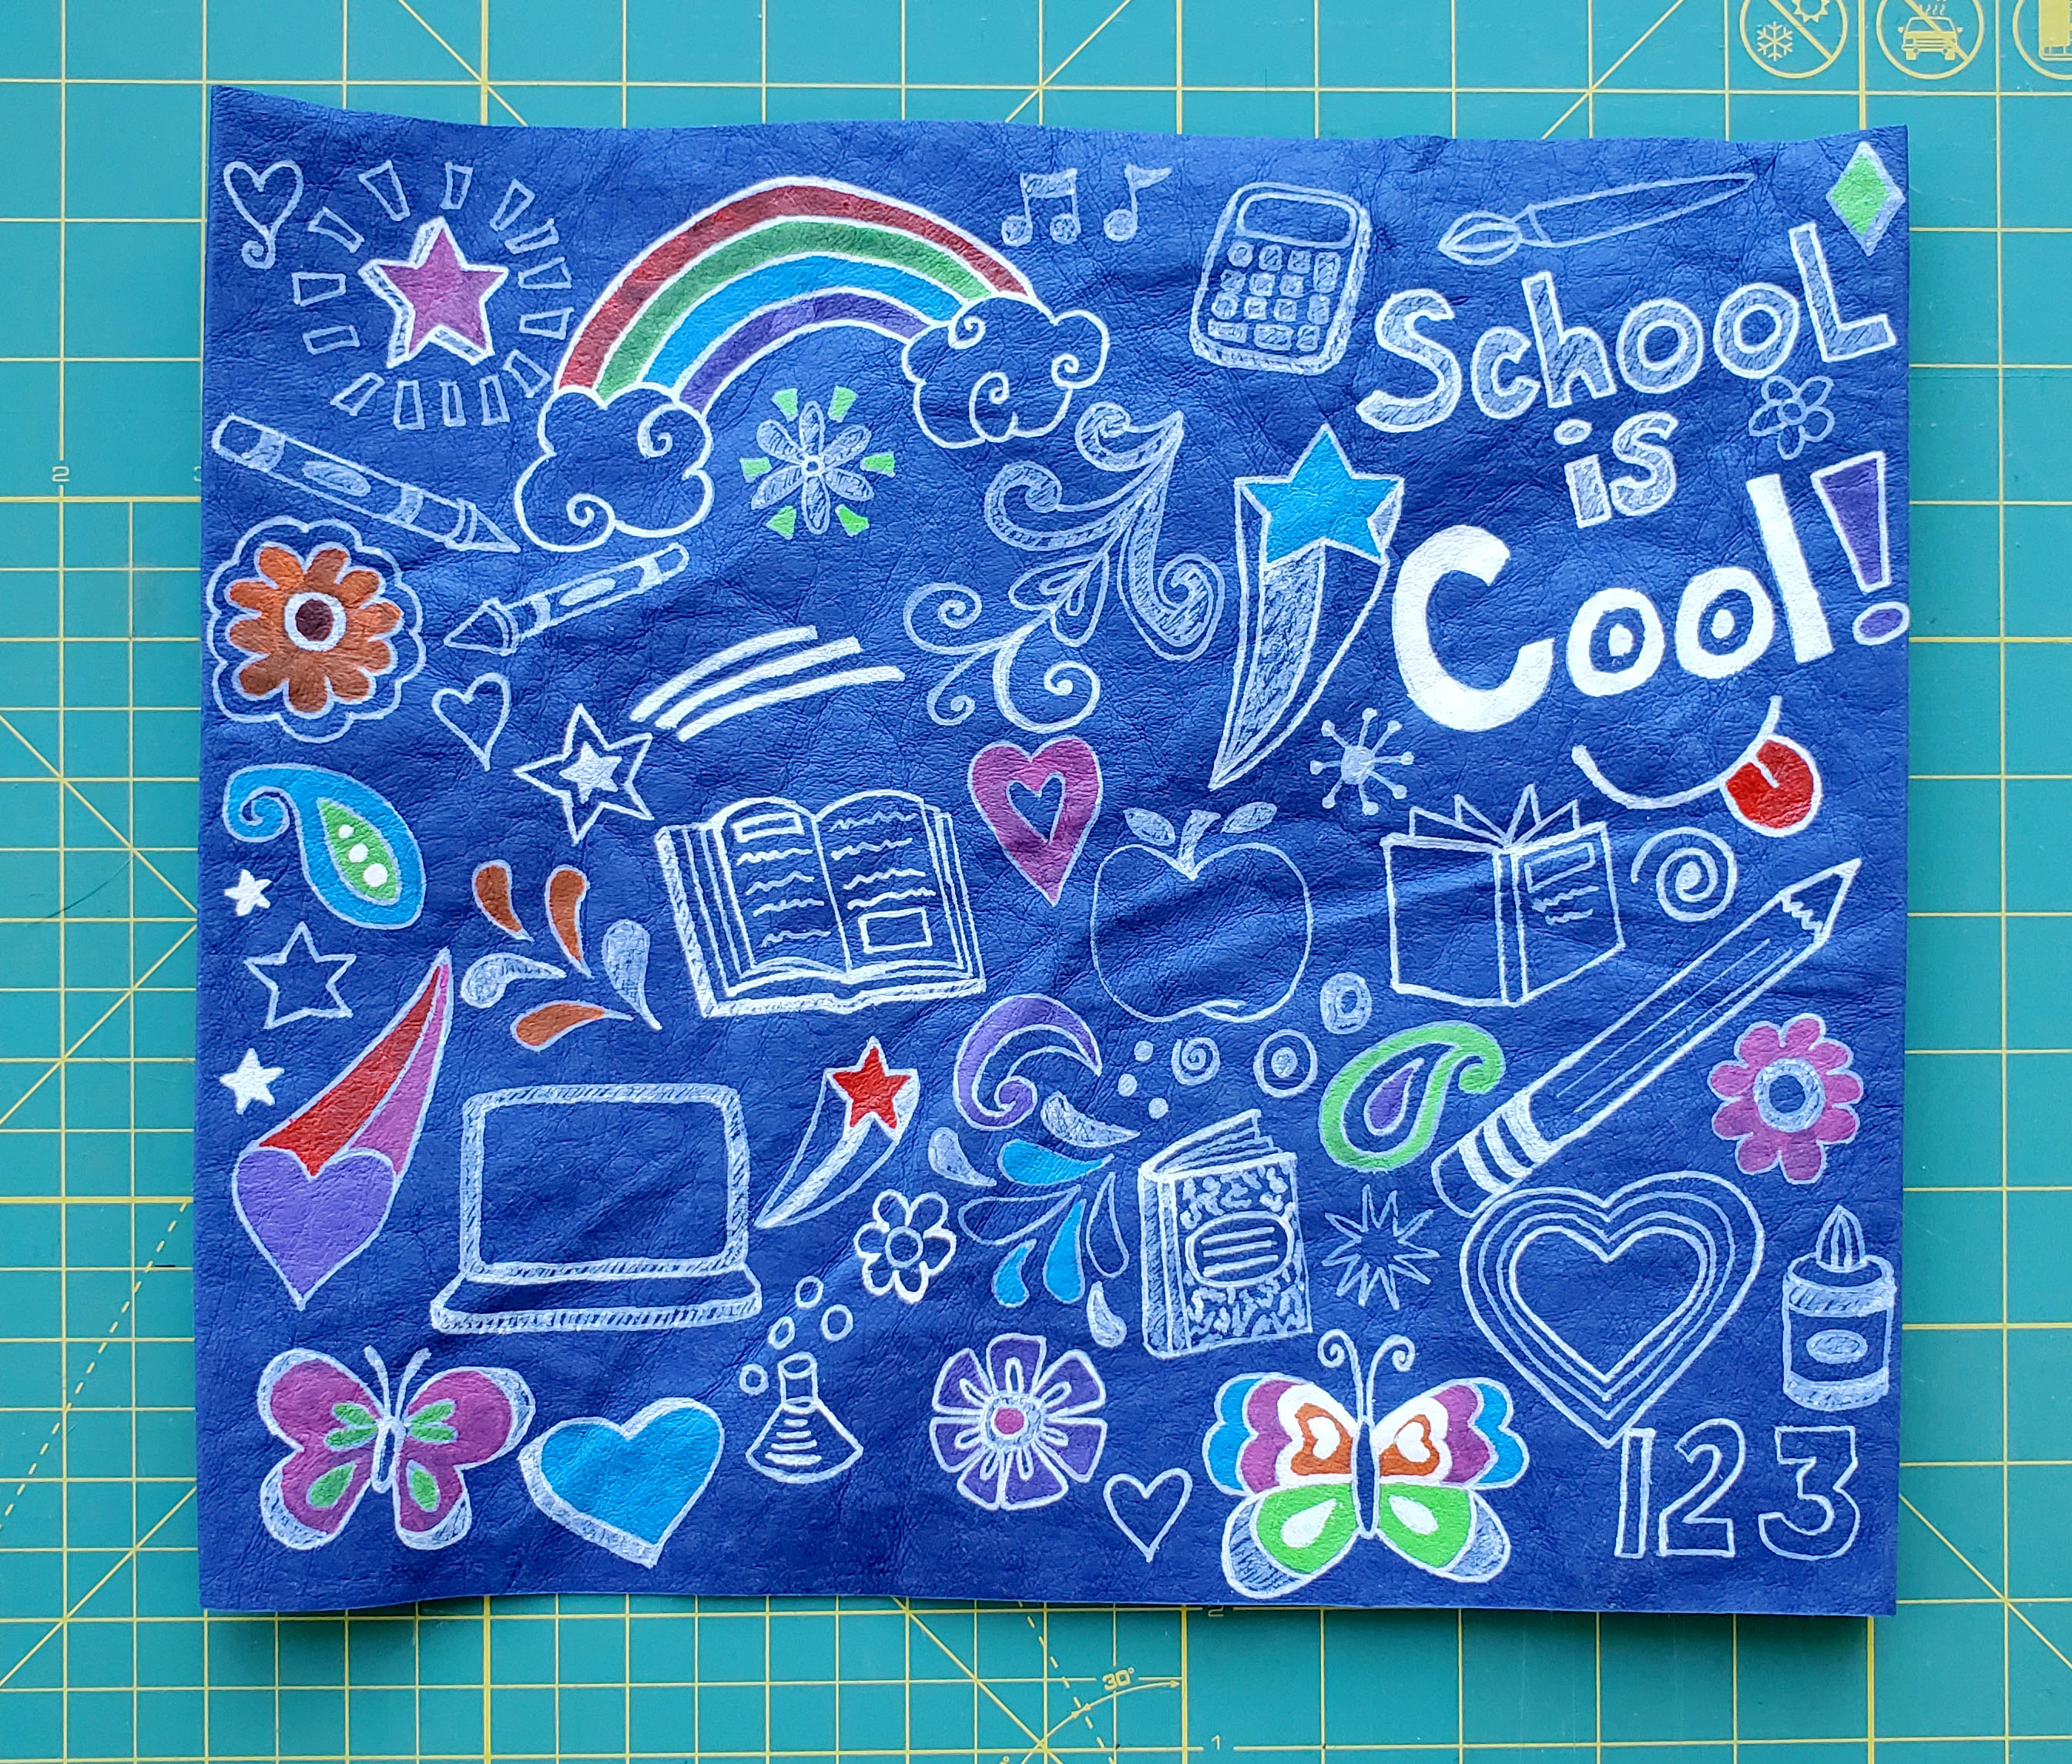
1. Cut a 10.5” x 13” rectangle of kraft-tex and decorate however you wish. I doodled school related designs with paint pens for this sample binder pouch. This is a great craft to get your little ones involved in customizing their pouch.
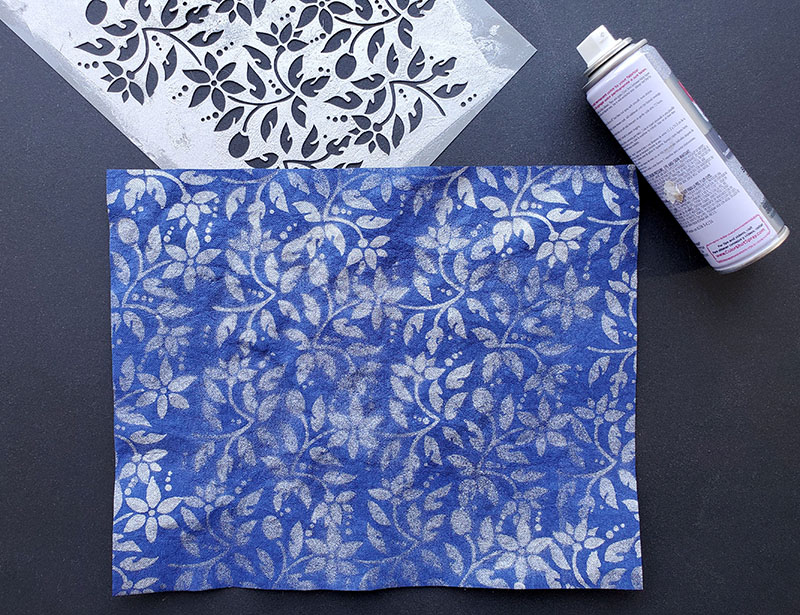
2. I used a stencil and spray painted the kraft-tex for another one.
3. I was able to make 3 binder pouches out of 1 roll of kraft-tex by making the last one out of 2 rectangles. Cut one 5.5” x 10.5” which will be the front of the pouch and one 7.5” x 10.5” for the back.
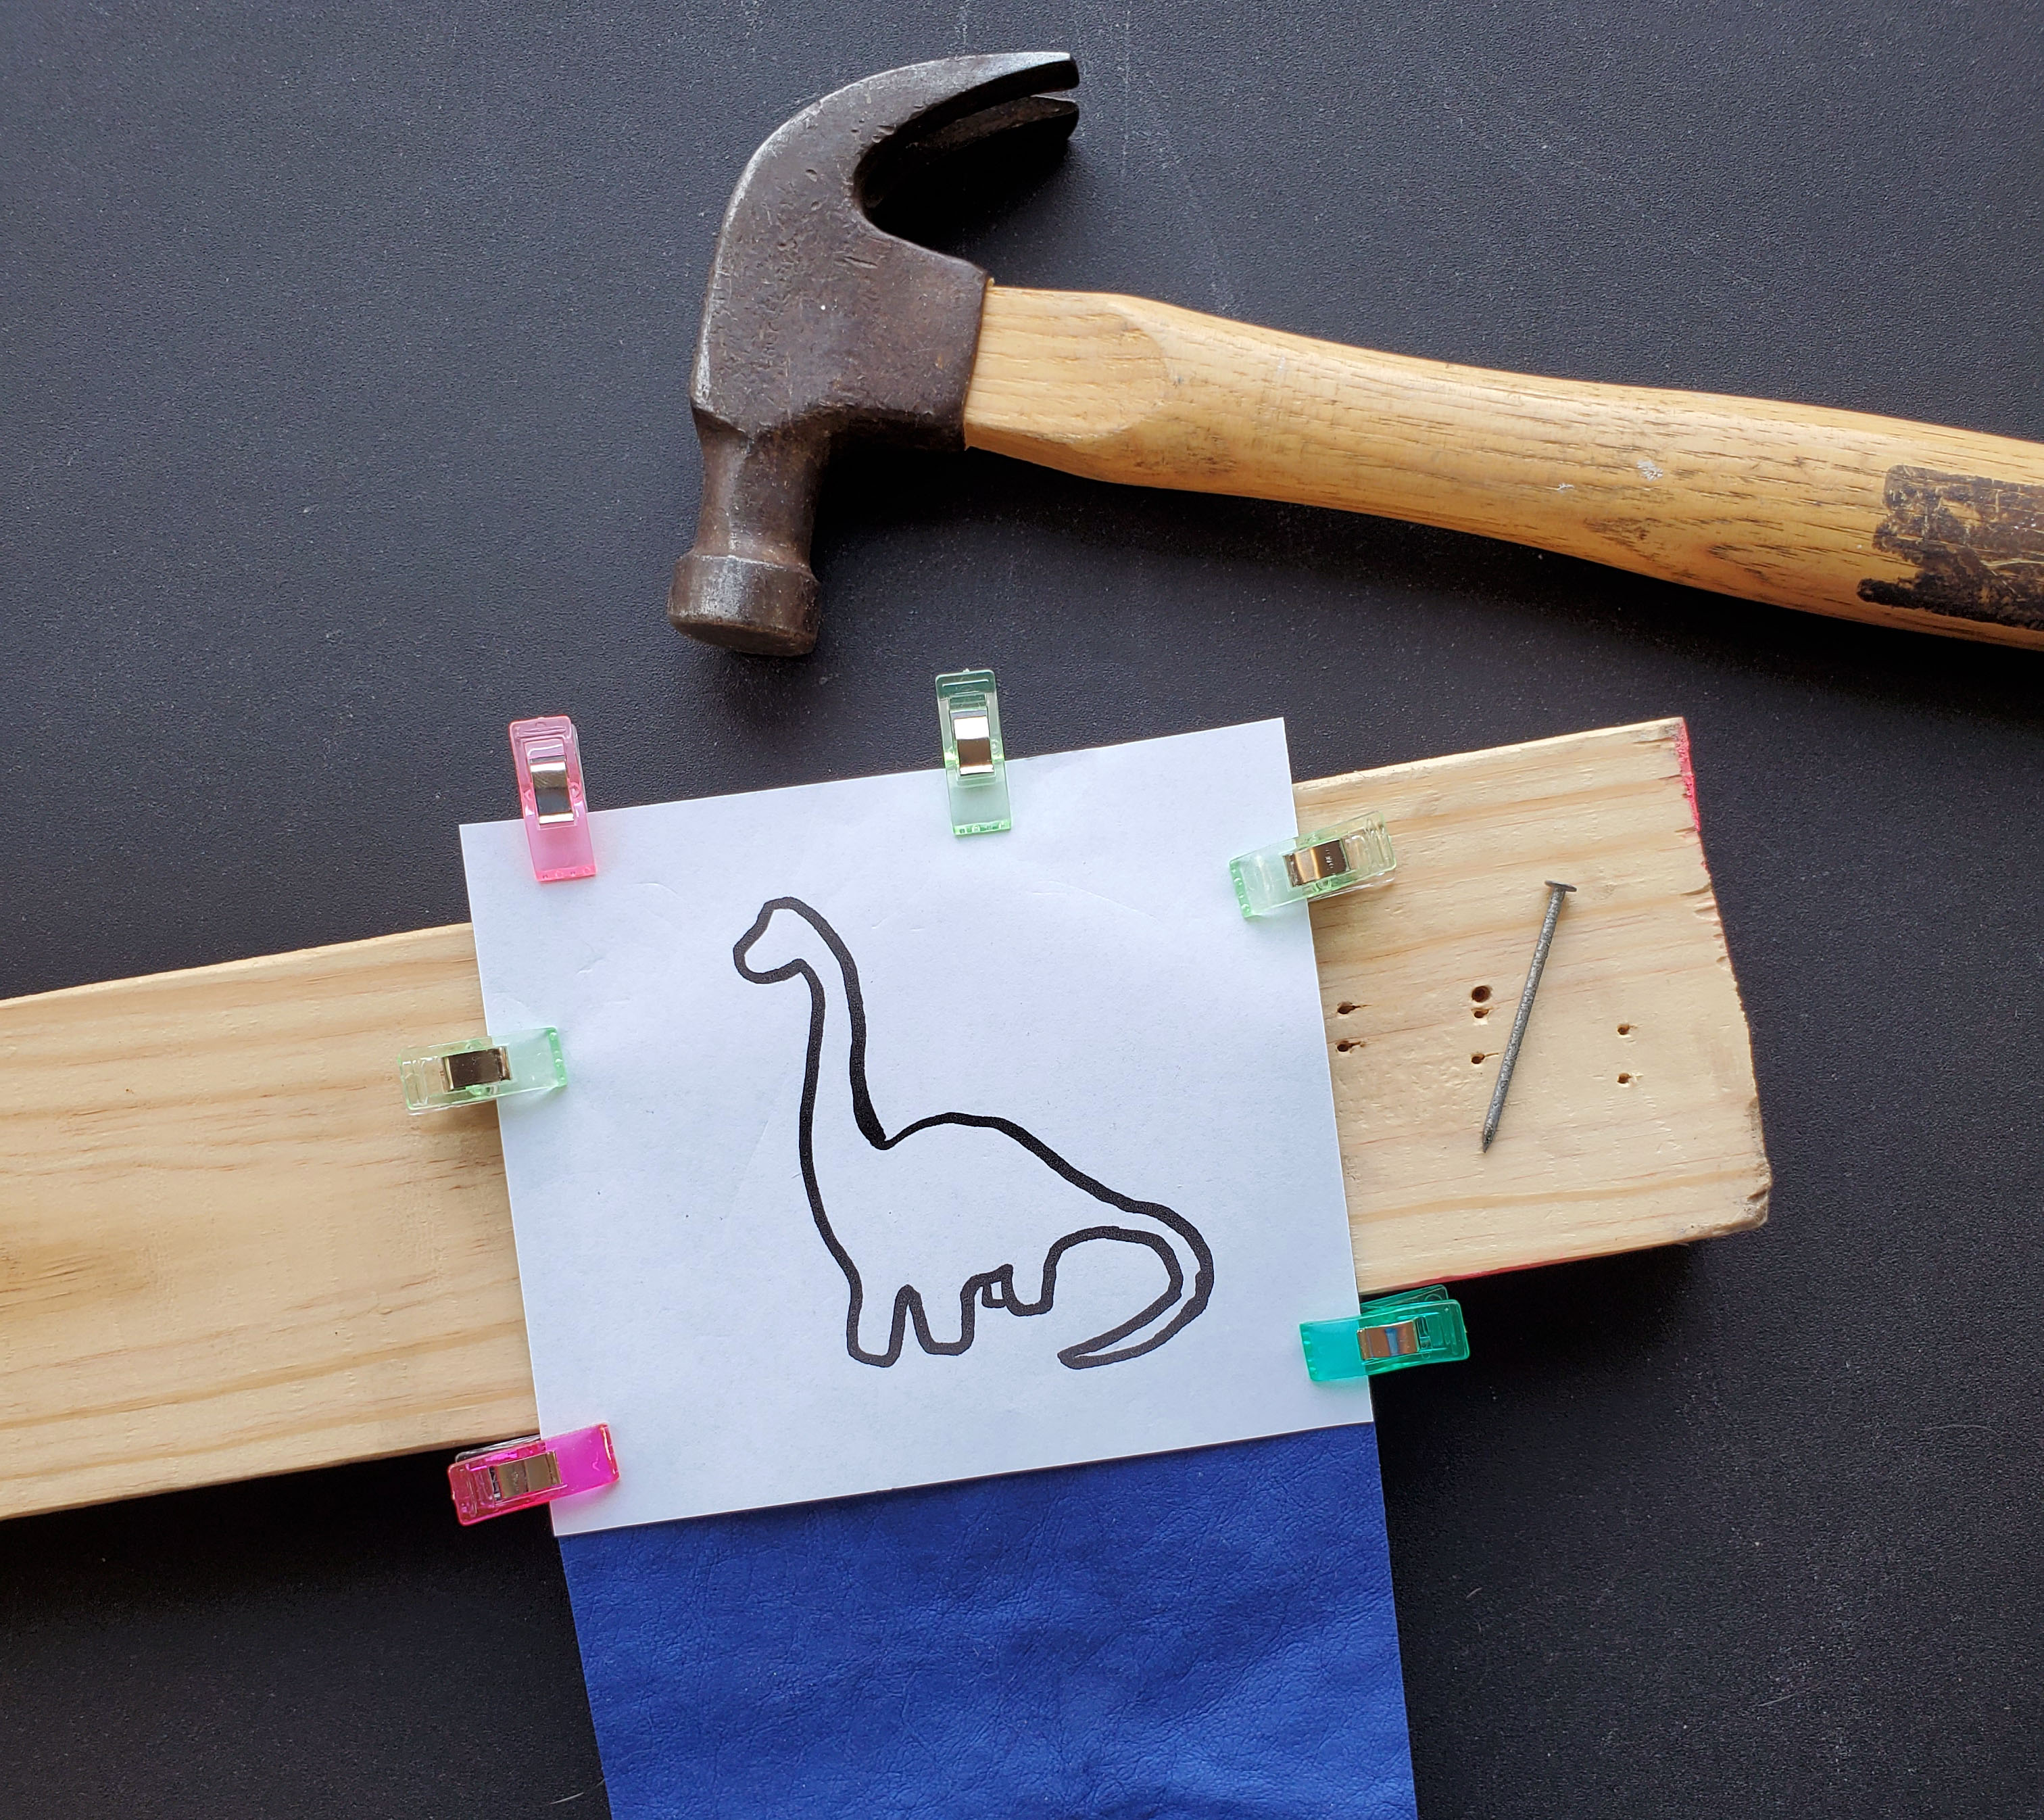
4. I embroidered this last one with yarn and some cute and simple shapes. To do this, trace the shape that you want on paper and clip it to your piece of kraft-tex.
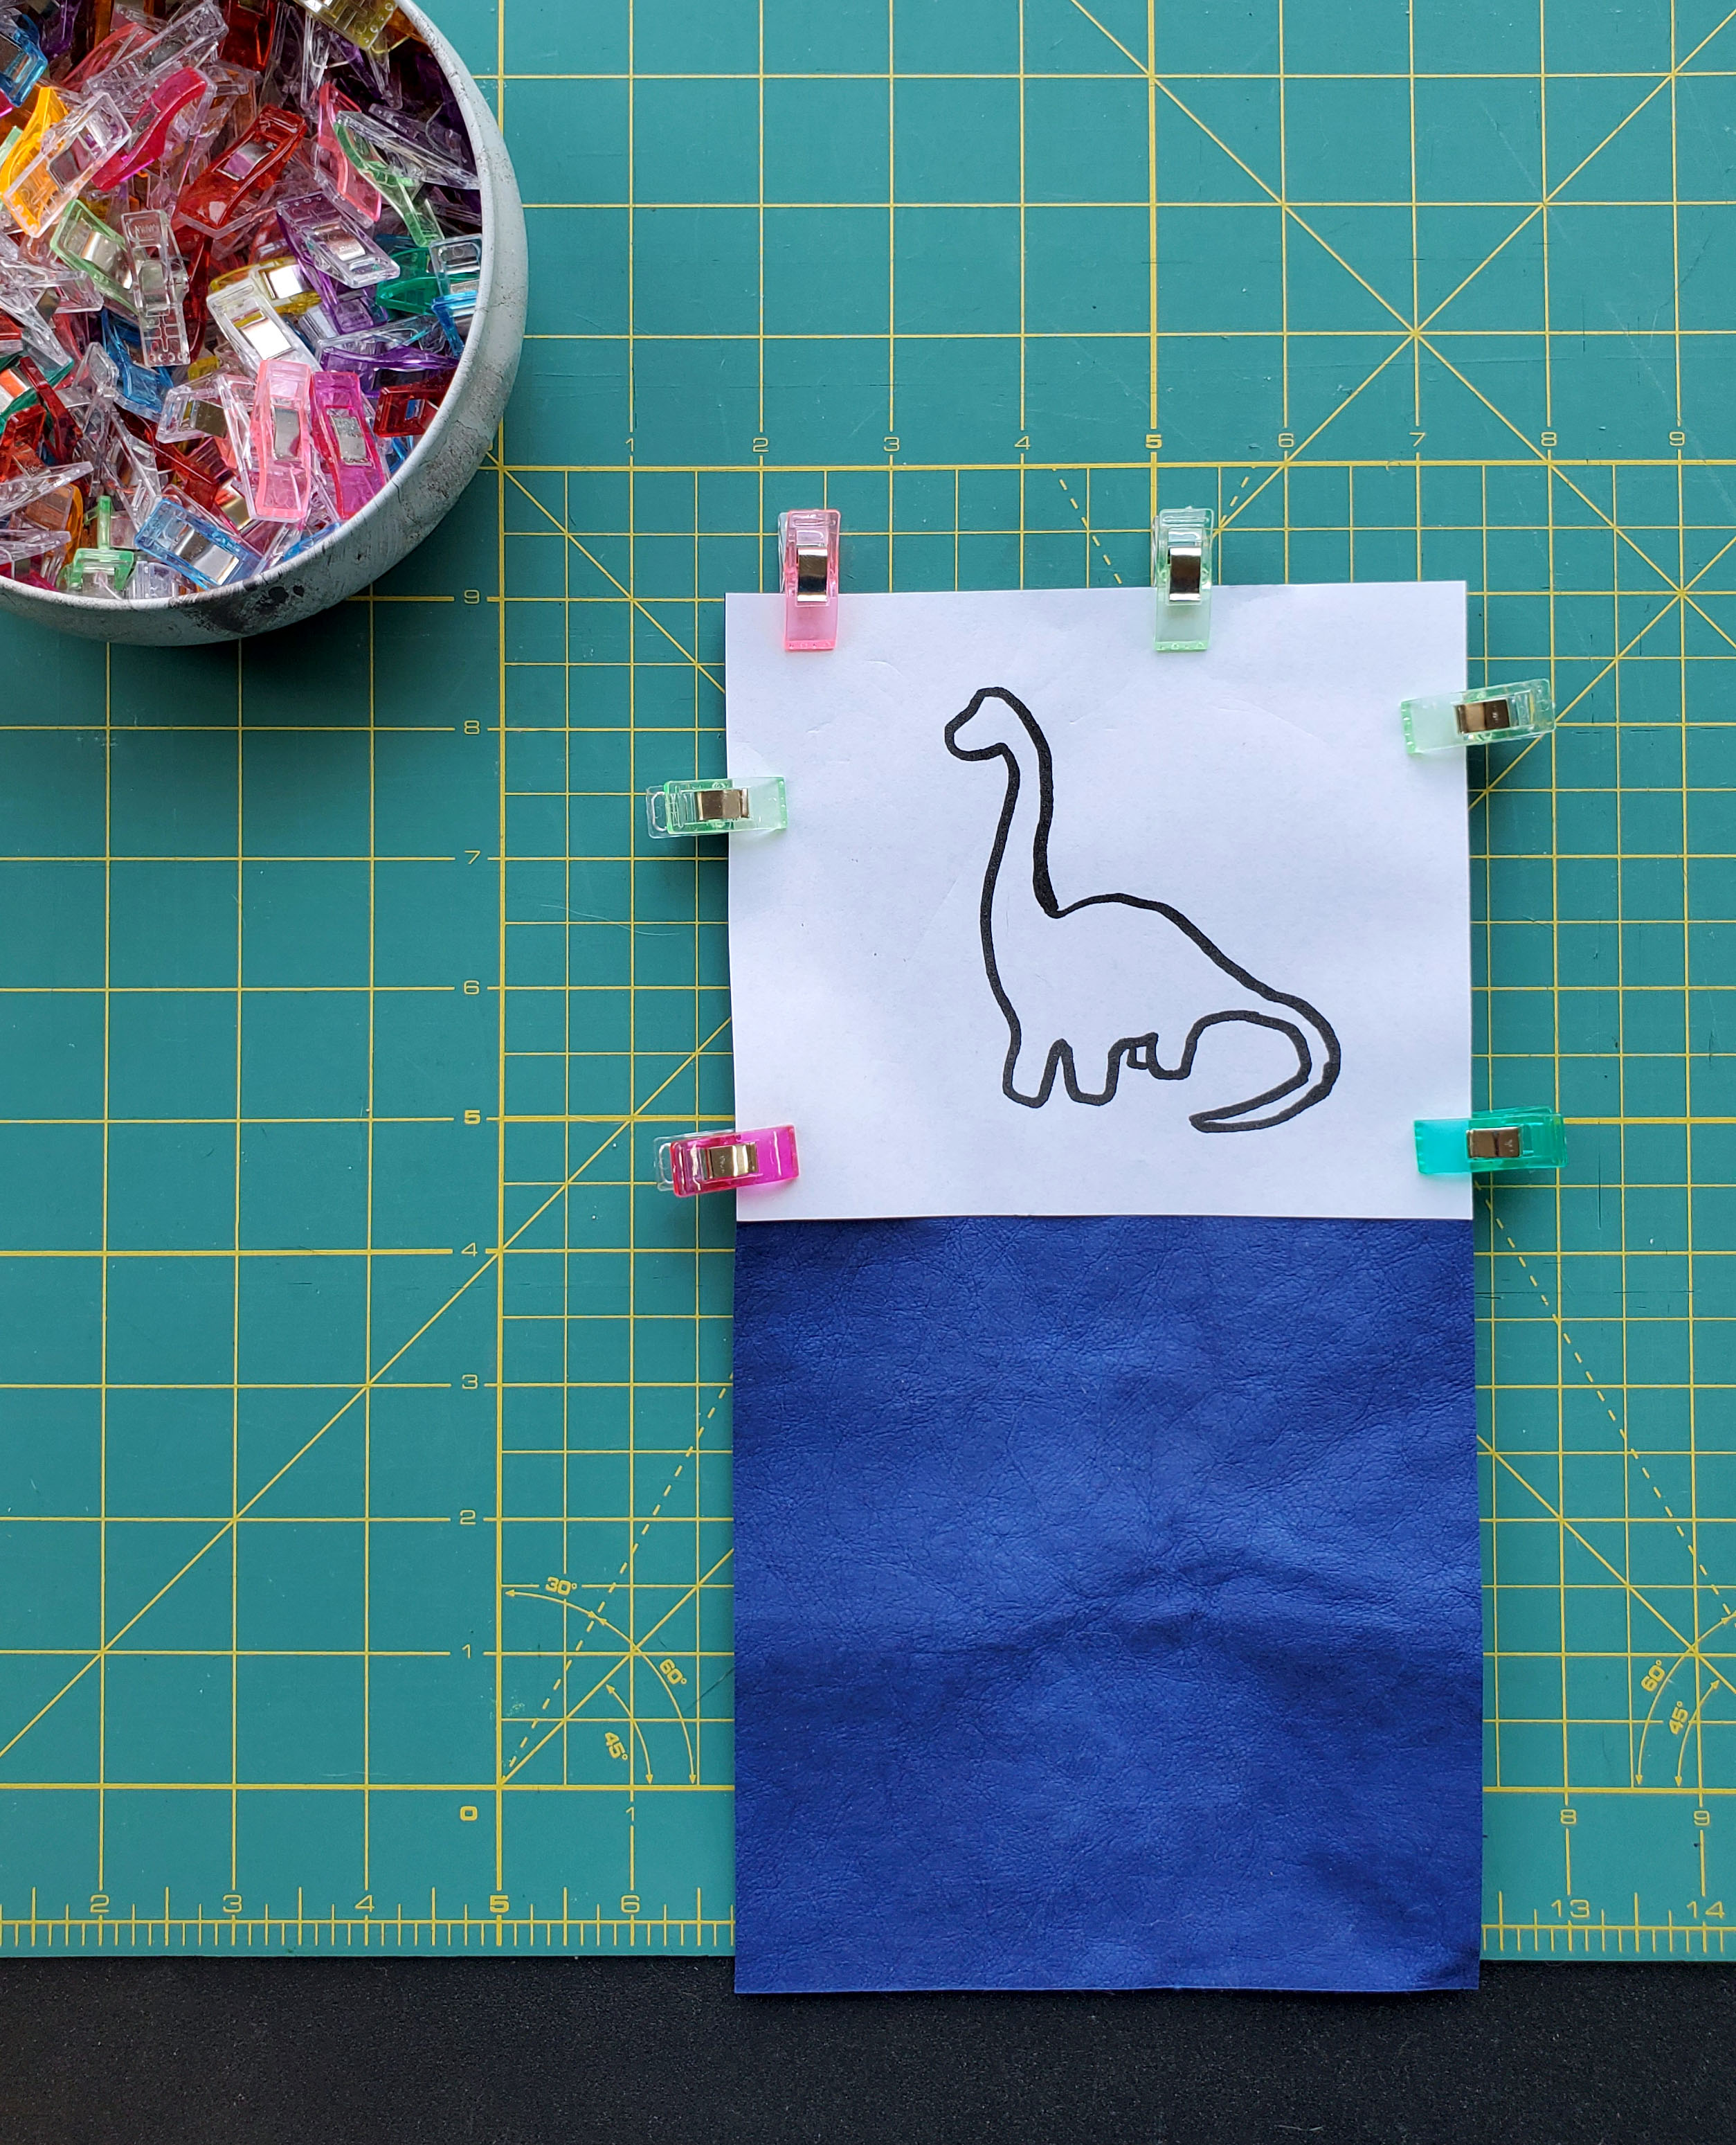
5. Pre-punch the holes by hammering a nail in just enough to make a small hole, placing the holes roughly equidistant apart and following the line drawing as a guide.
6. Stitch the design using the back stitch. This is a great way to introduce the little ones to needlecrafts because they can use a large, dull needle and it’s just like connecting a dot-to-dot puzzle.
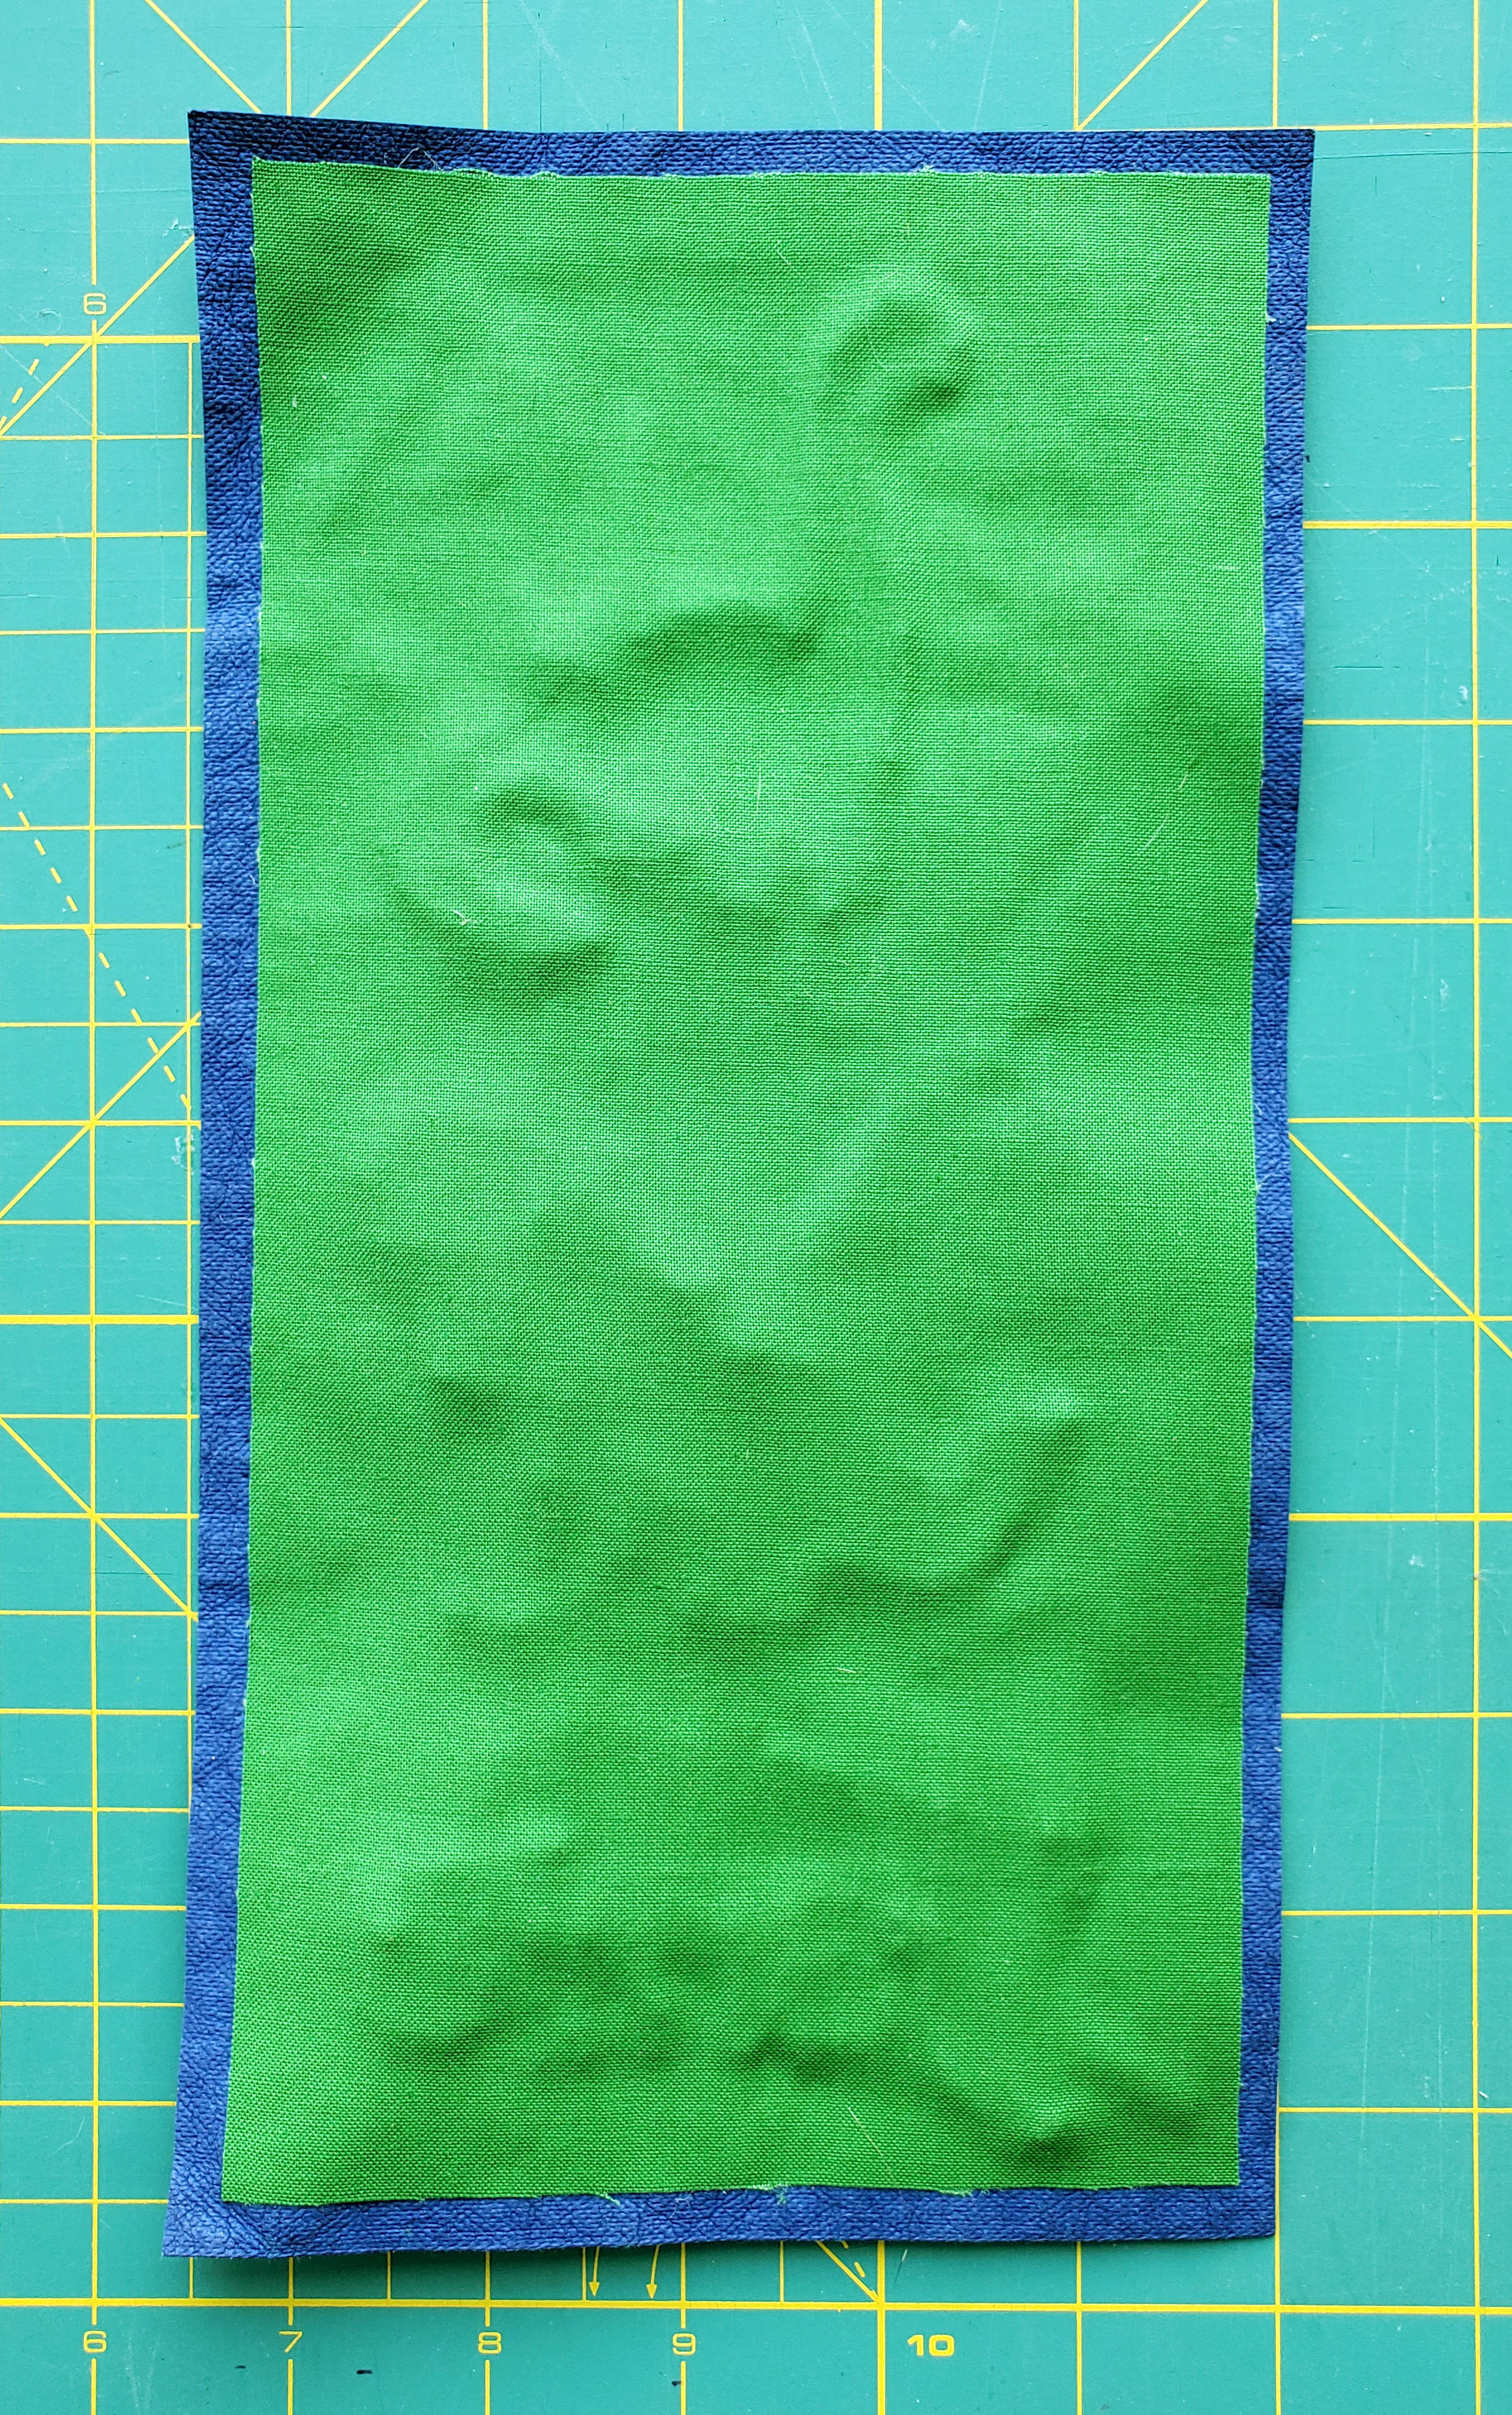
7. Add a quick and easy lining to cover up the wrong side of the embroidery and to keep it from getting tangled with all the things you plan to put in the binder pouch. Cut a piece of fabric about 5” x 10”.

8. Glue the fabric centered on the wrong side of your embroidered kraft-tex.
Assemble:
1. Fold over about ½” of the short ends of the 10.5” x 13” rectangle to the wrong side and finger press.
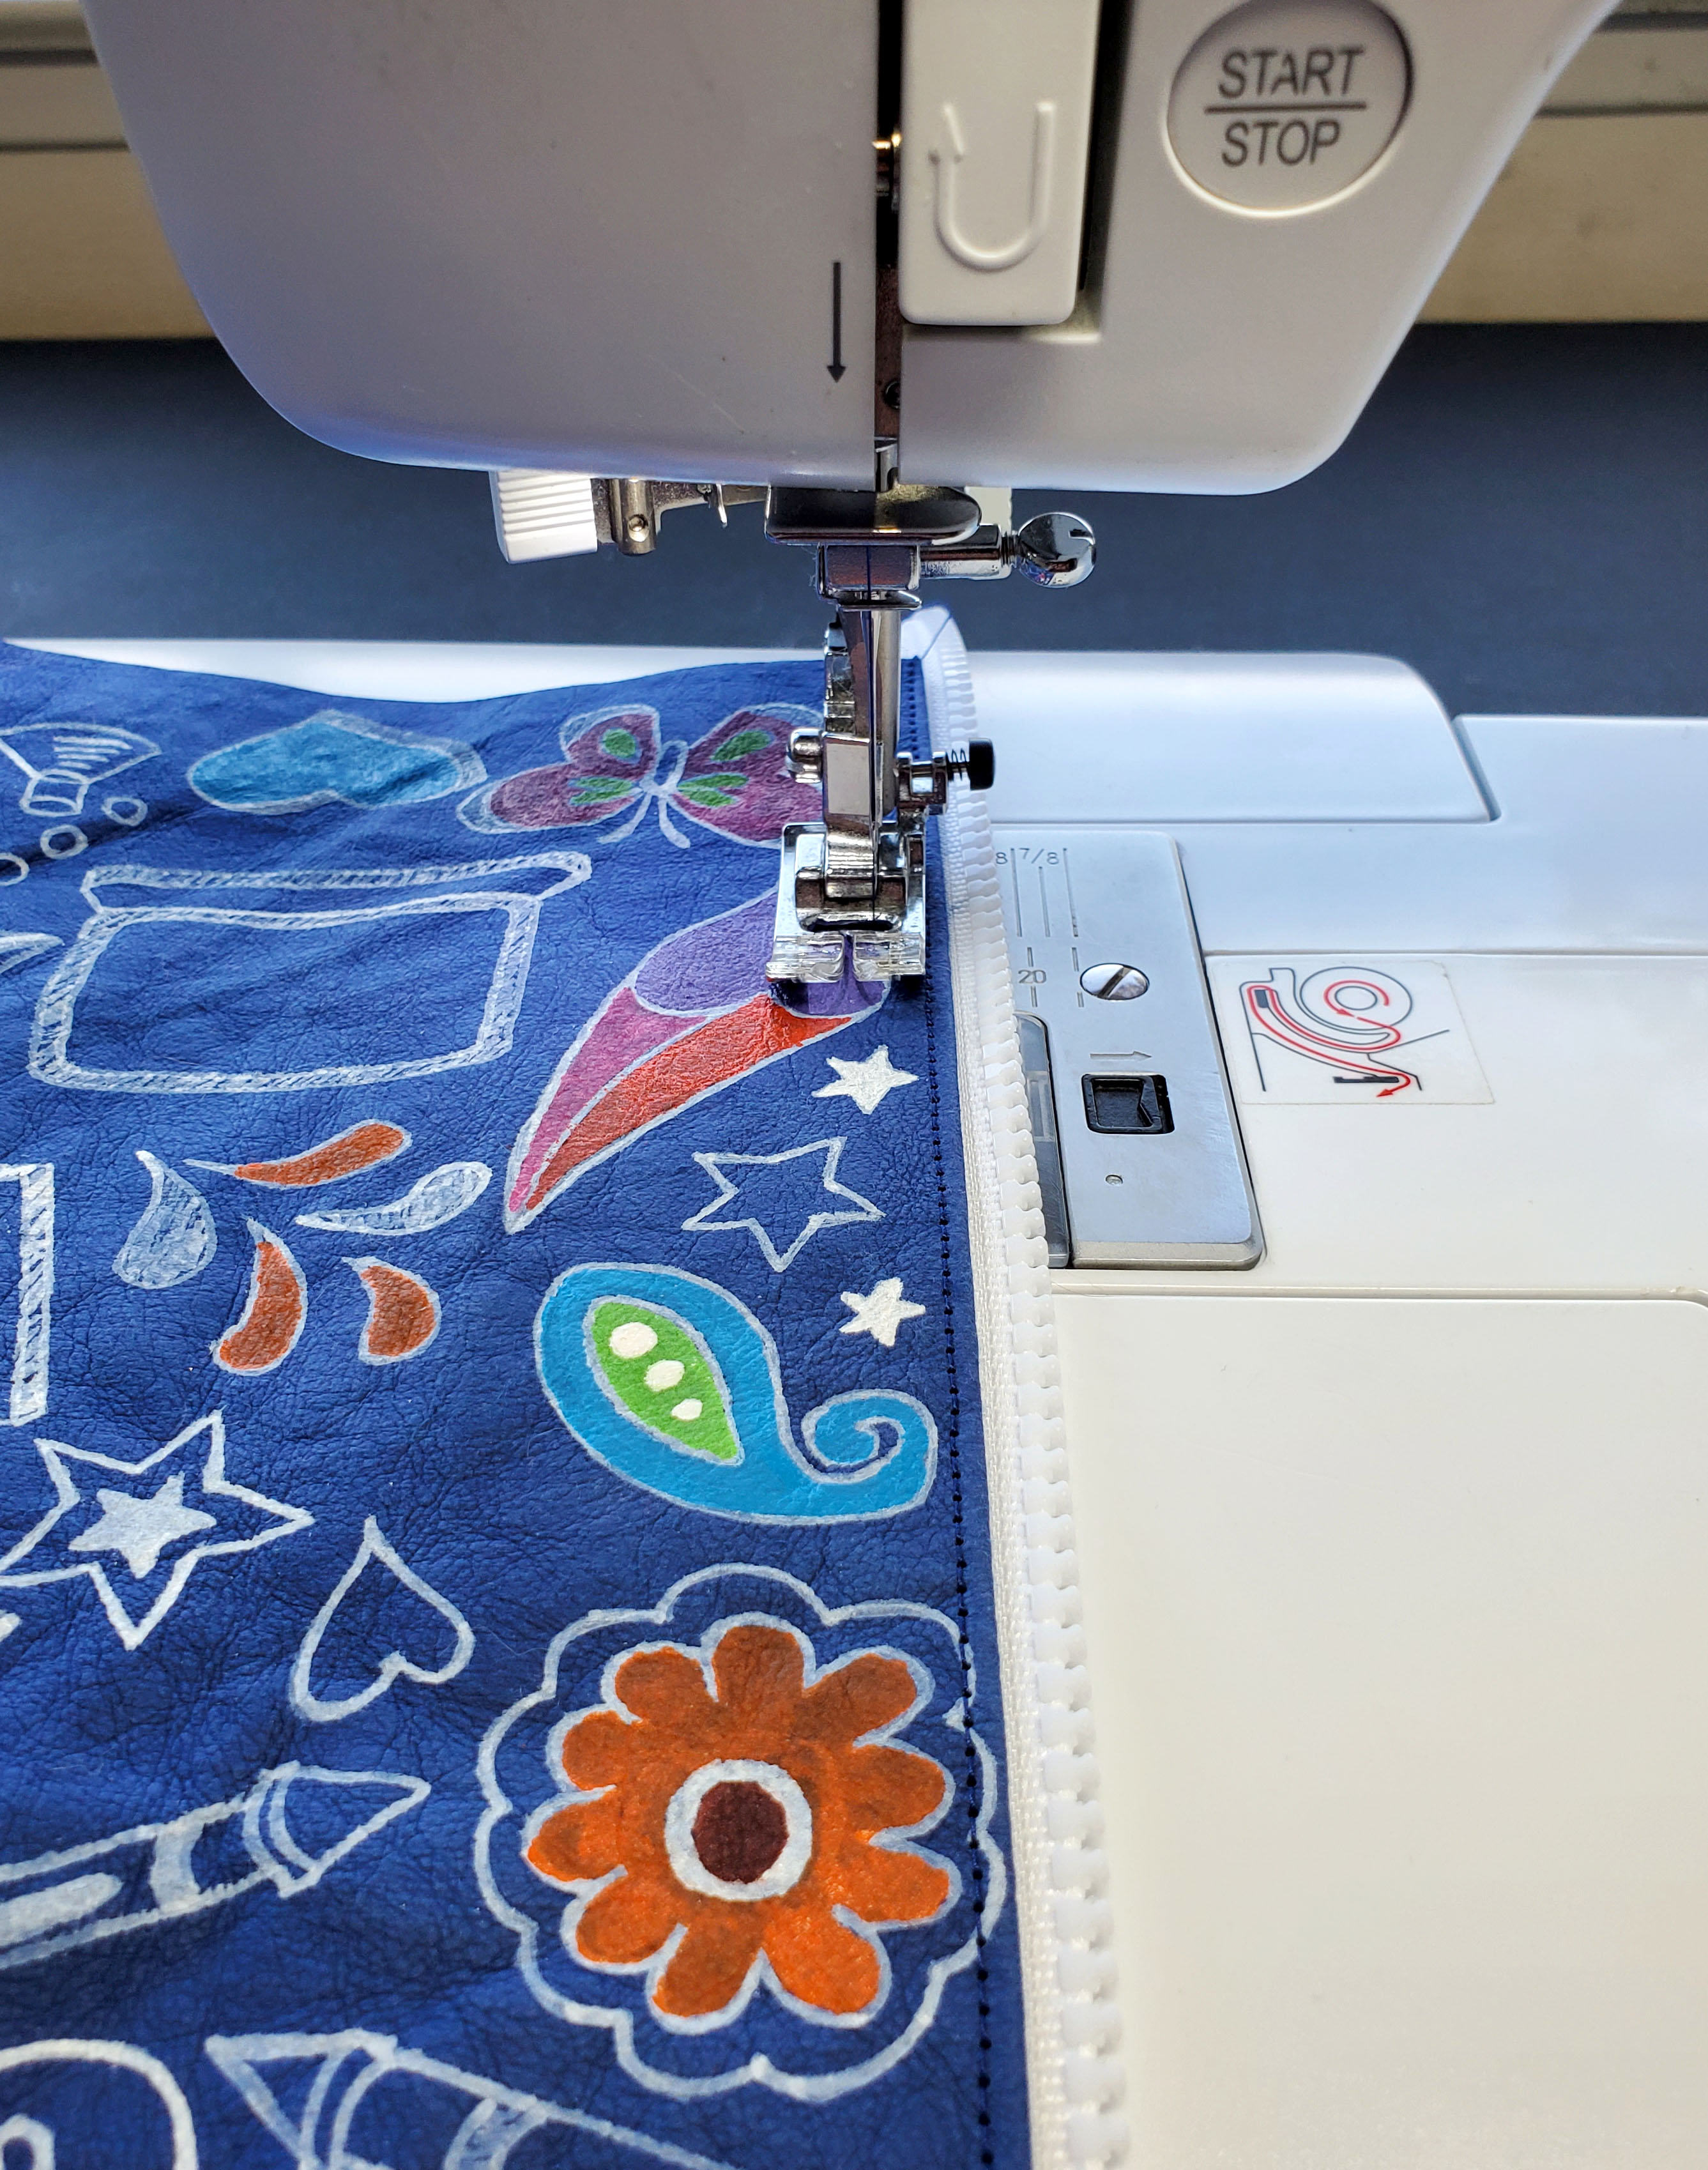
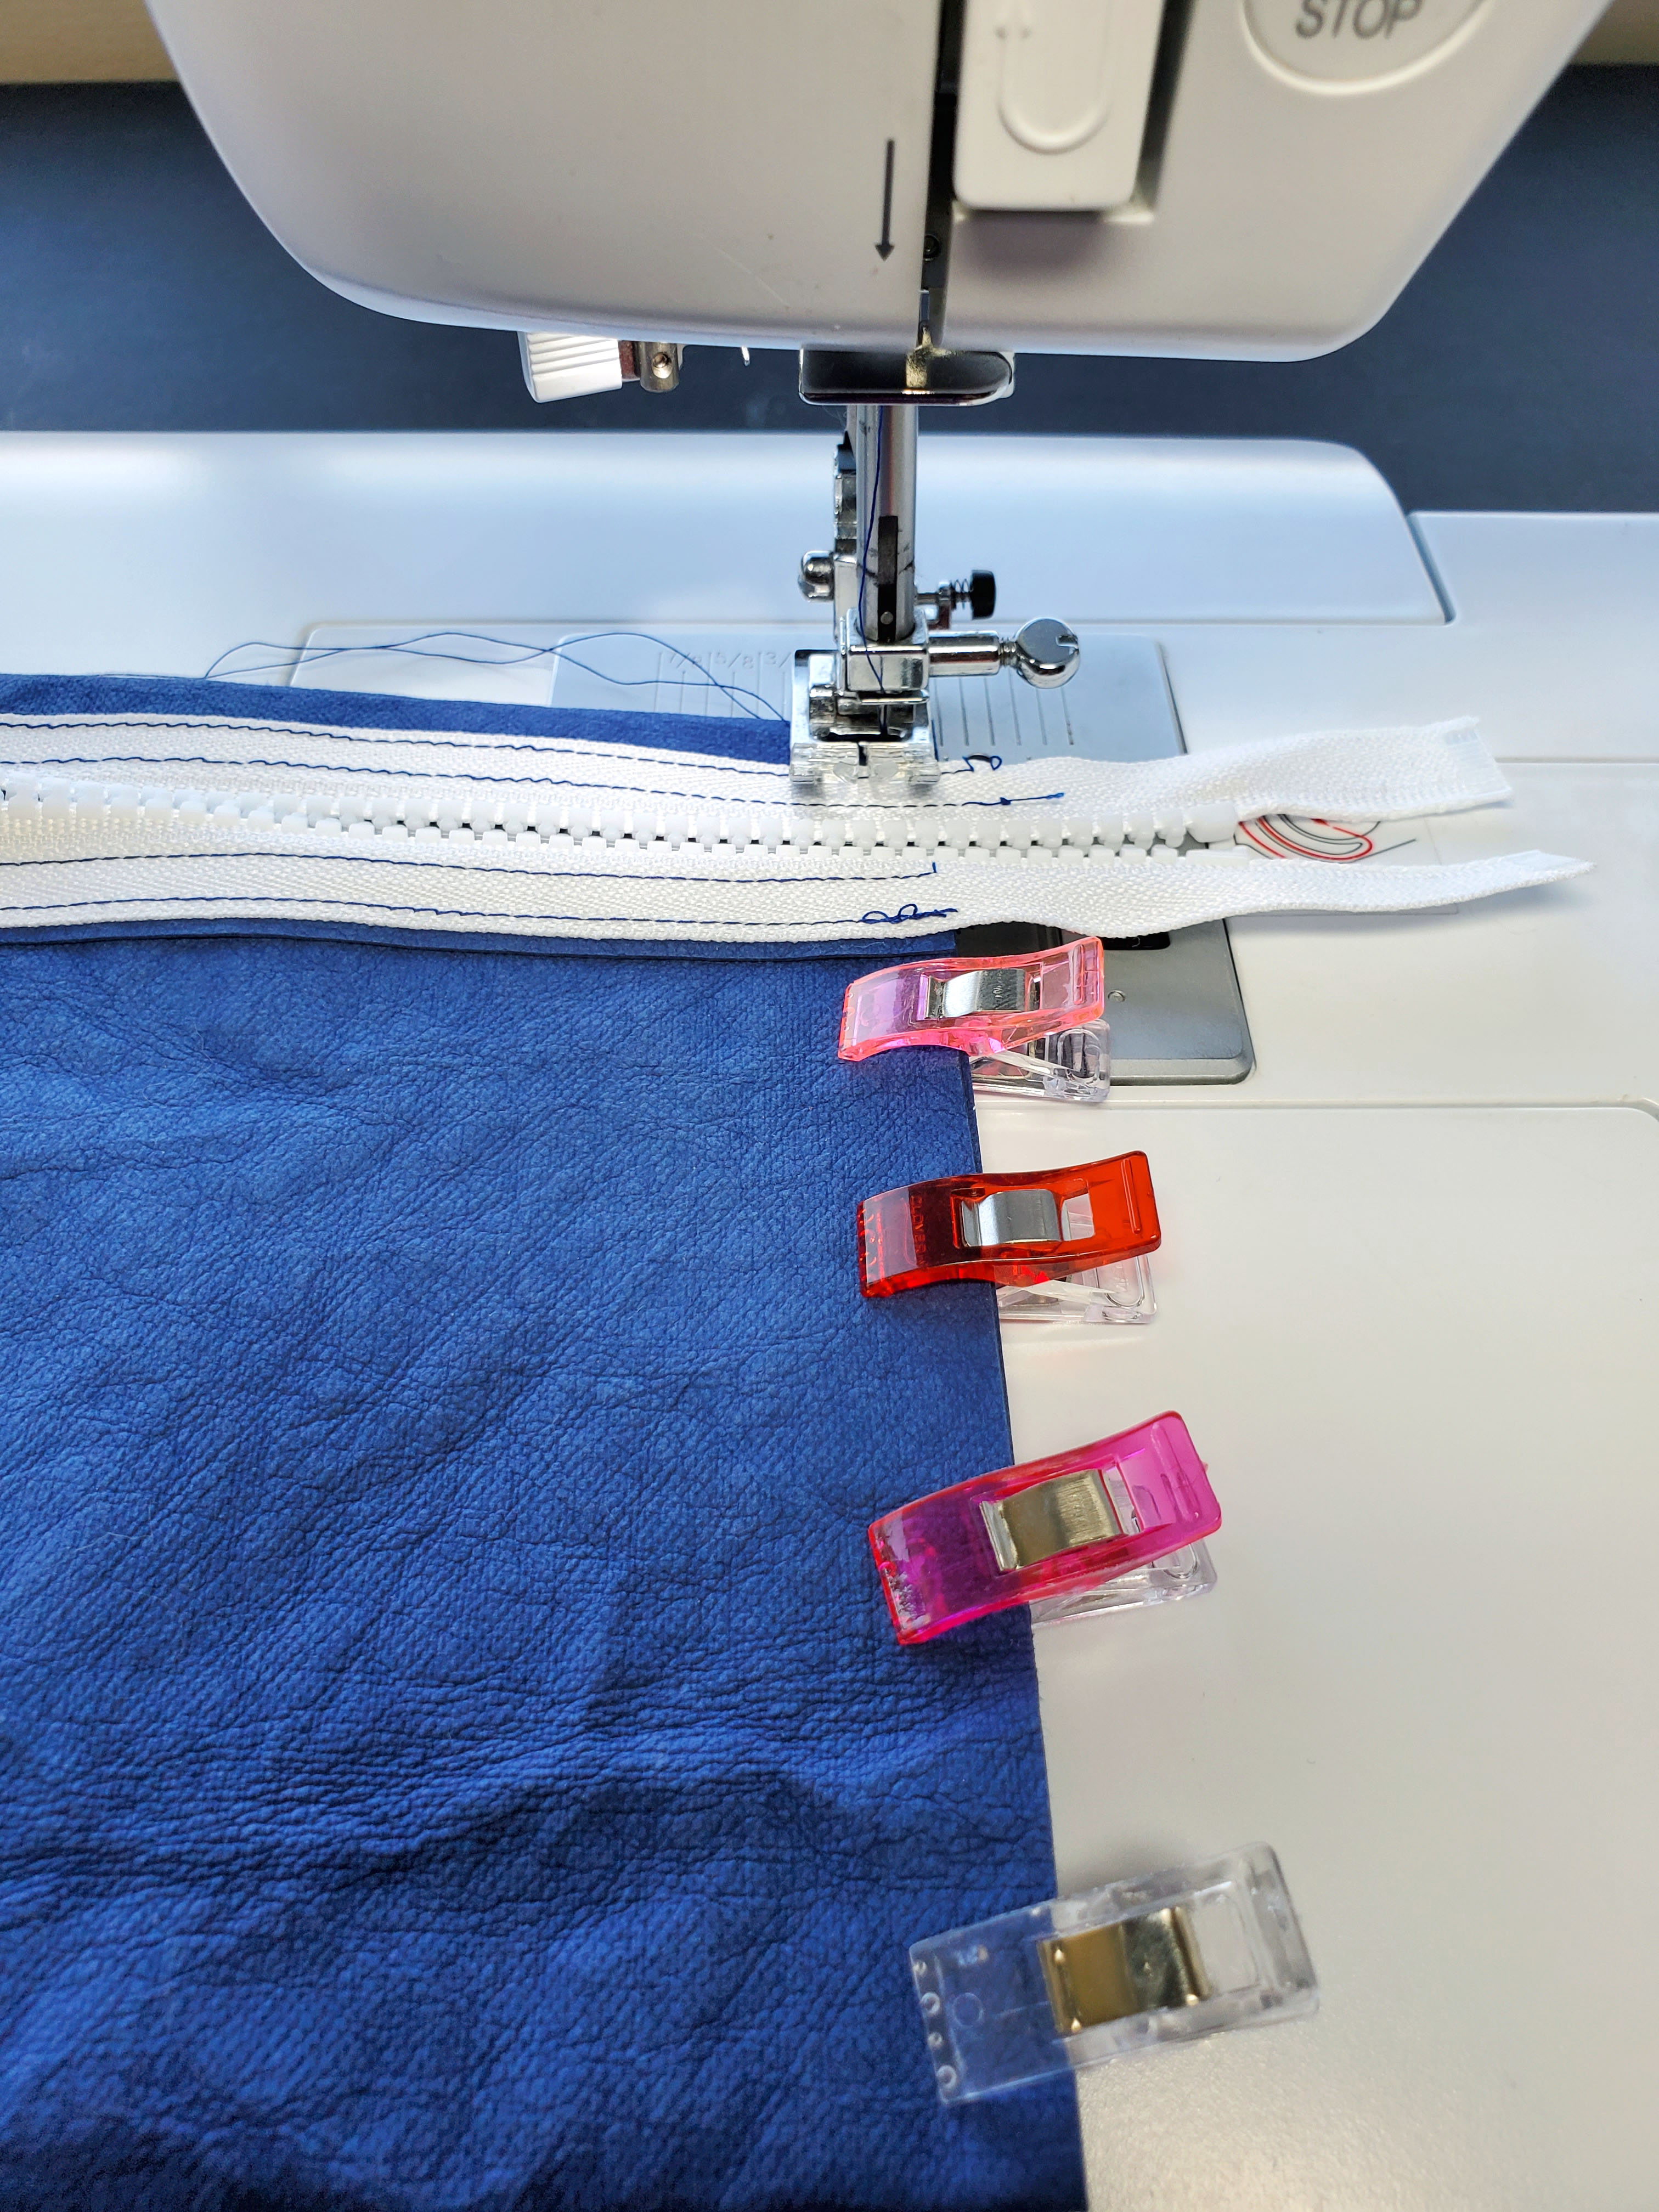
2. Sew the right short side to the zipper so that when the zipper is closed, the zipper pull is at the top.
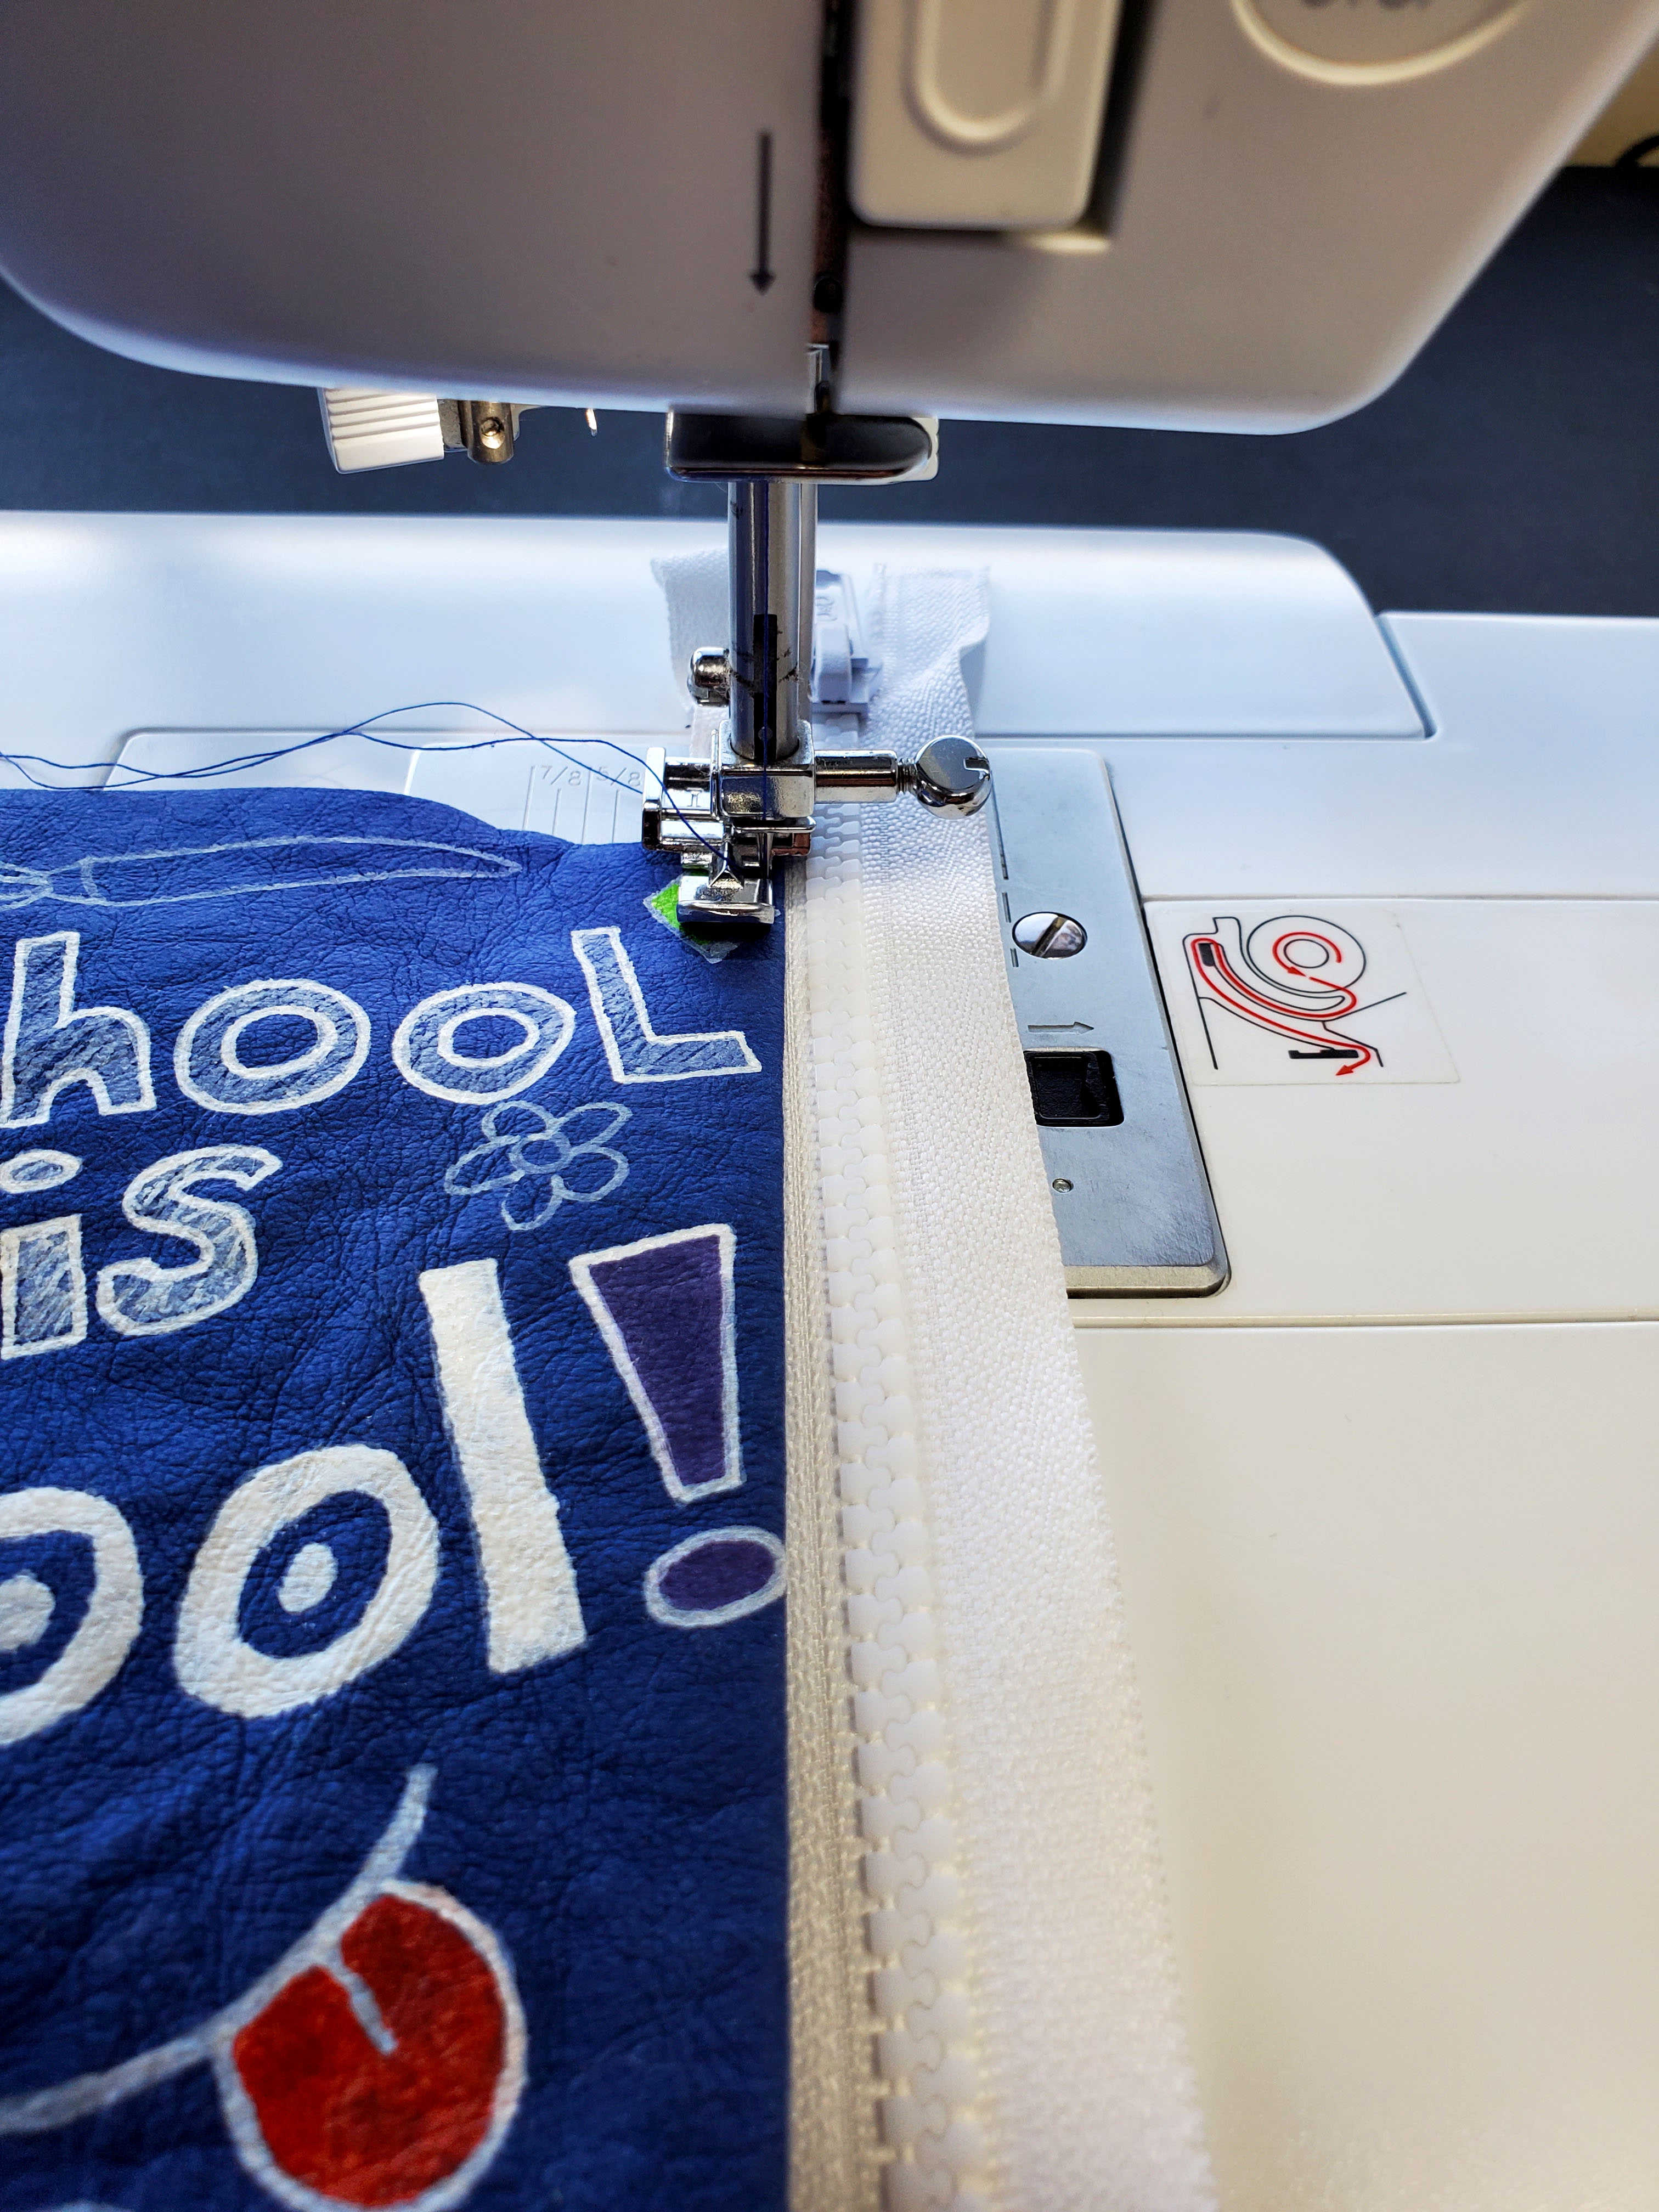
3. Fold the kraft-tex around the zipper and clip the other short side so that it matches up with the side that you have already sewn.
4. Unzip the zipper and sew the other side down. (This is where it helps to have a separating zipper, but it is still possible with a zipper that doesn’t separate. You’ll want at least a 14” zipper and to use your machine’s free arm. If you have trouble with a non-separating zipper, you can do the method where you cut 2 rectangles instead of just 1.)
5. OPTIONAL: Sew an extra row of stitching on both sides of the zipper.
6. Zip the zipper back together with the pouch inside out. Finger press the sides of the pouch with about ½” from the edge of the zipper.
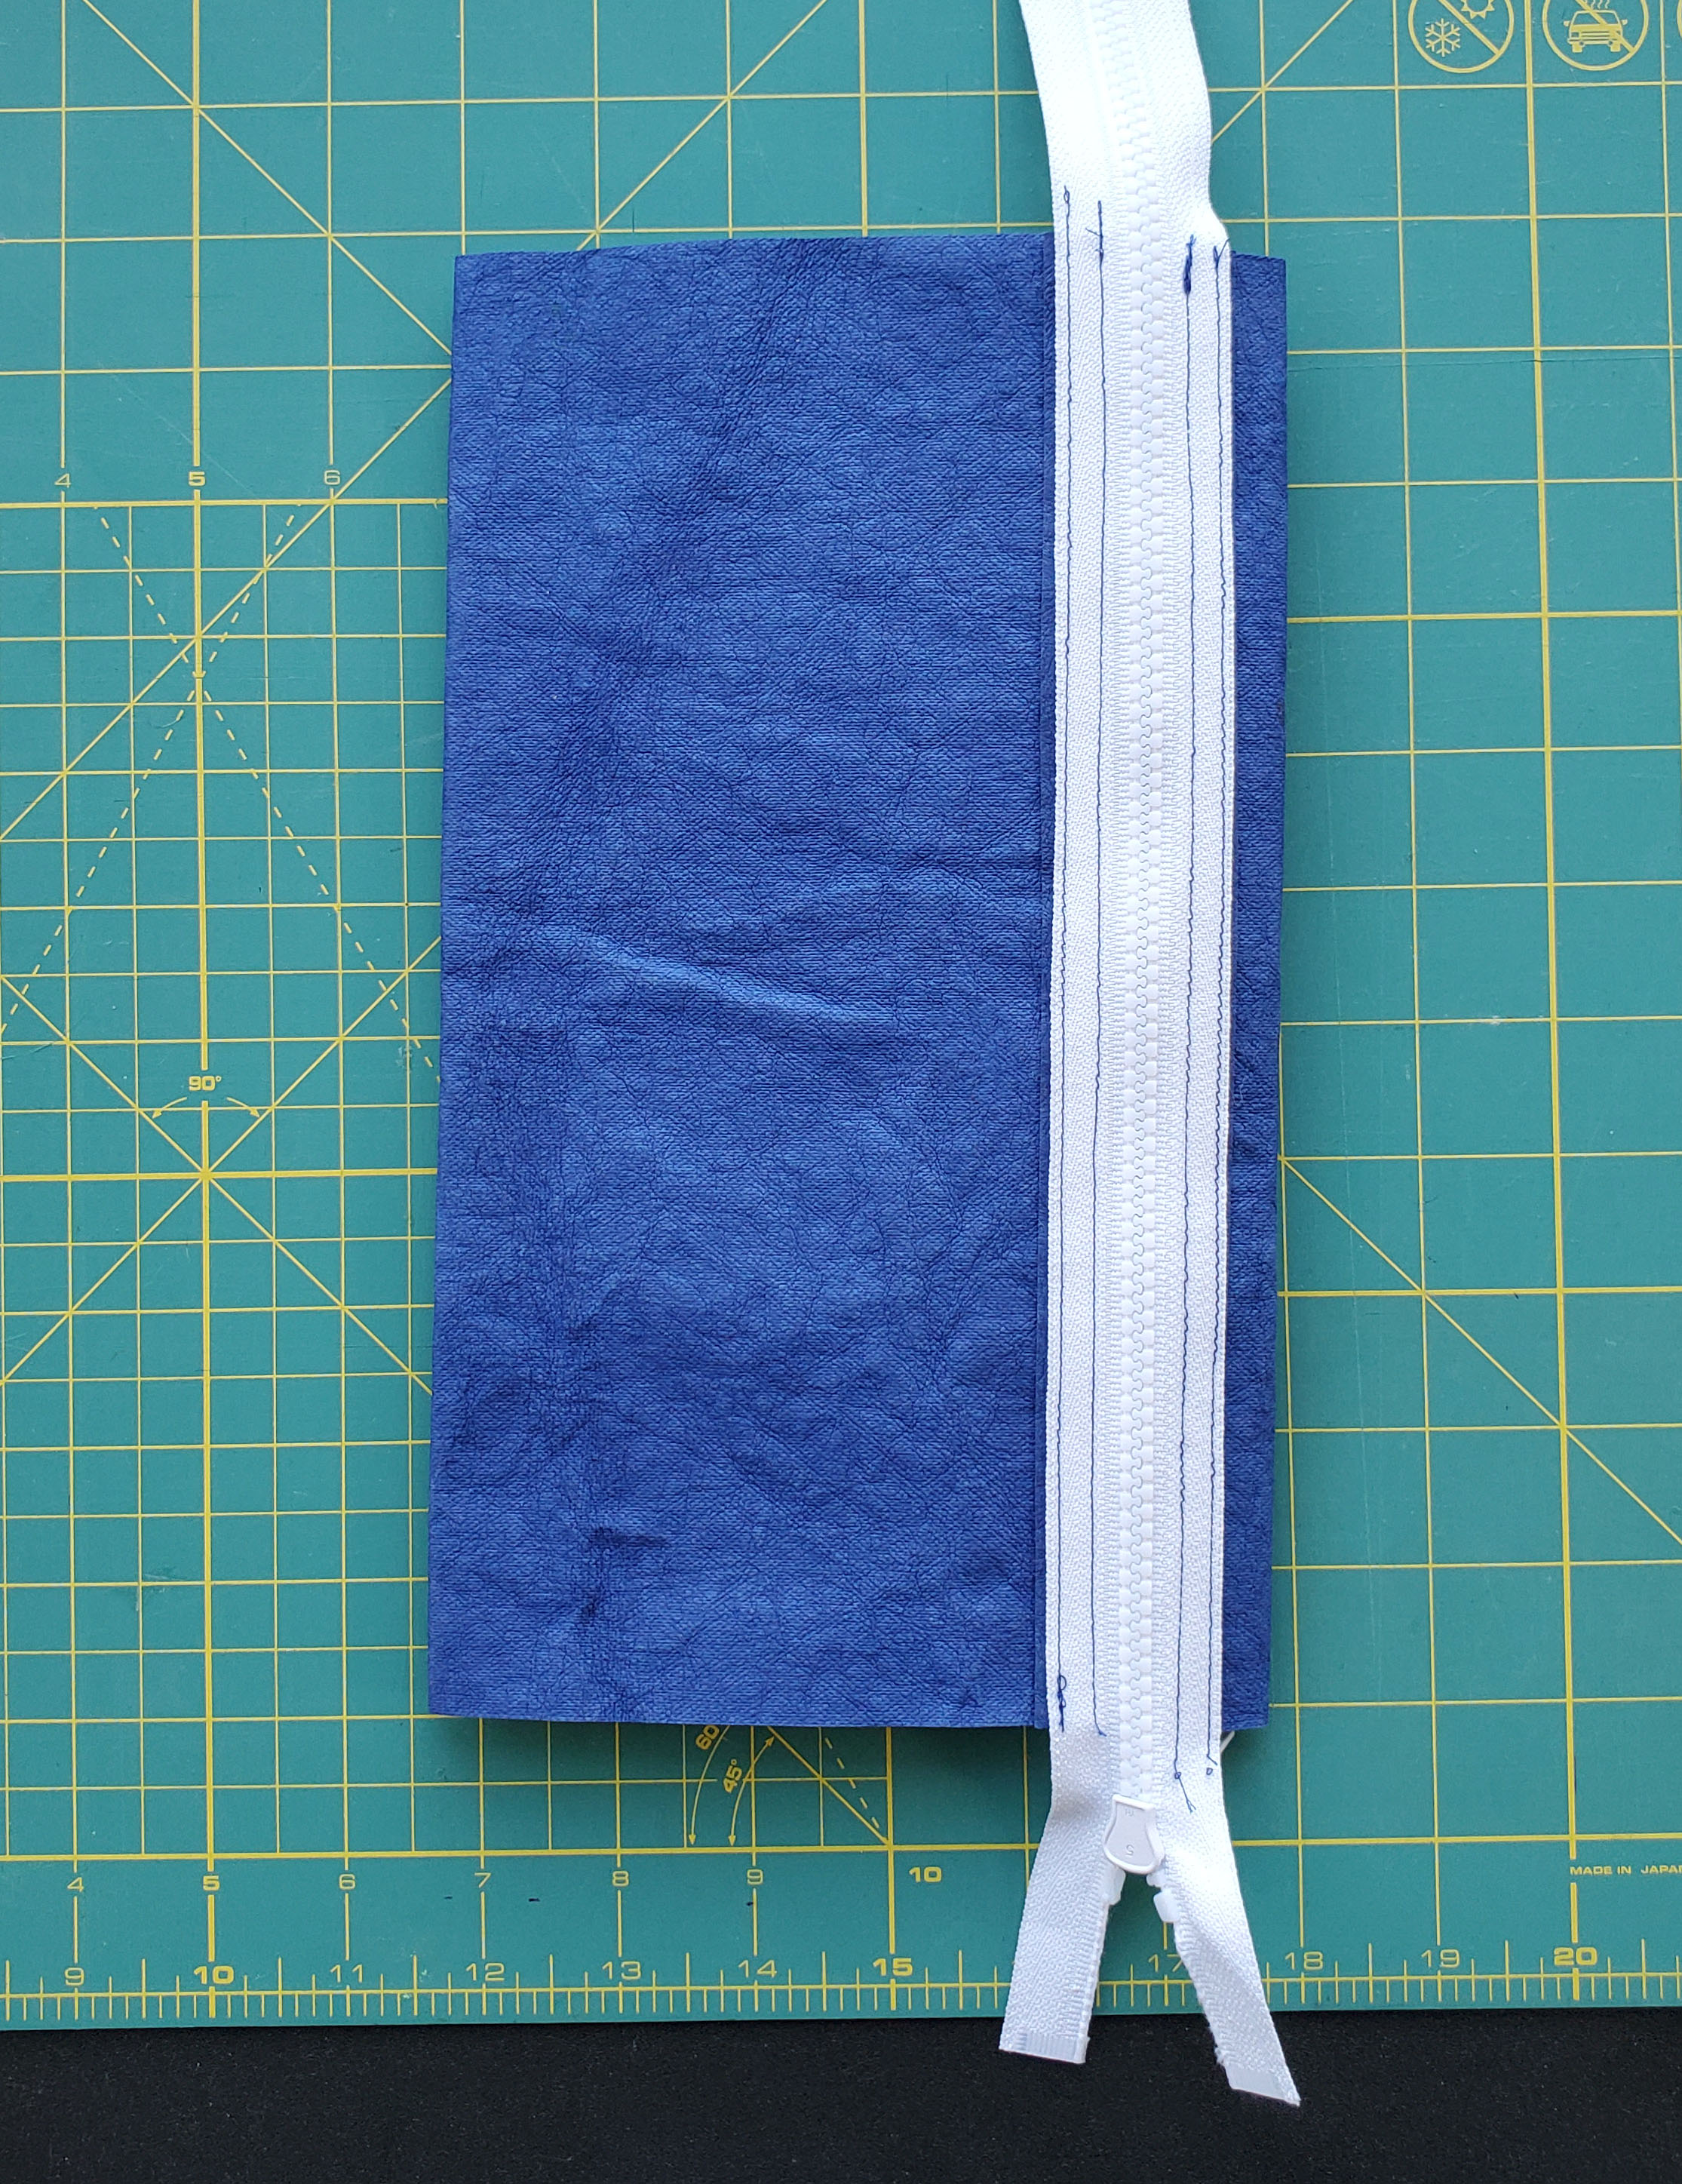
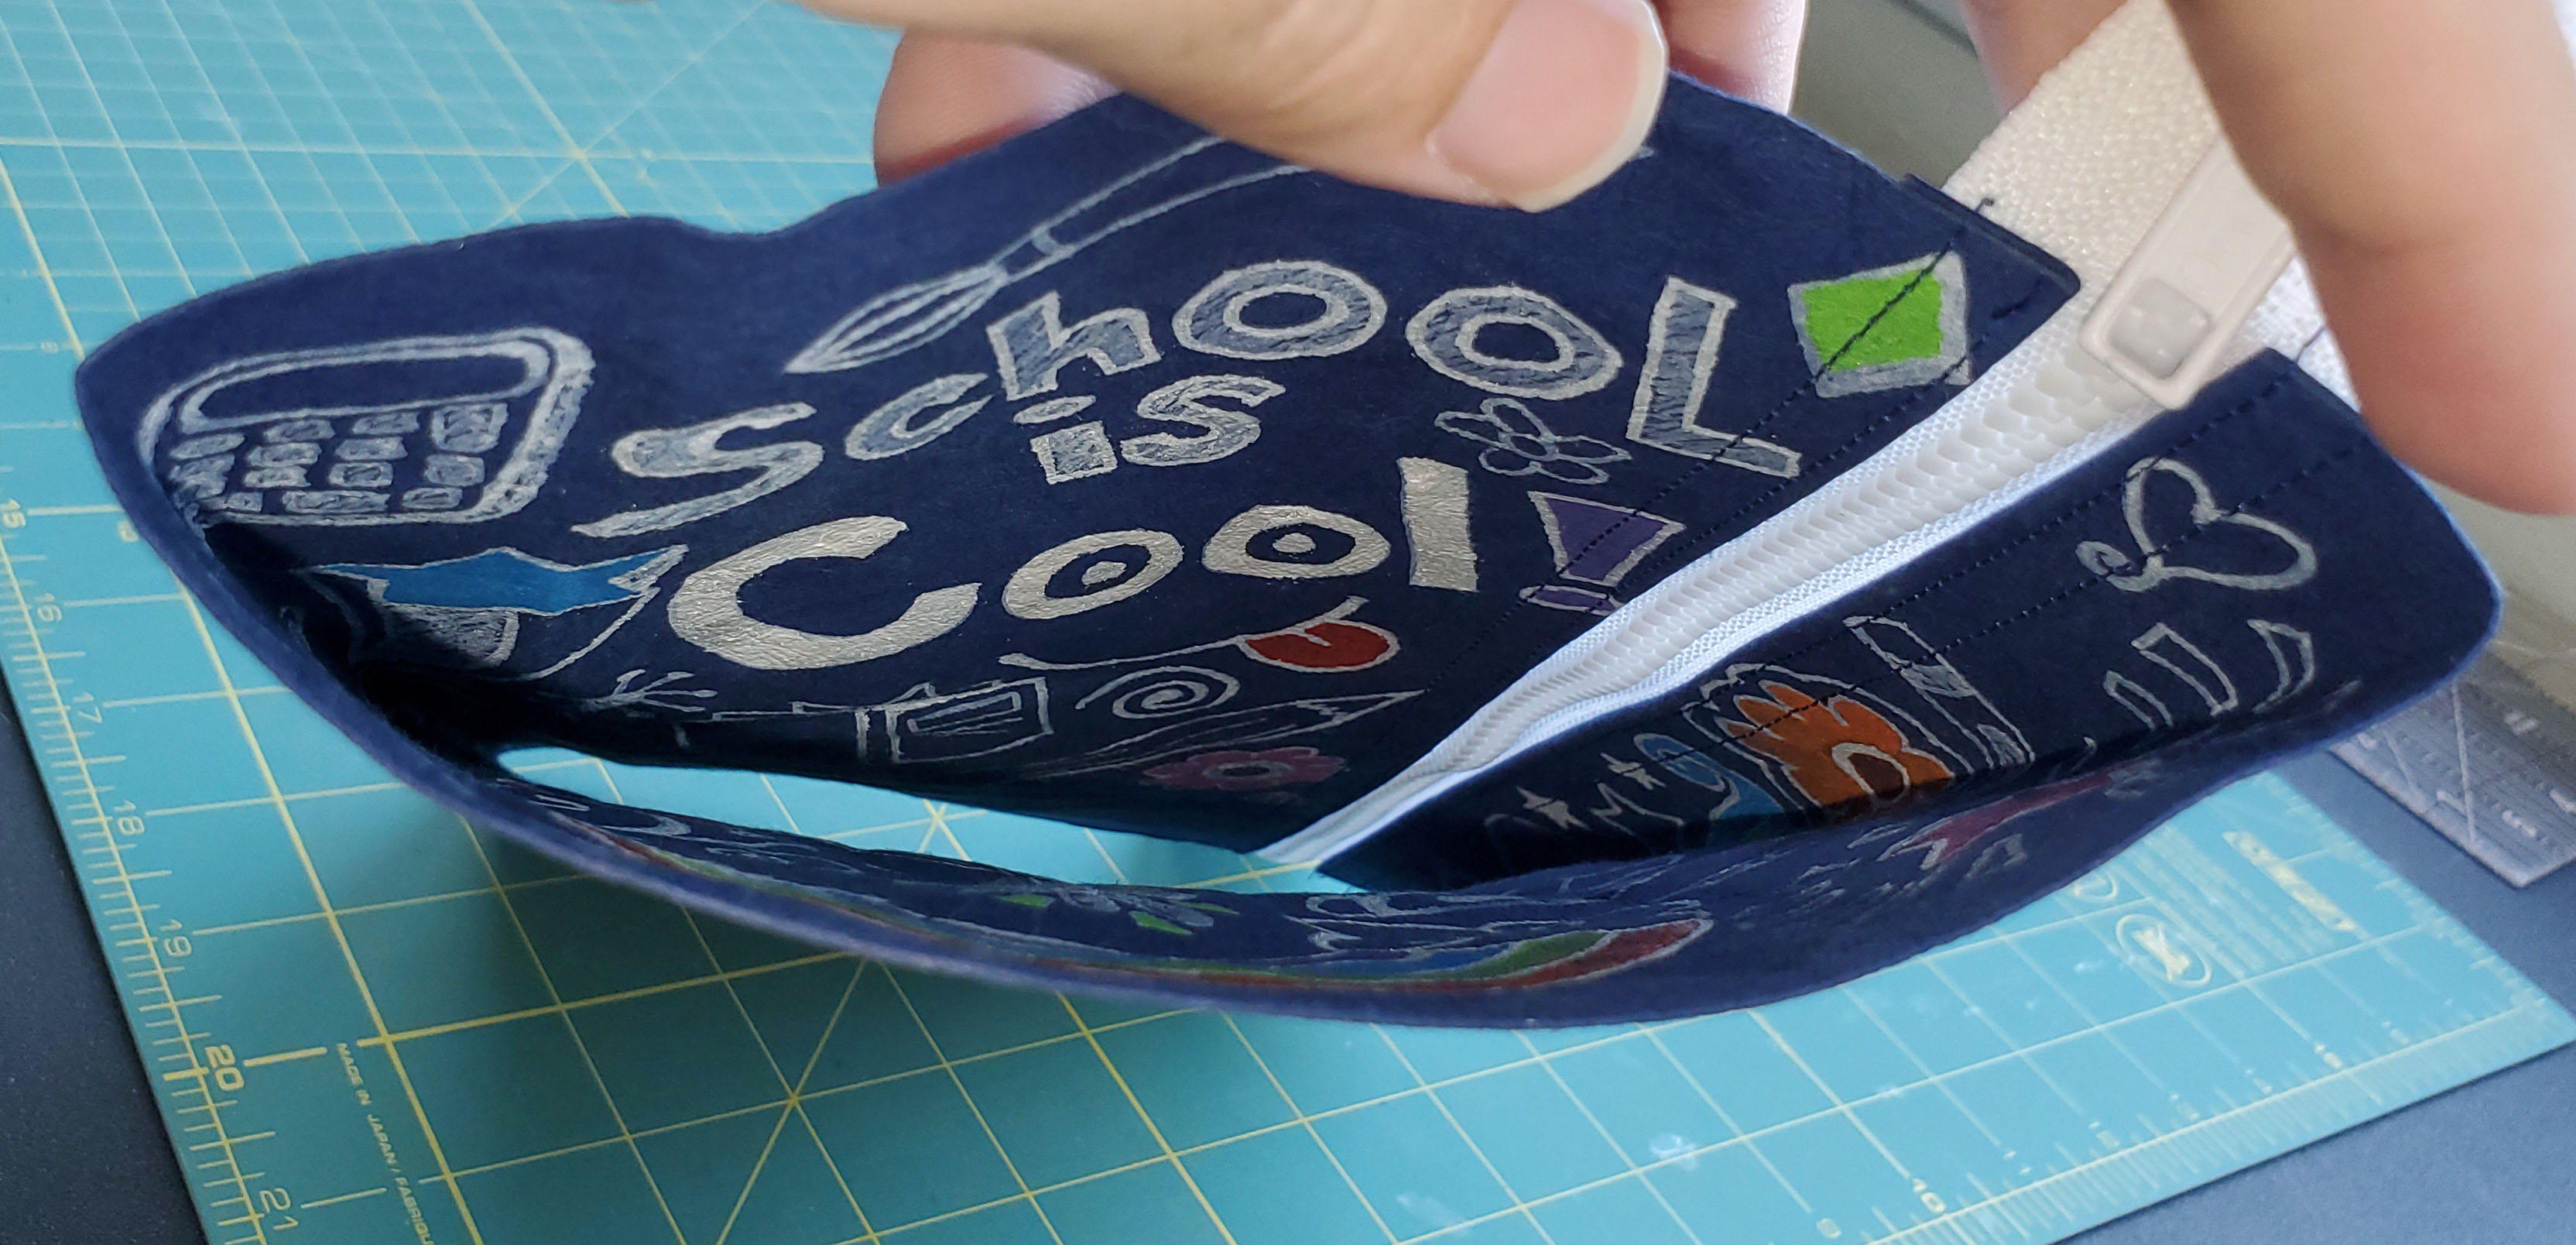
7. If your decorated kraft-tex has a front or back, make sure by checking inside the tube that you fold the side that is supposed to go to the back close to the zipper. On my sample pouch, I want the “School is Cool” to go on the front of my pouch, so I folded the other side about ½” from the edge of the zipper.
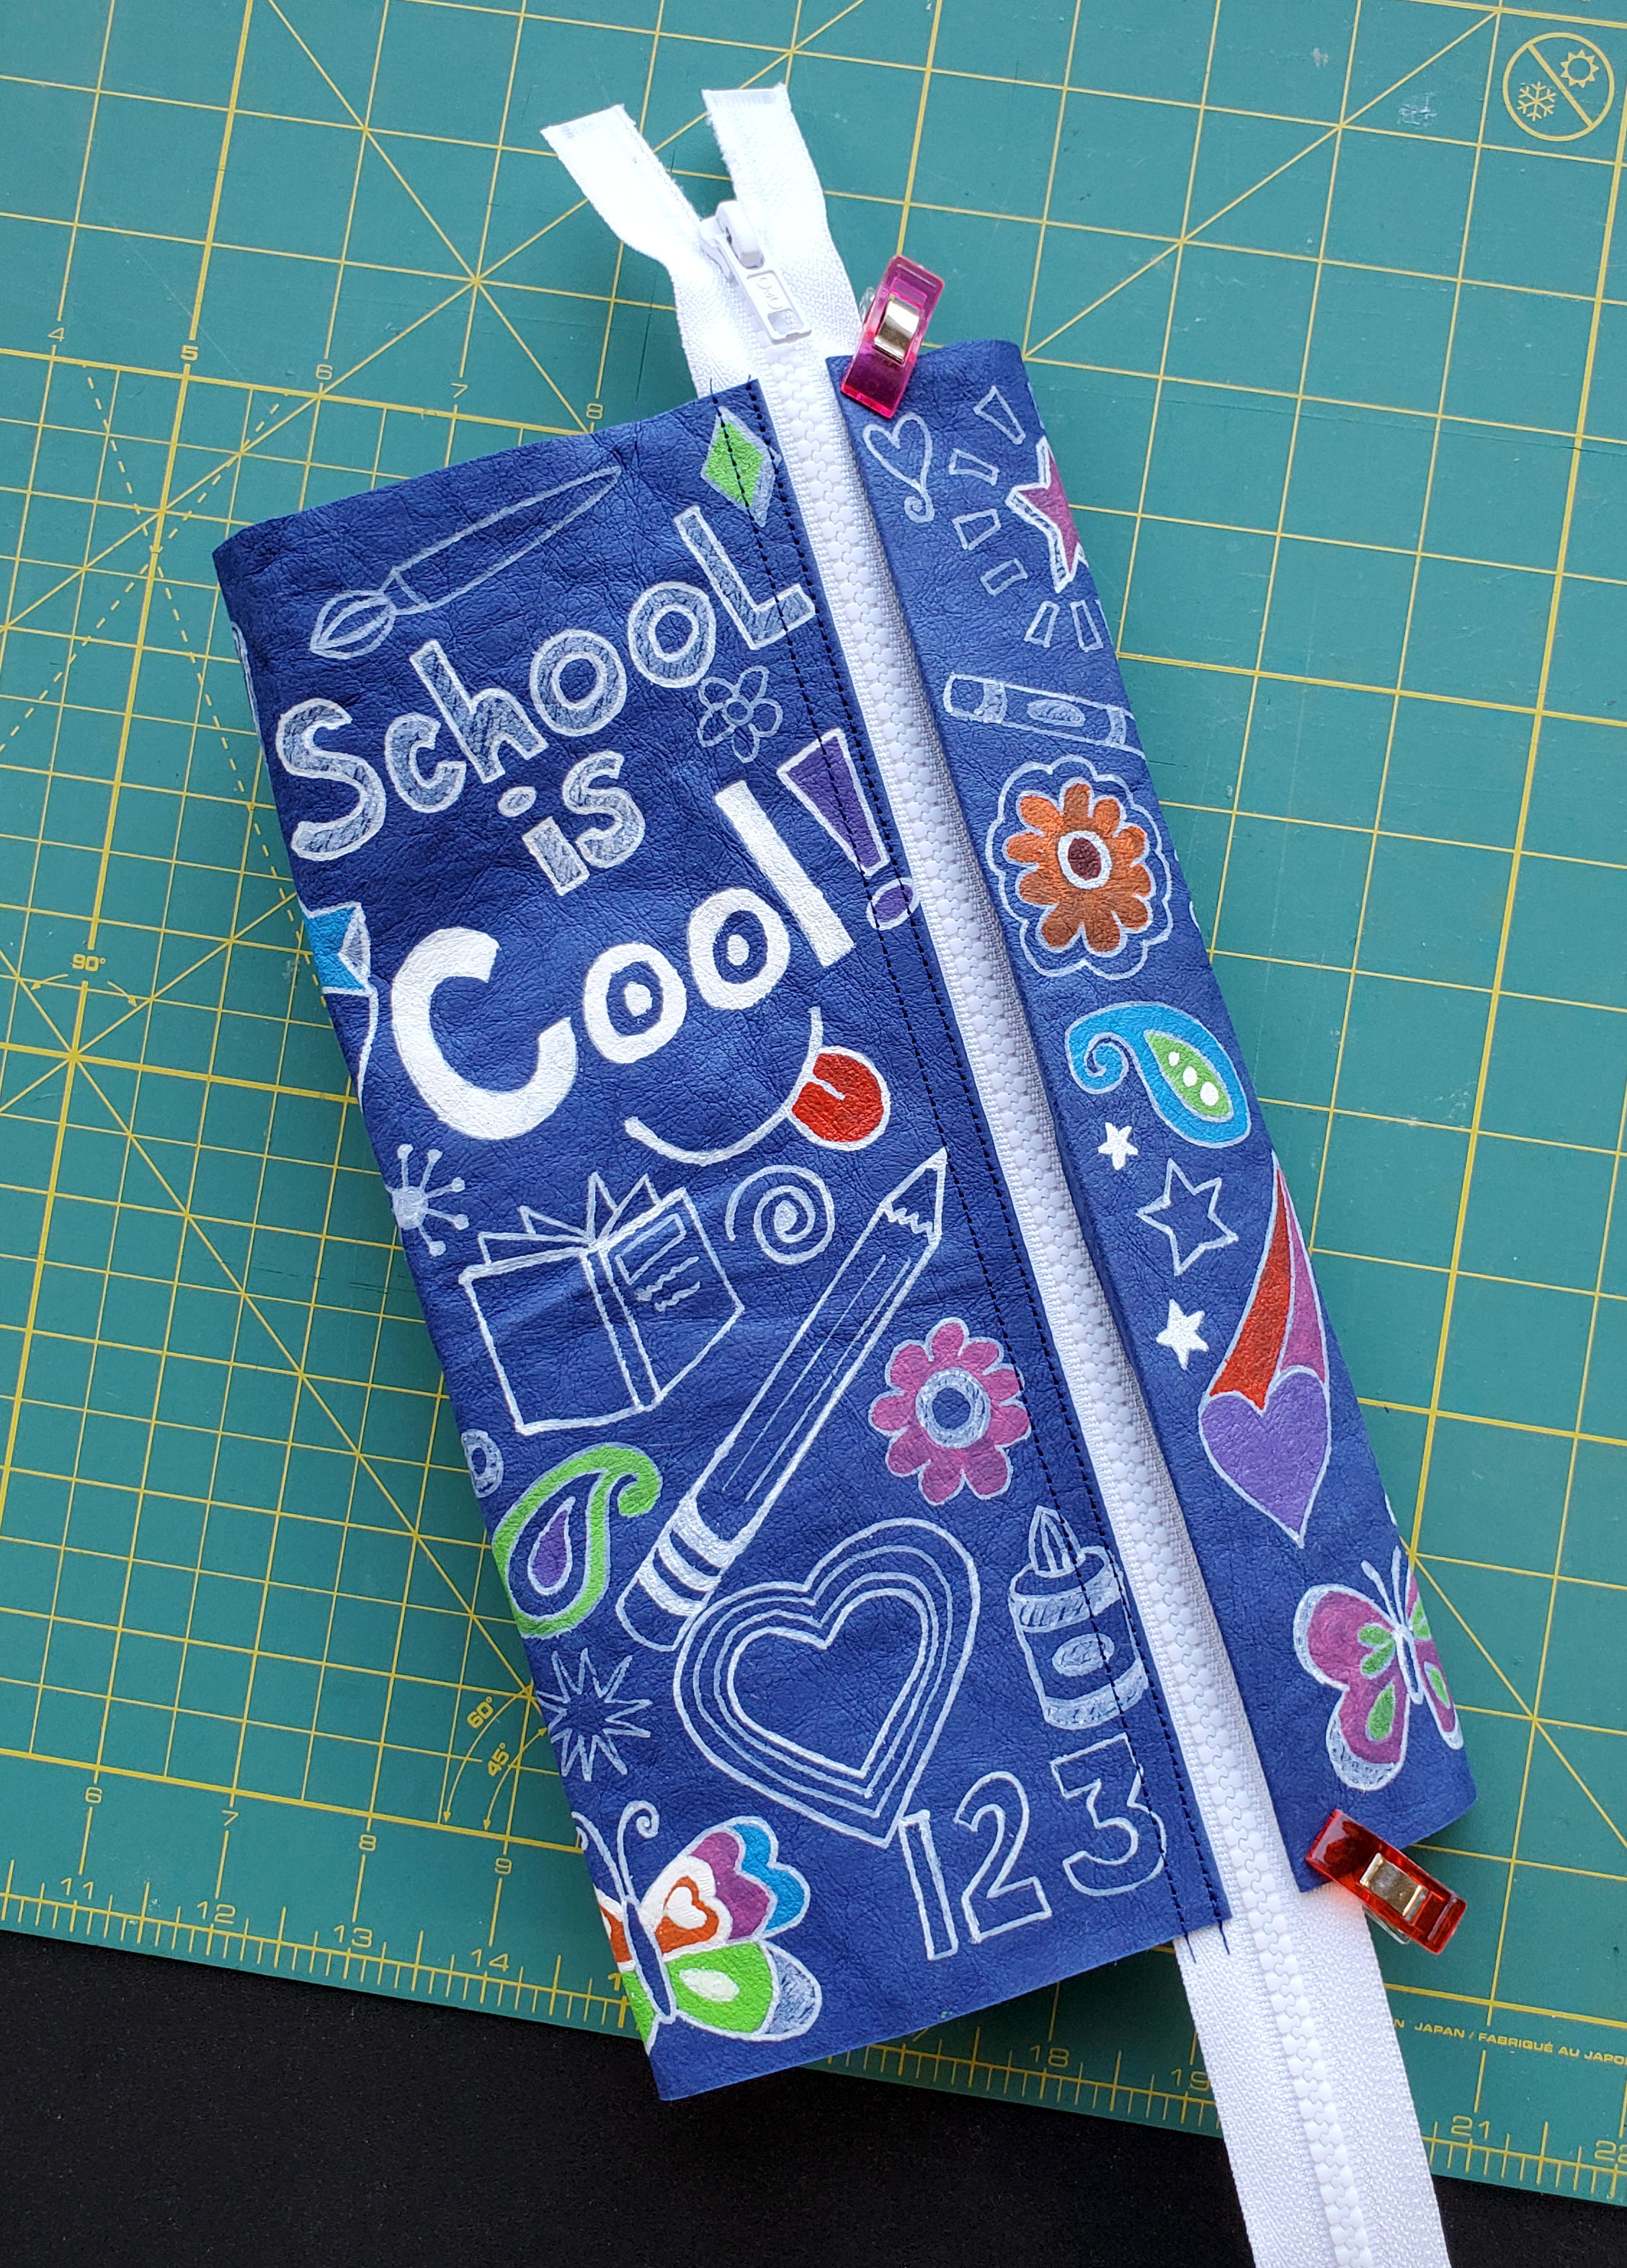
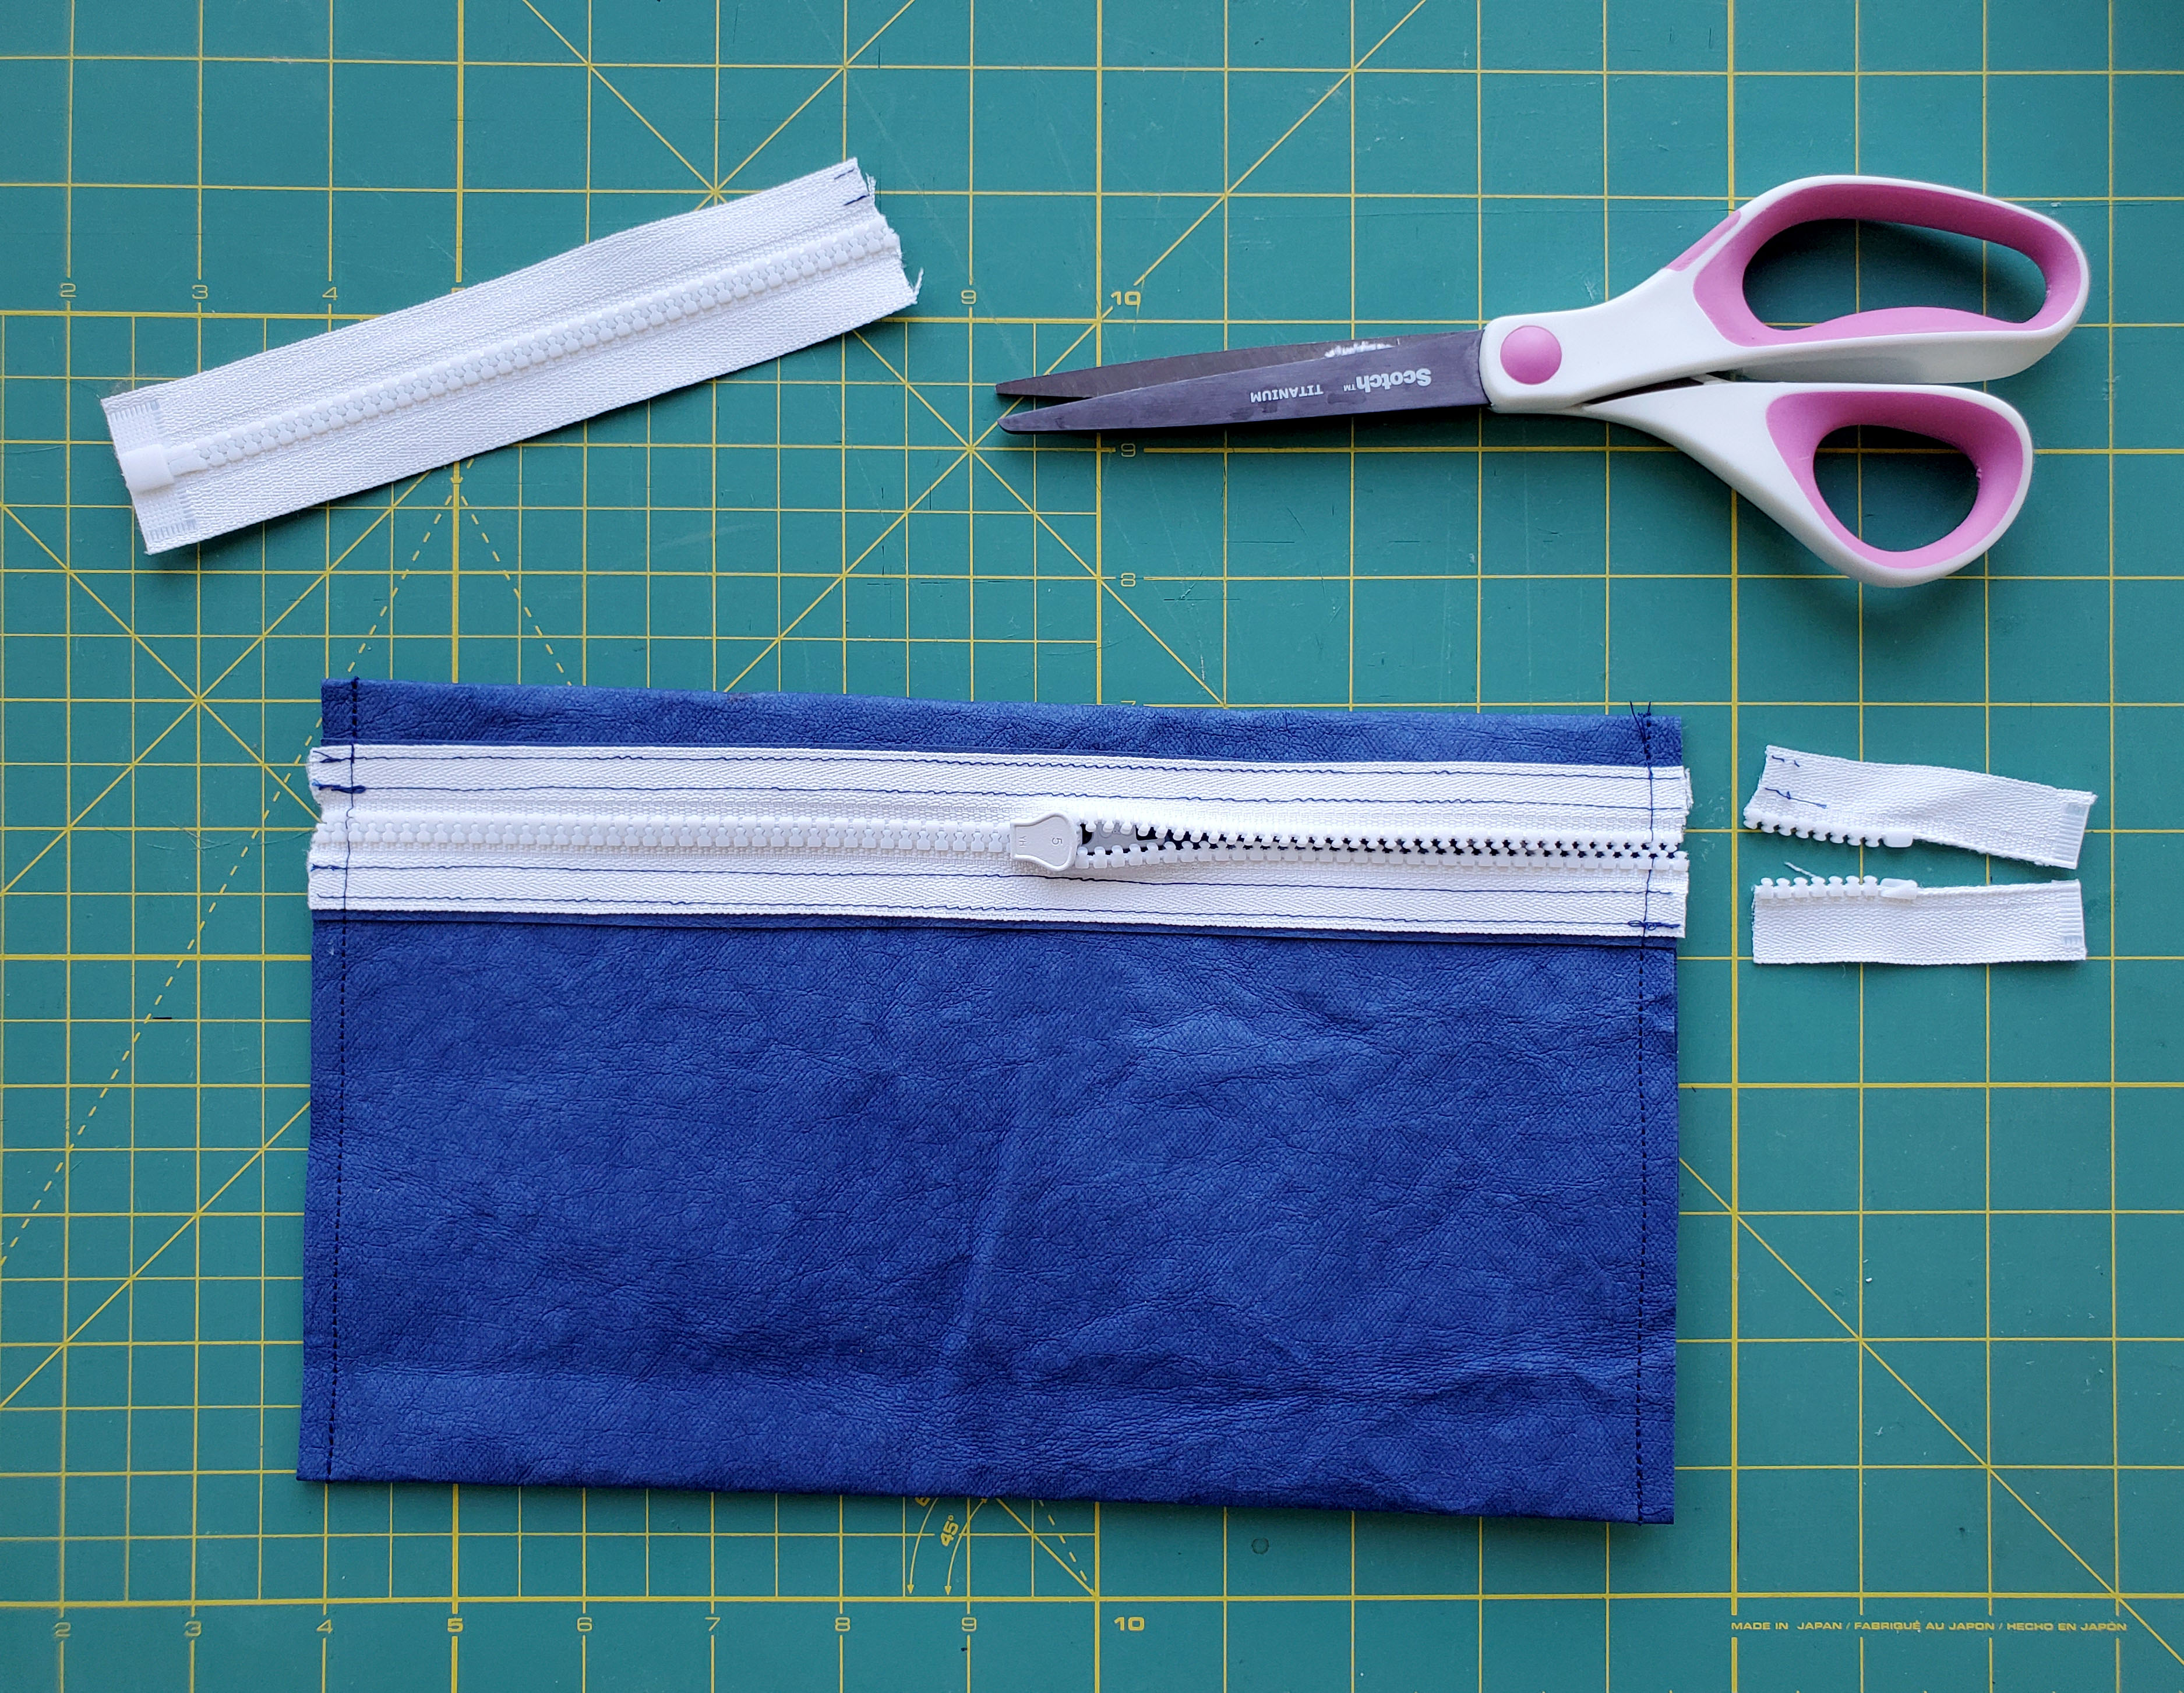
8. Partially unzip the zipper so that the pull is in the middle of your pouch. Clip both of the short sides ensuring that the edges of the kraft-tex match up.
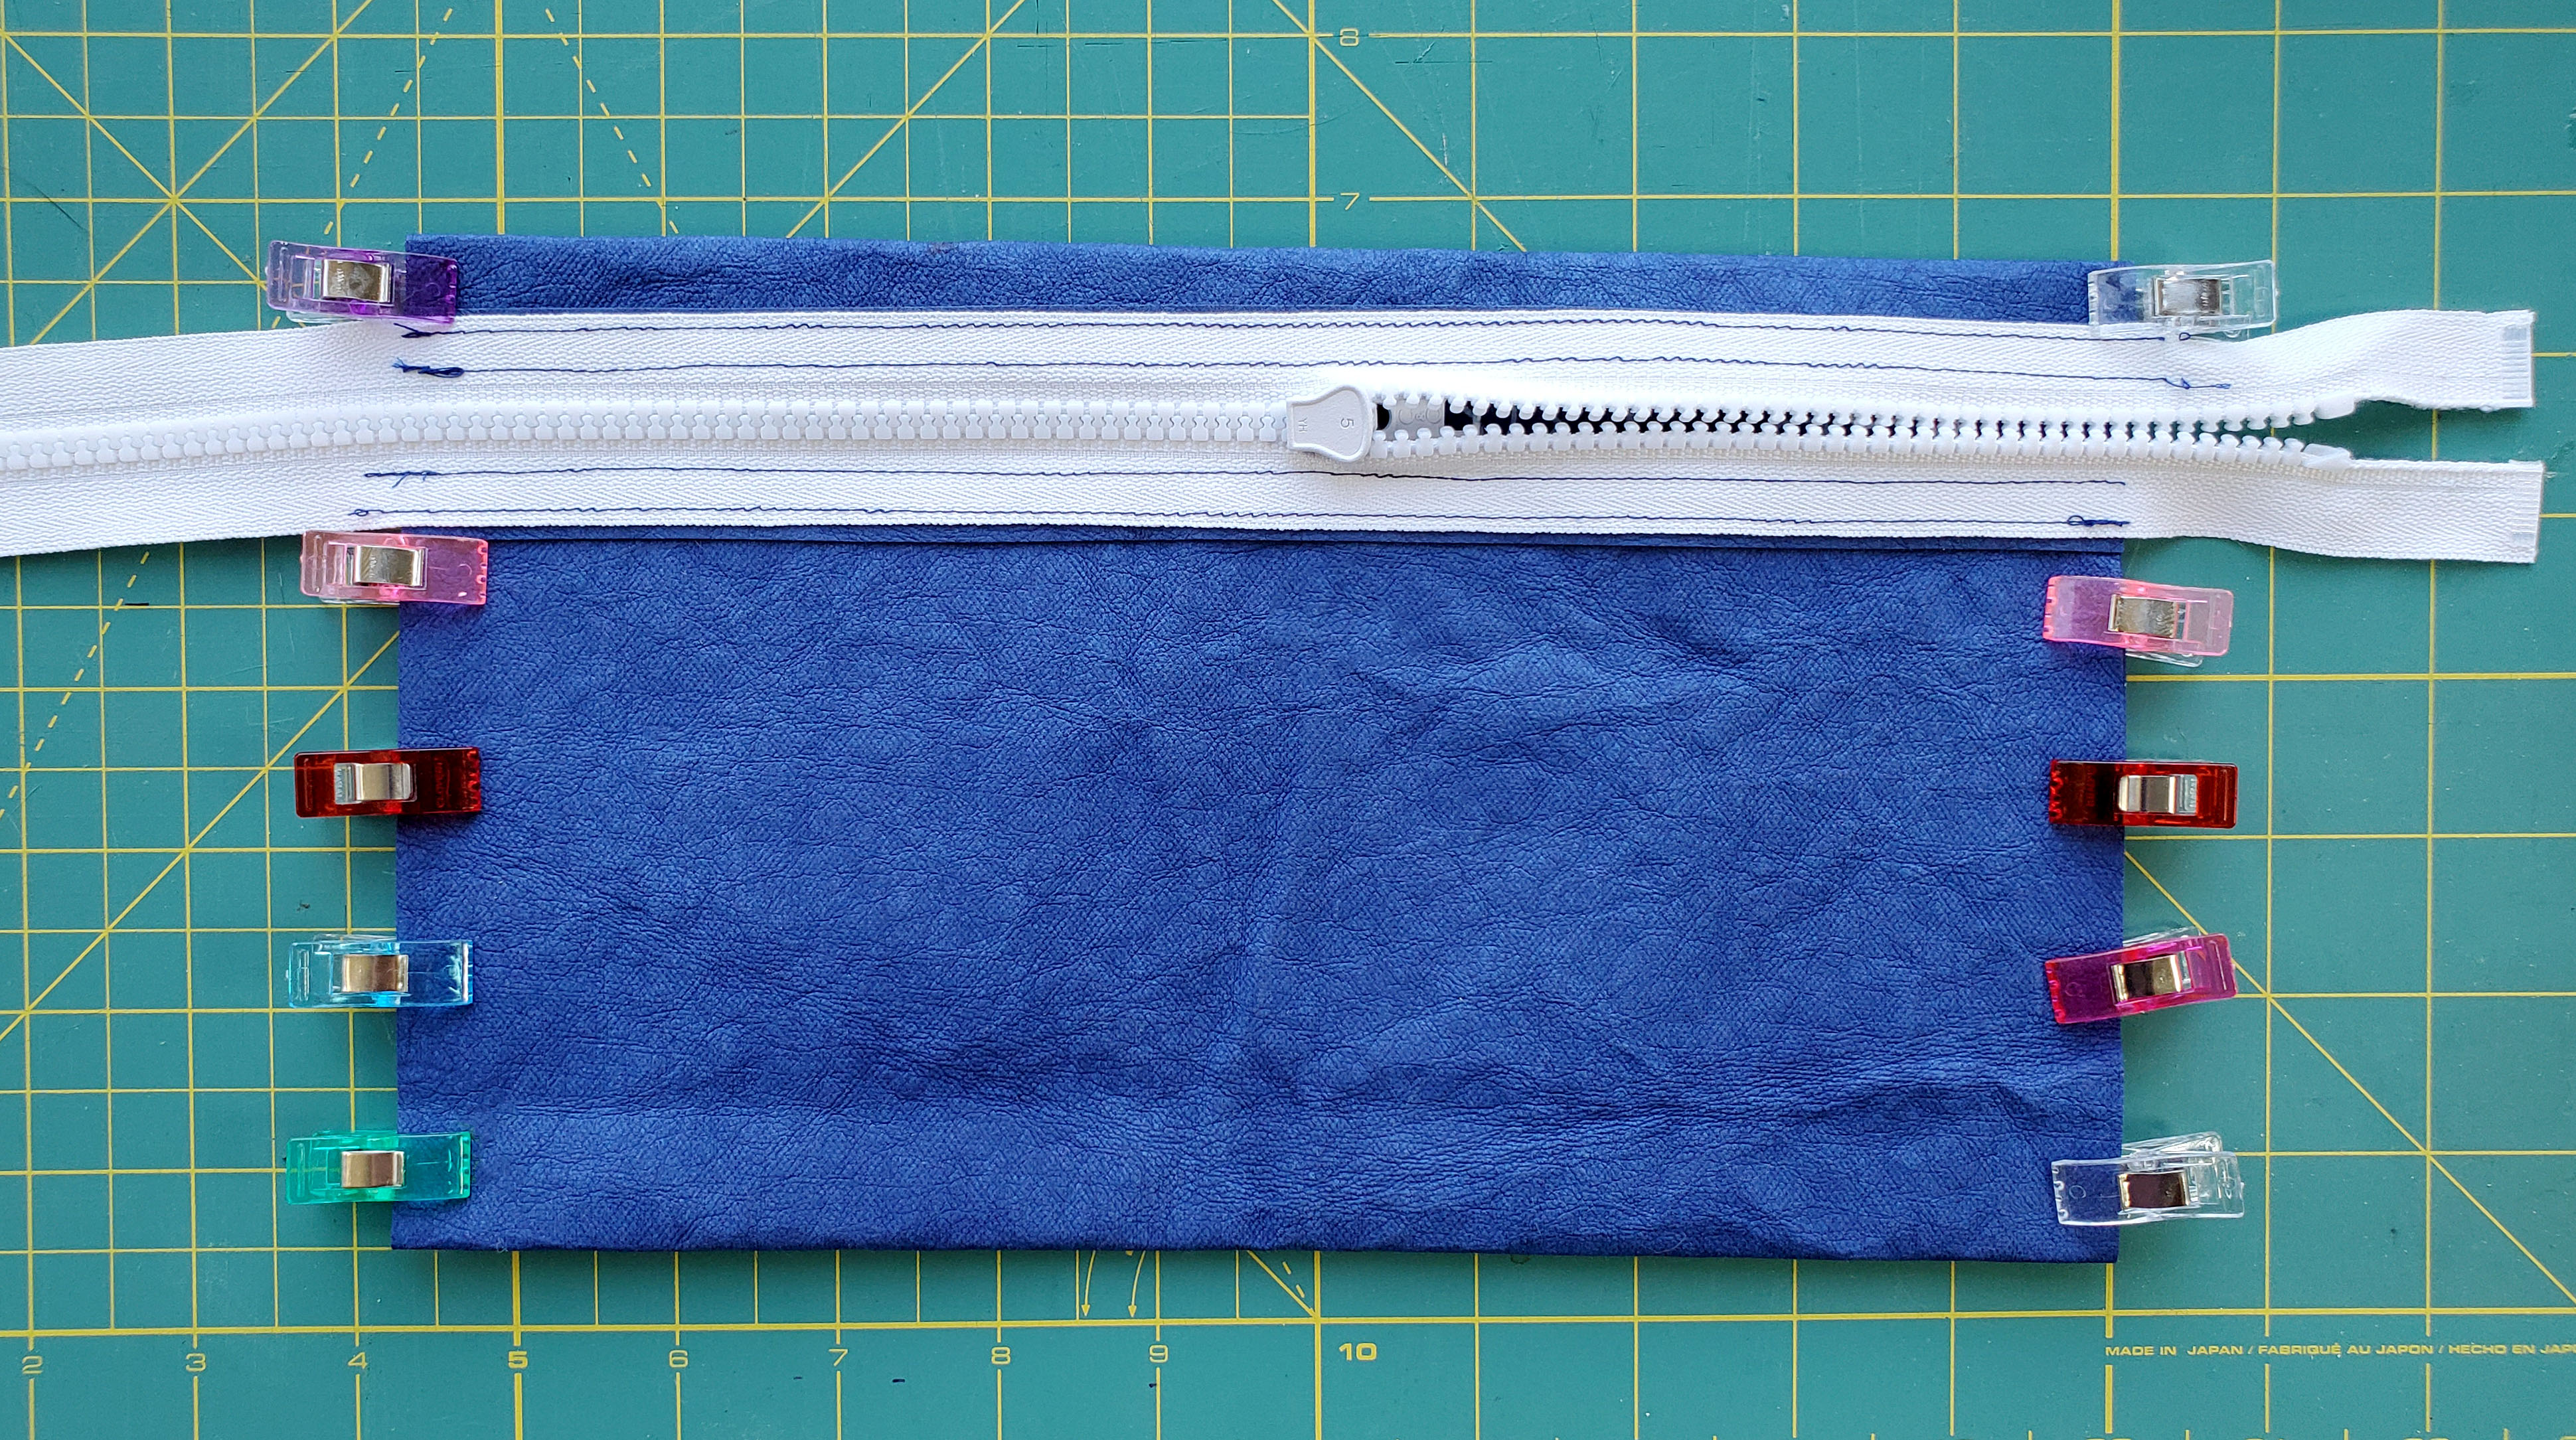
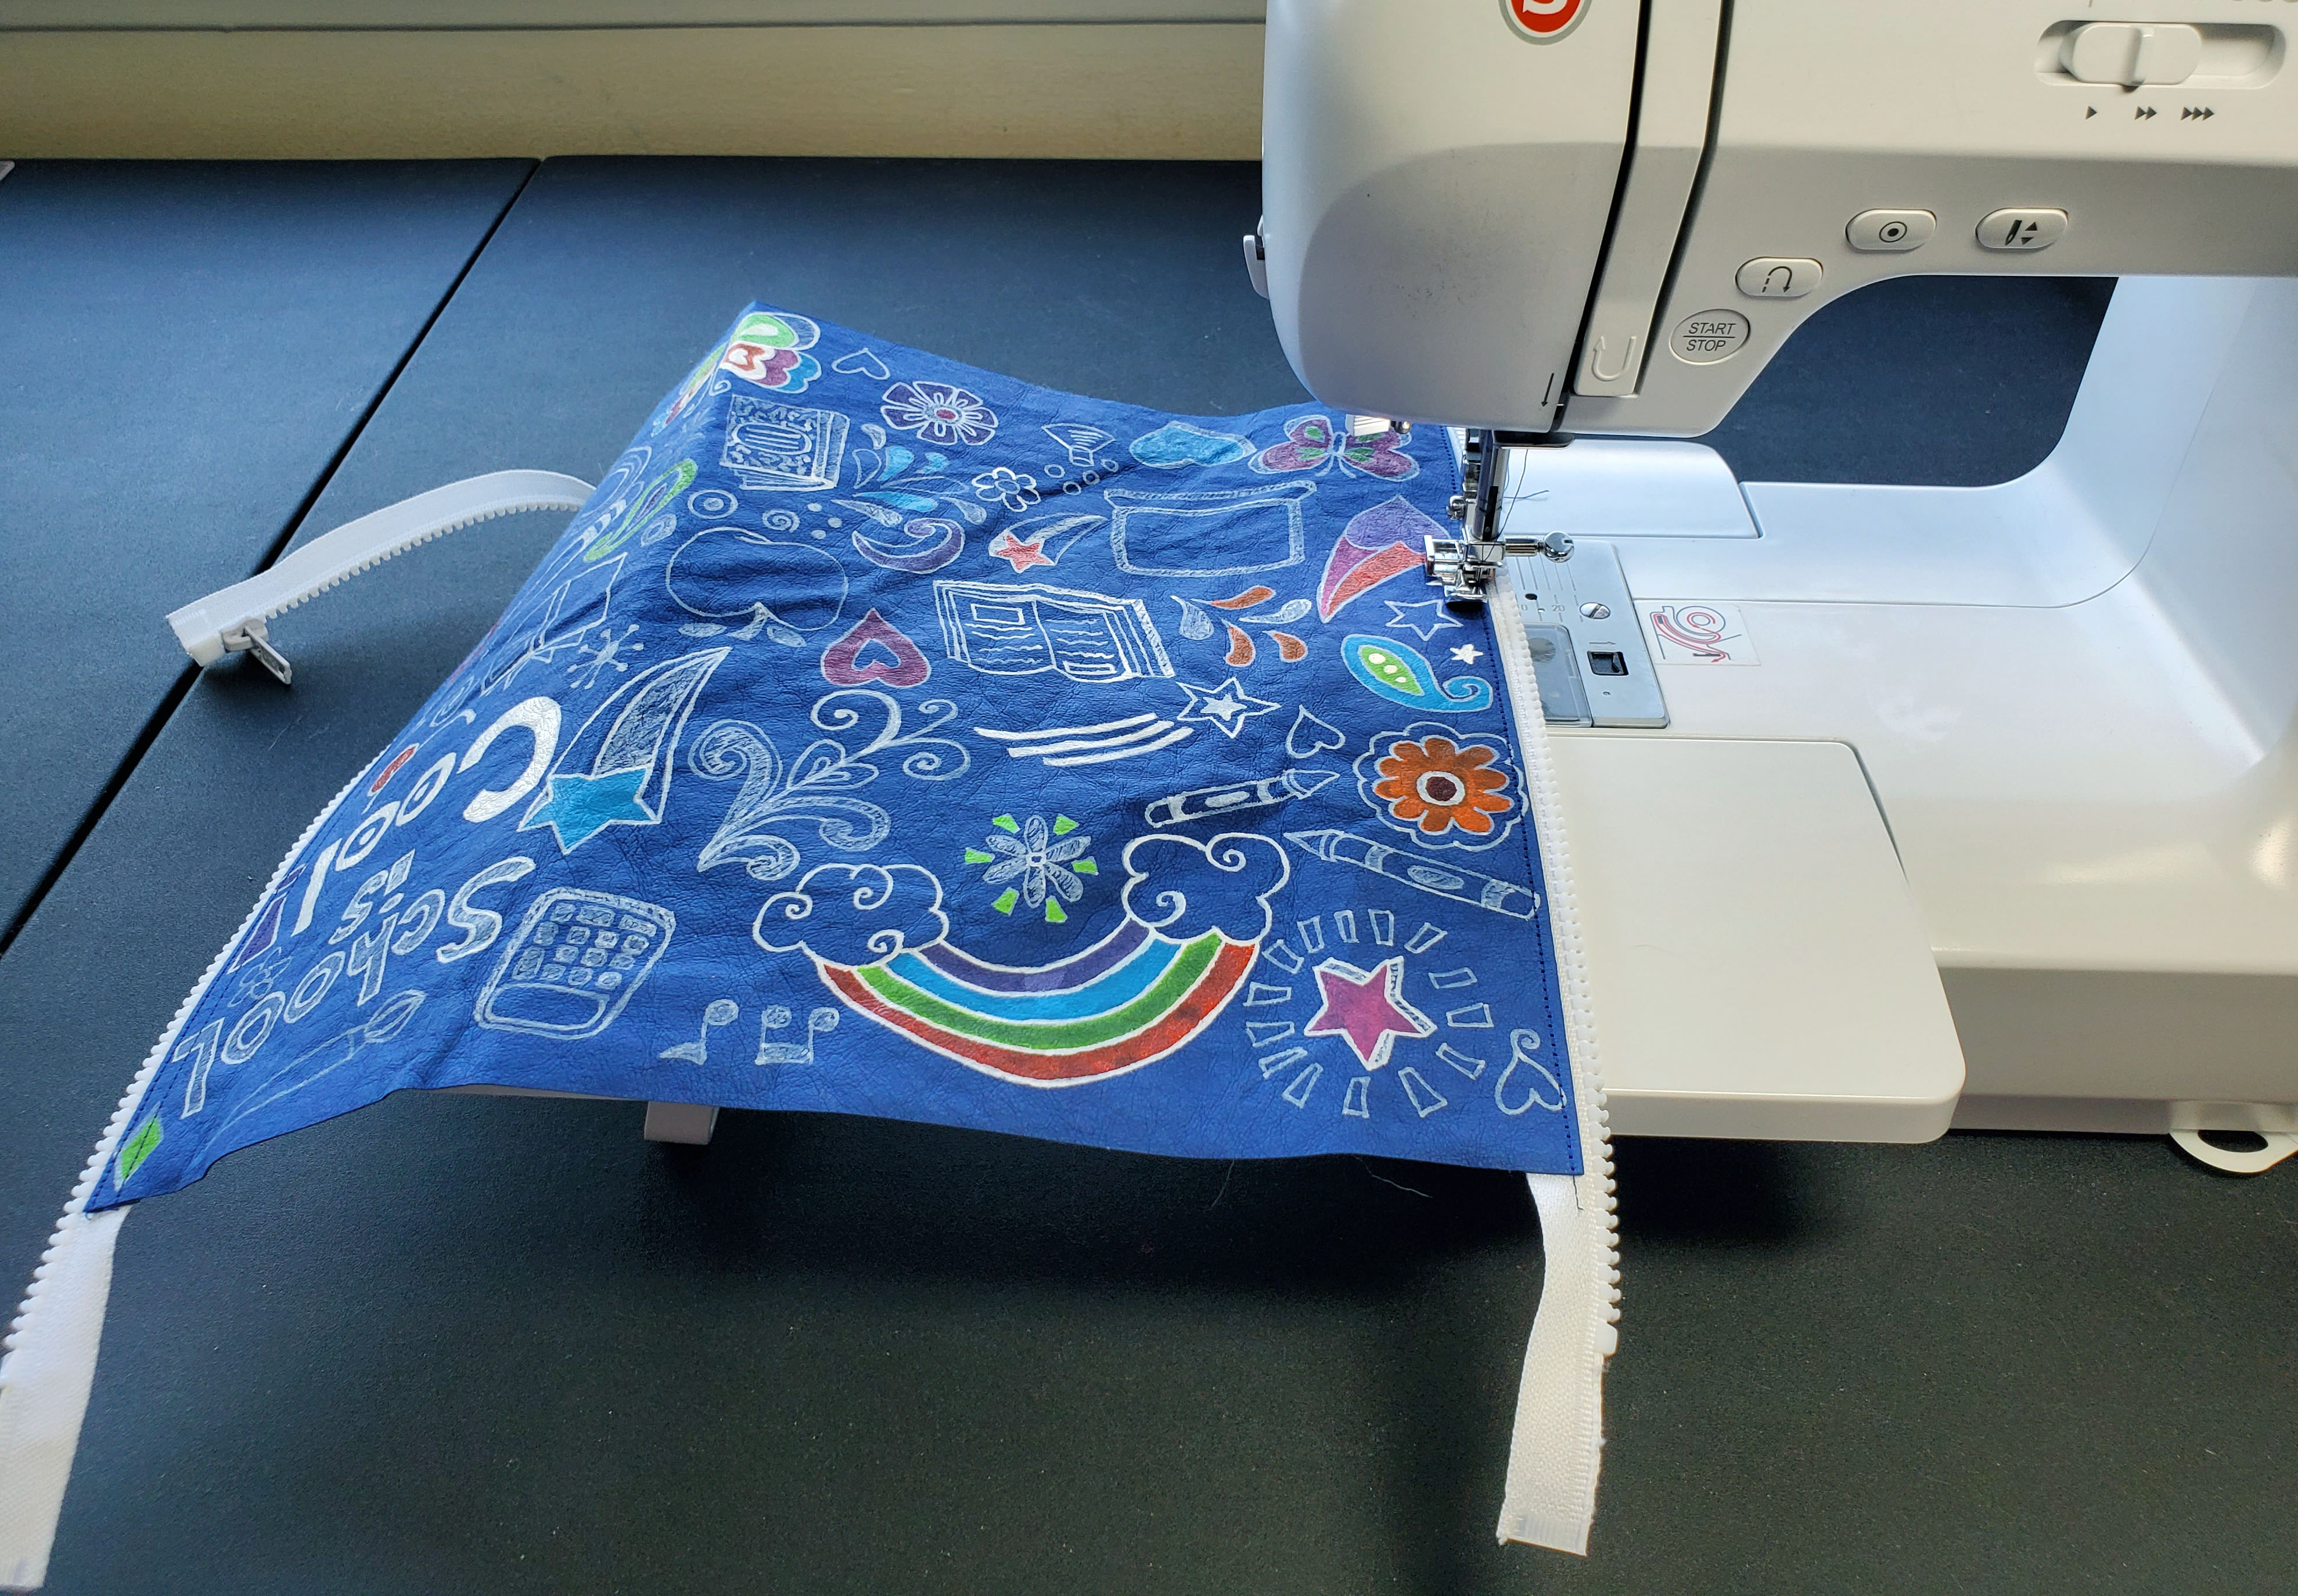
9. Sew down both sides with a ¼” seam allowance.
10. Trim the zipper so it is flush with the edge of the kraft-tex.
11. Unzip the zipper fully and turn your binder pouch right side out. Kraft-tex is a very tough material which makes this step a little more difficult. I grabbed a handful of random sewing room tools to stage a multi-pronged attack at getting those corners turned, but eventually I triumphed! Just remember: the pointier the tool you use, the more careful you need to be to not poke a hole through your kraft-tex! Also, can anyone tell me what the orange handled tool is supposed to be used for? Leave in the comments below. Thanks!
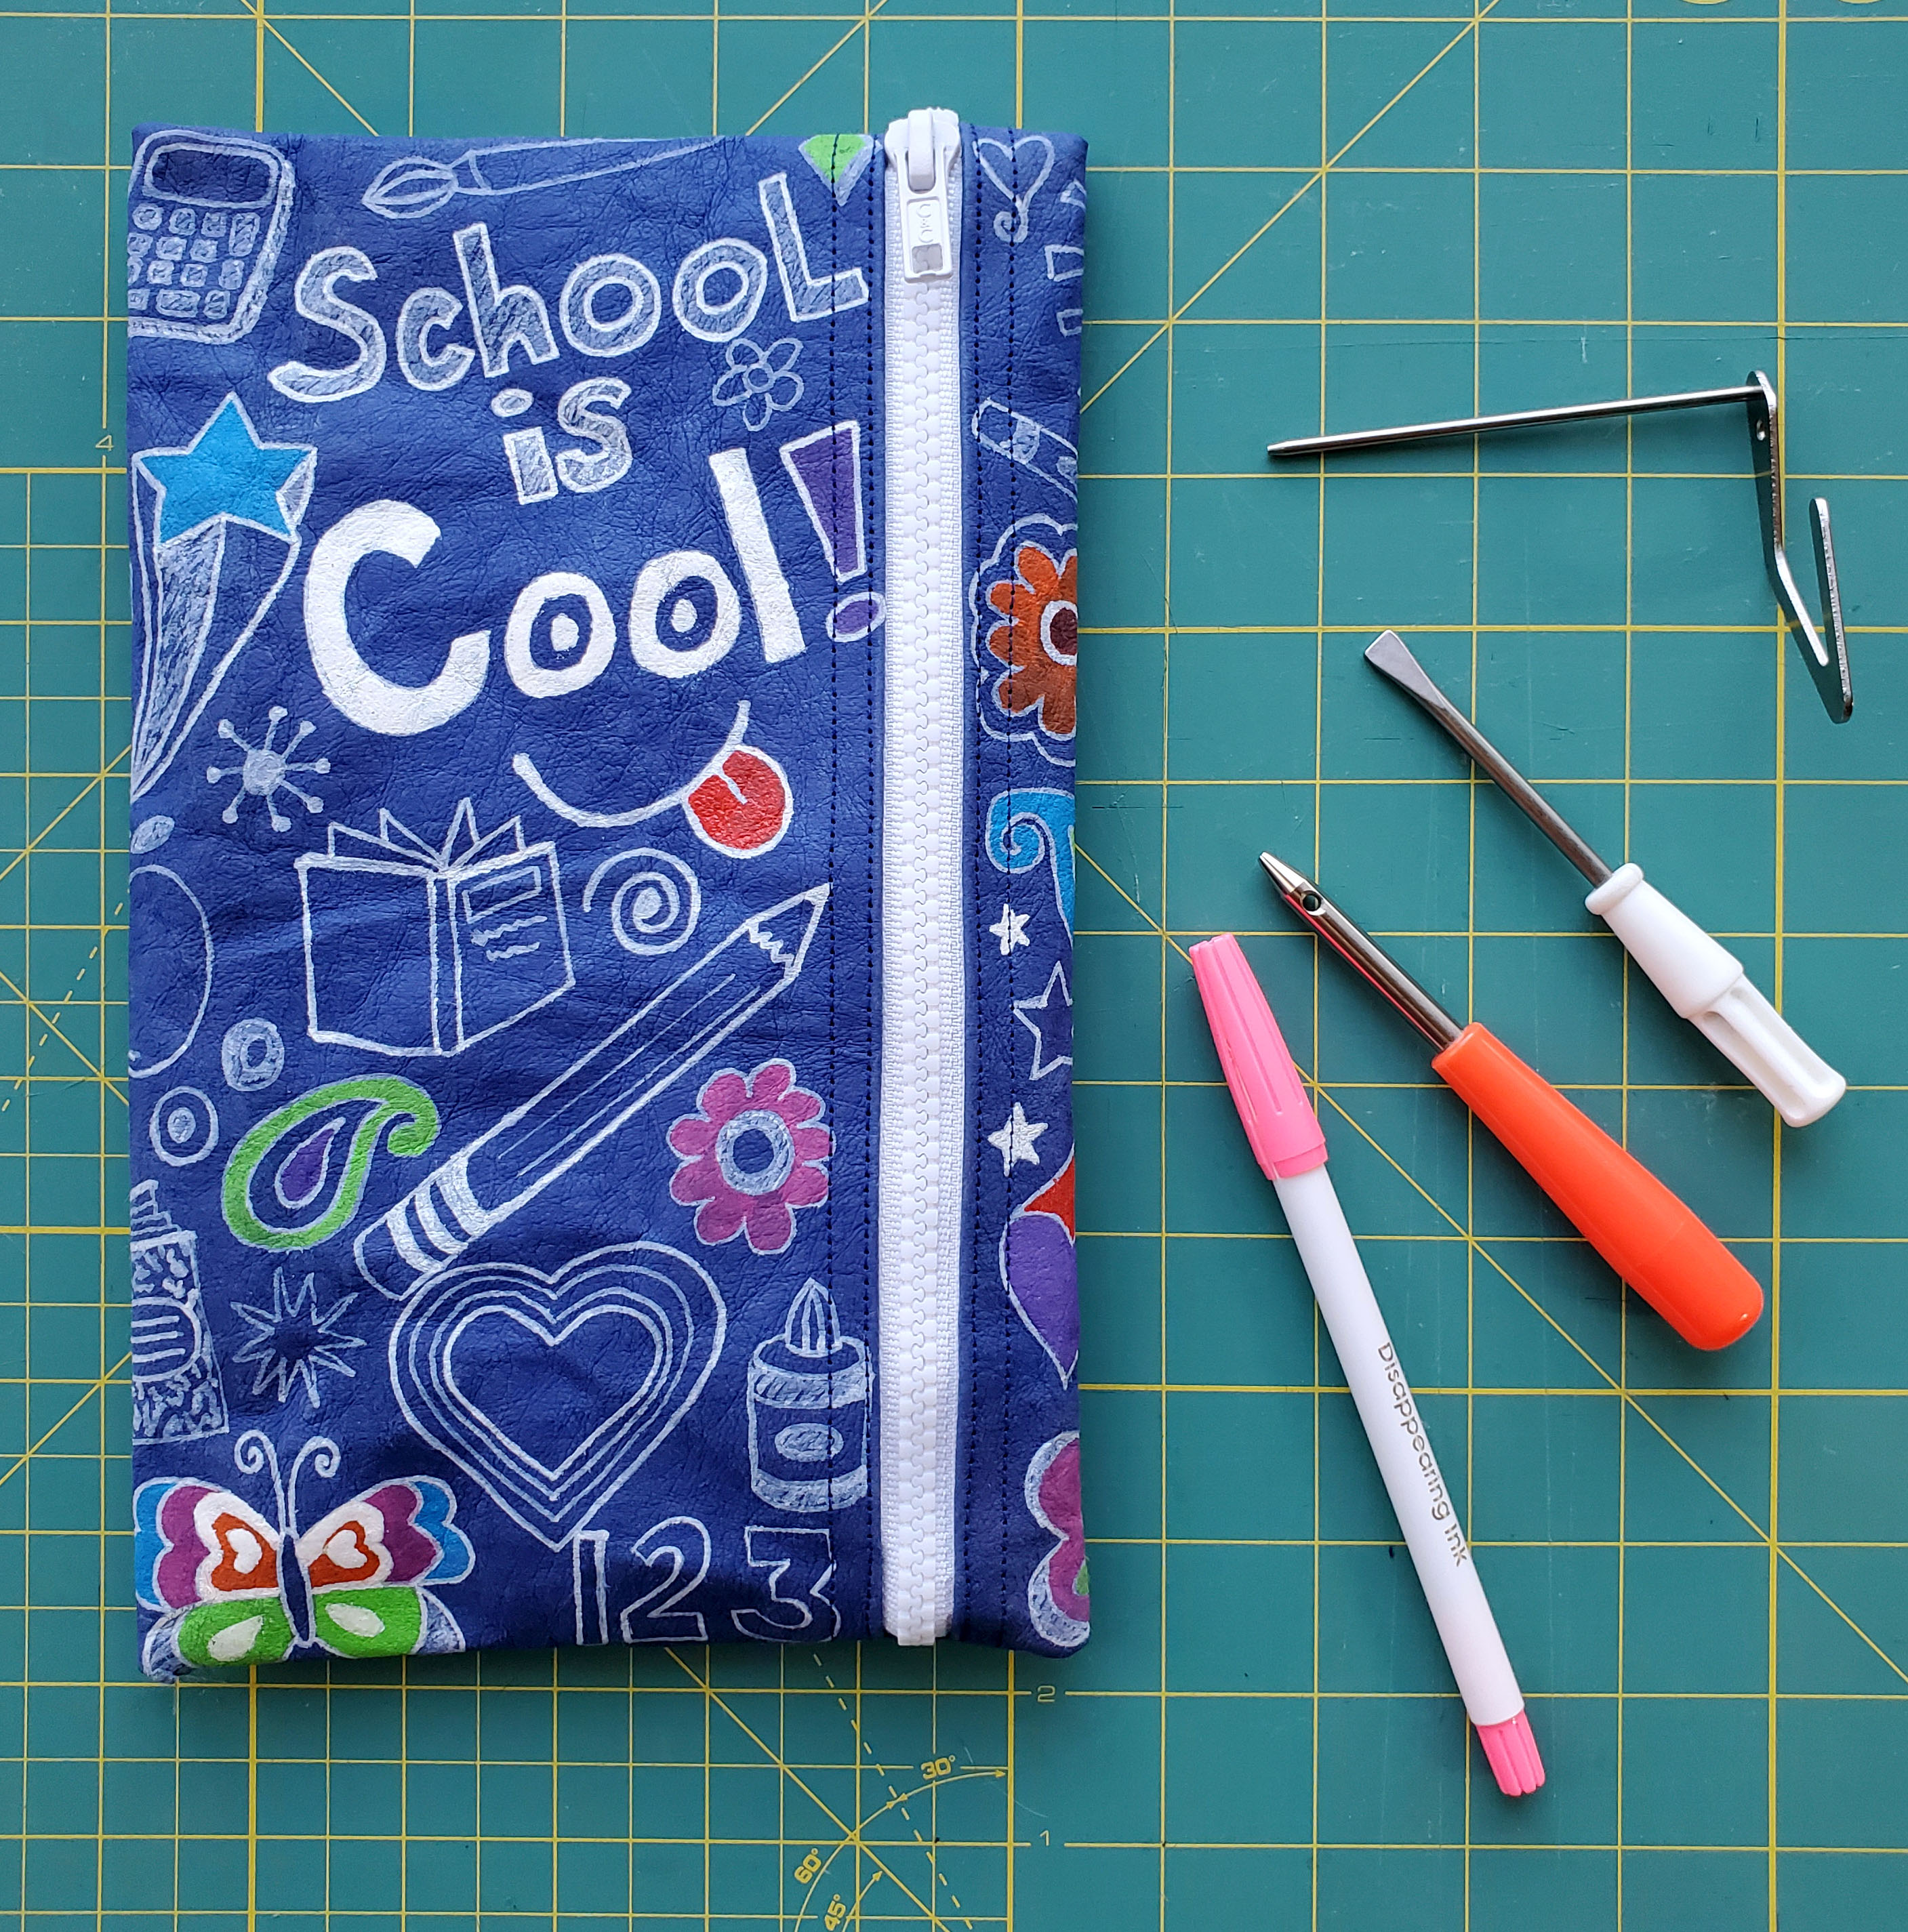
NOTE: You could totally stop here and have an awesome kraft-tex zipper pouch, but keep going to turn it into a binder pouch!
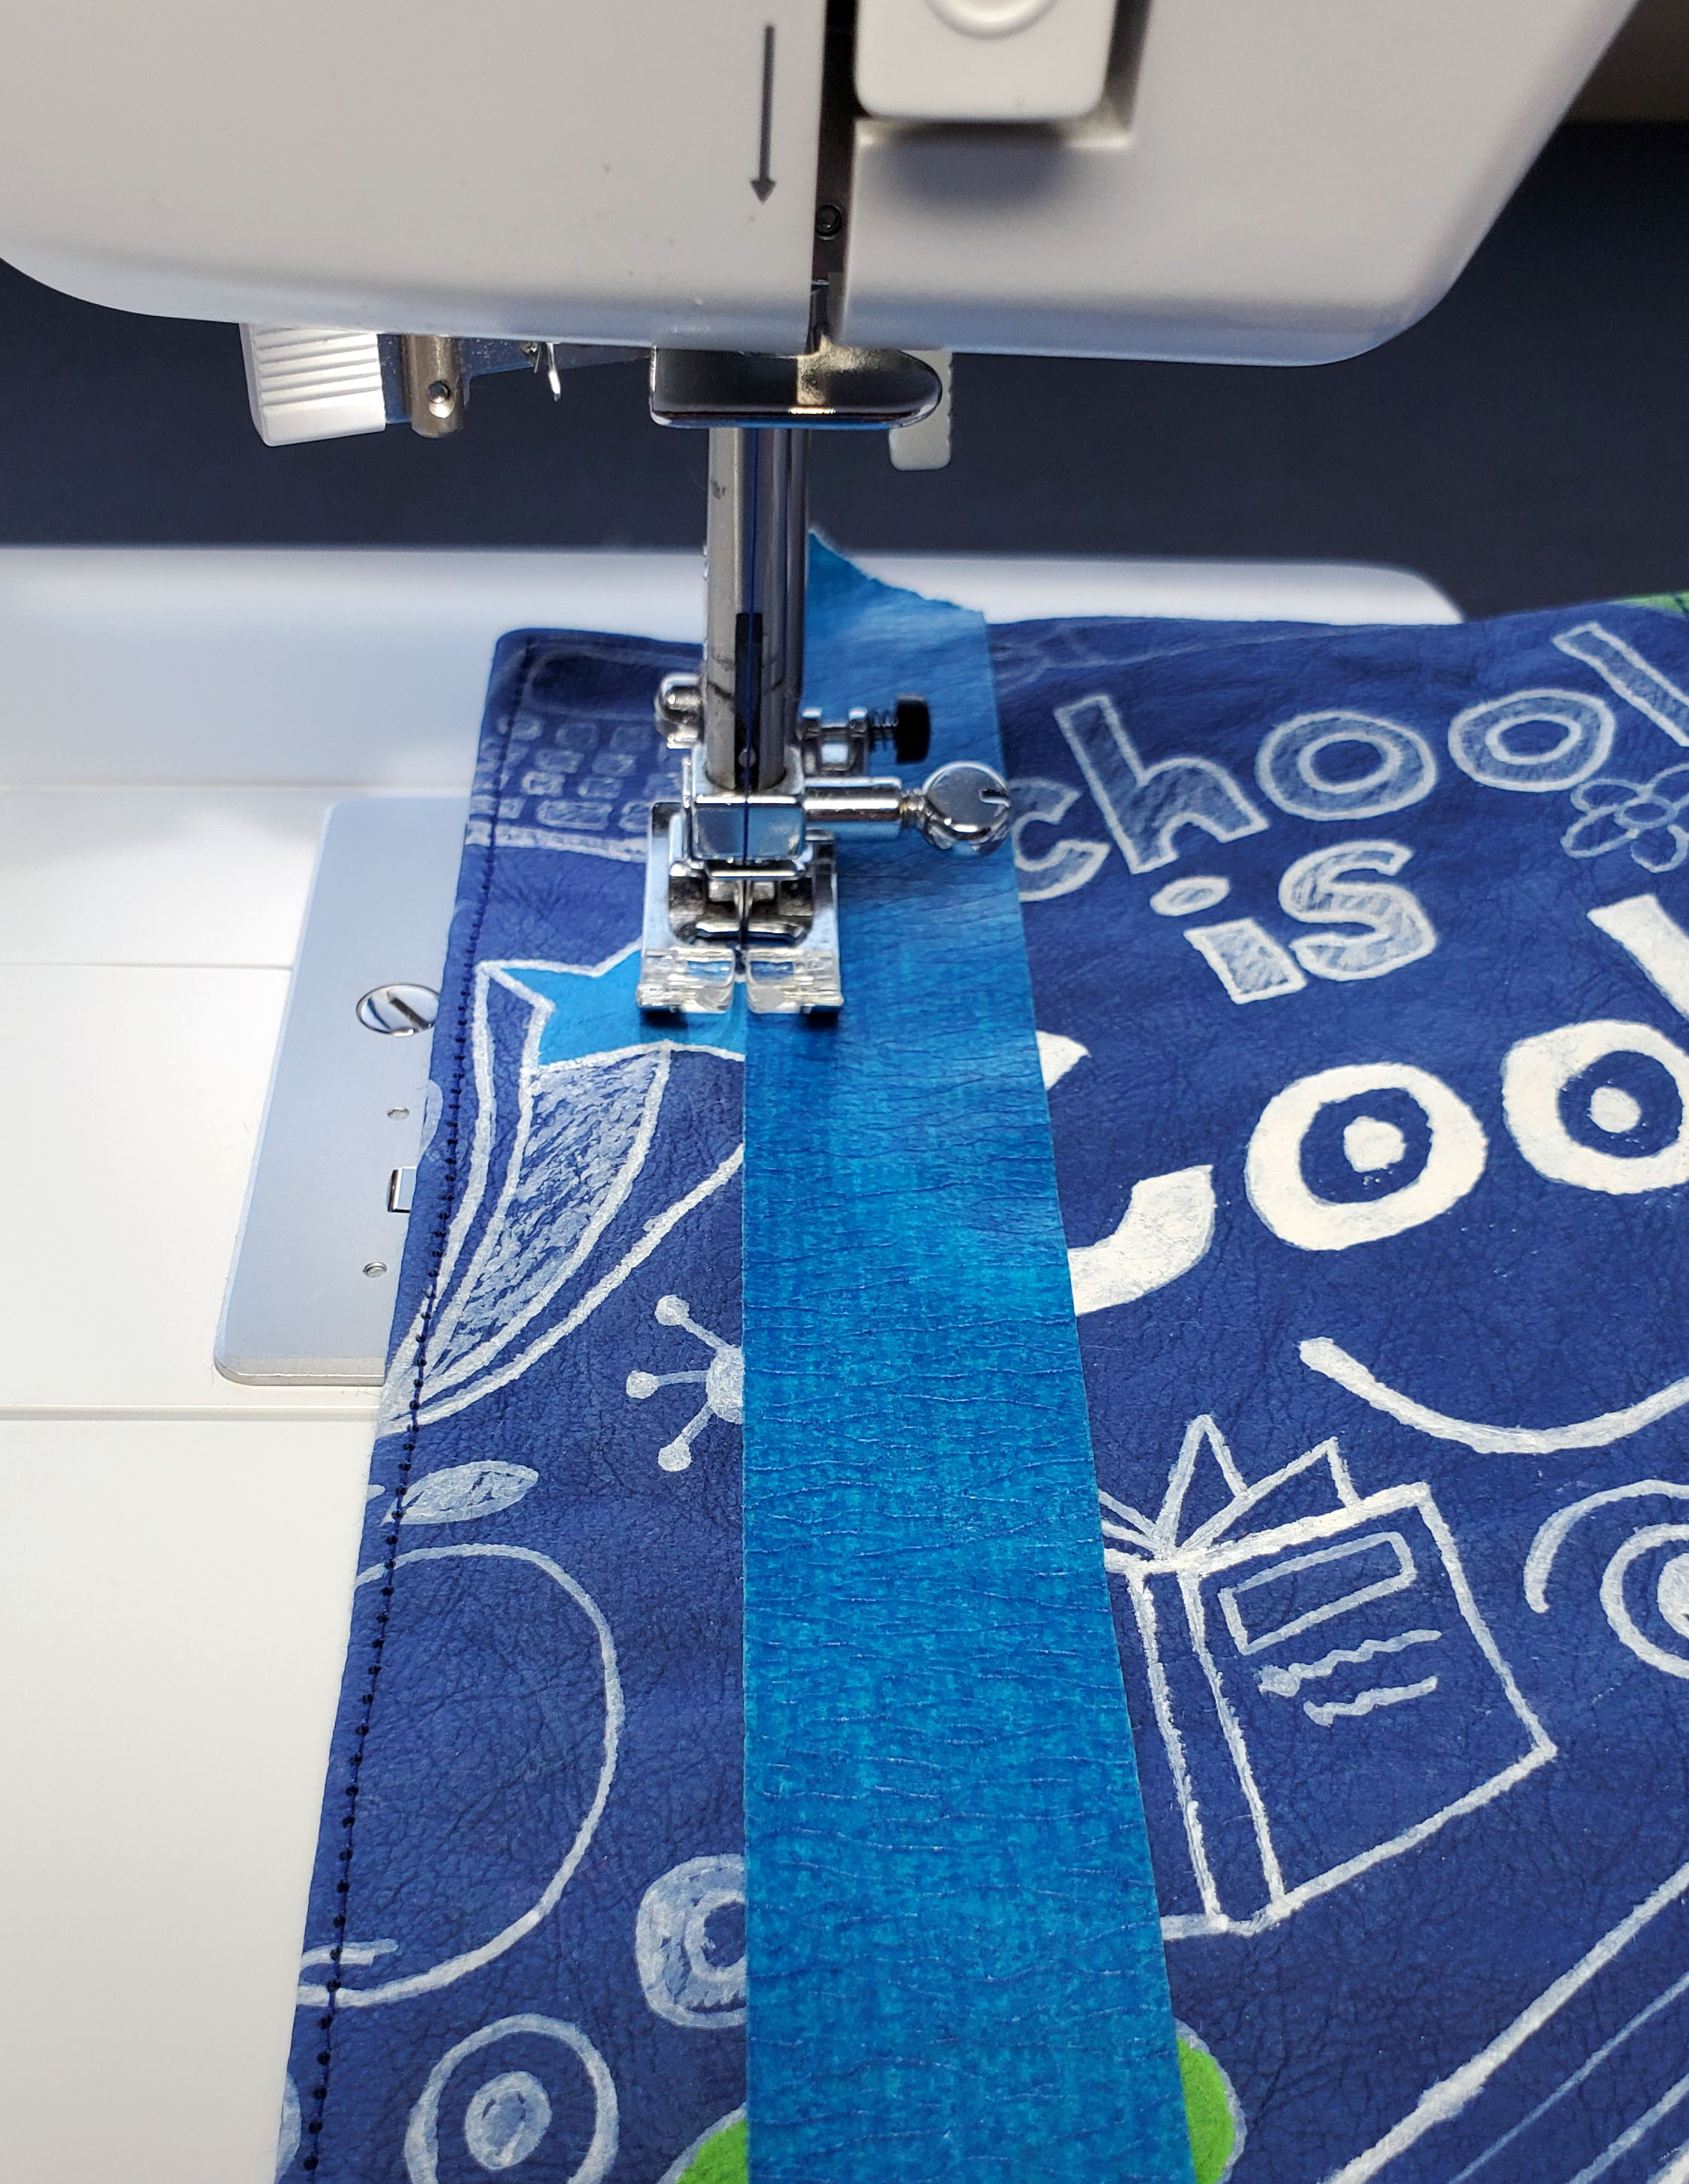
12. Measure 1” from the side opposite the zipper and place some easily removable type tape as a guide.

13. Topstitch a long skinny rectangle shape by following the tape guide and then stitching very close to the edge of the pouch for the other 3 sides.
14. Remove the tape. Measure and mark the placement of the holes needed to fit the binder you will use with the pouch. For a standard 3-ring binder, I marked a dot at the middle (at the 5” mark) and the other 2 dots should be 4.25” from the center (at .75” and 9.25”). If you have a different sized binder or different number of rings, you can mark the right spots on the pouch by putting the edge of your pouch in the rings and clamping them down on the pouch. Place a dot on the spots where the rings left indents in the kraft-tex.
15. Punch the holes at the spots that you marked.
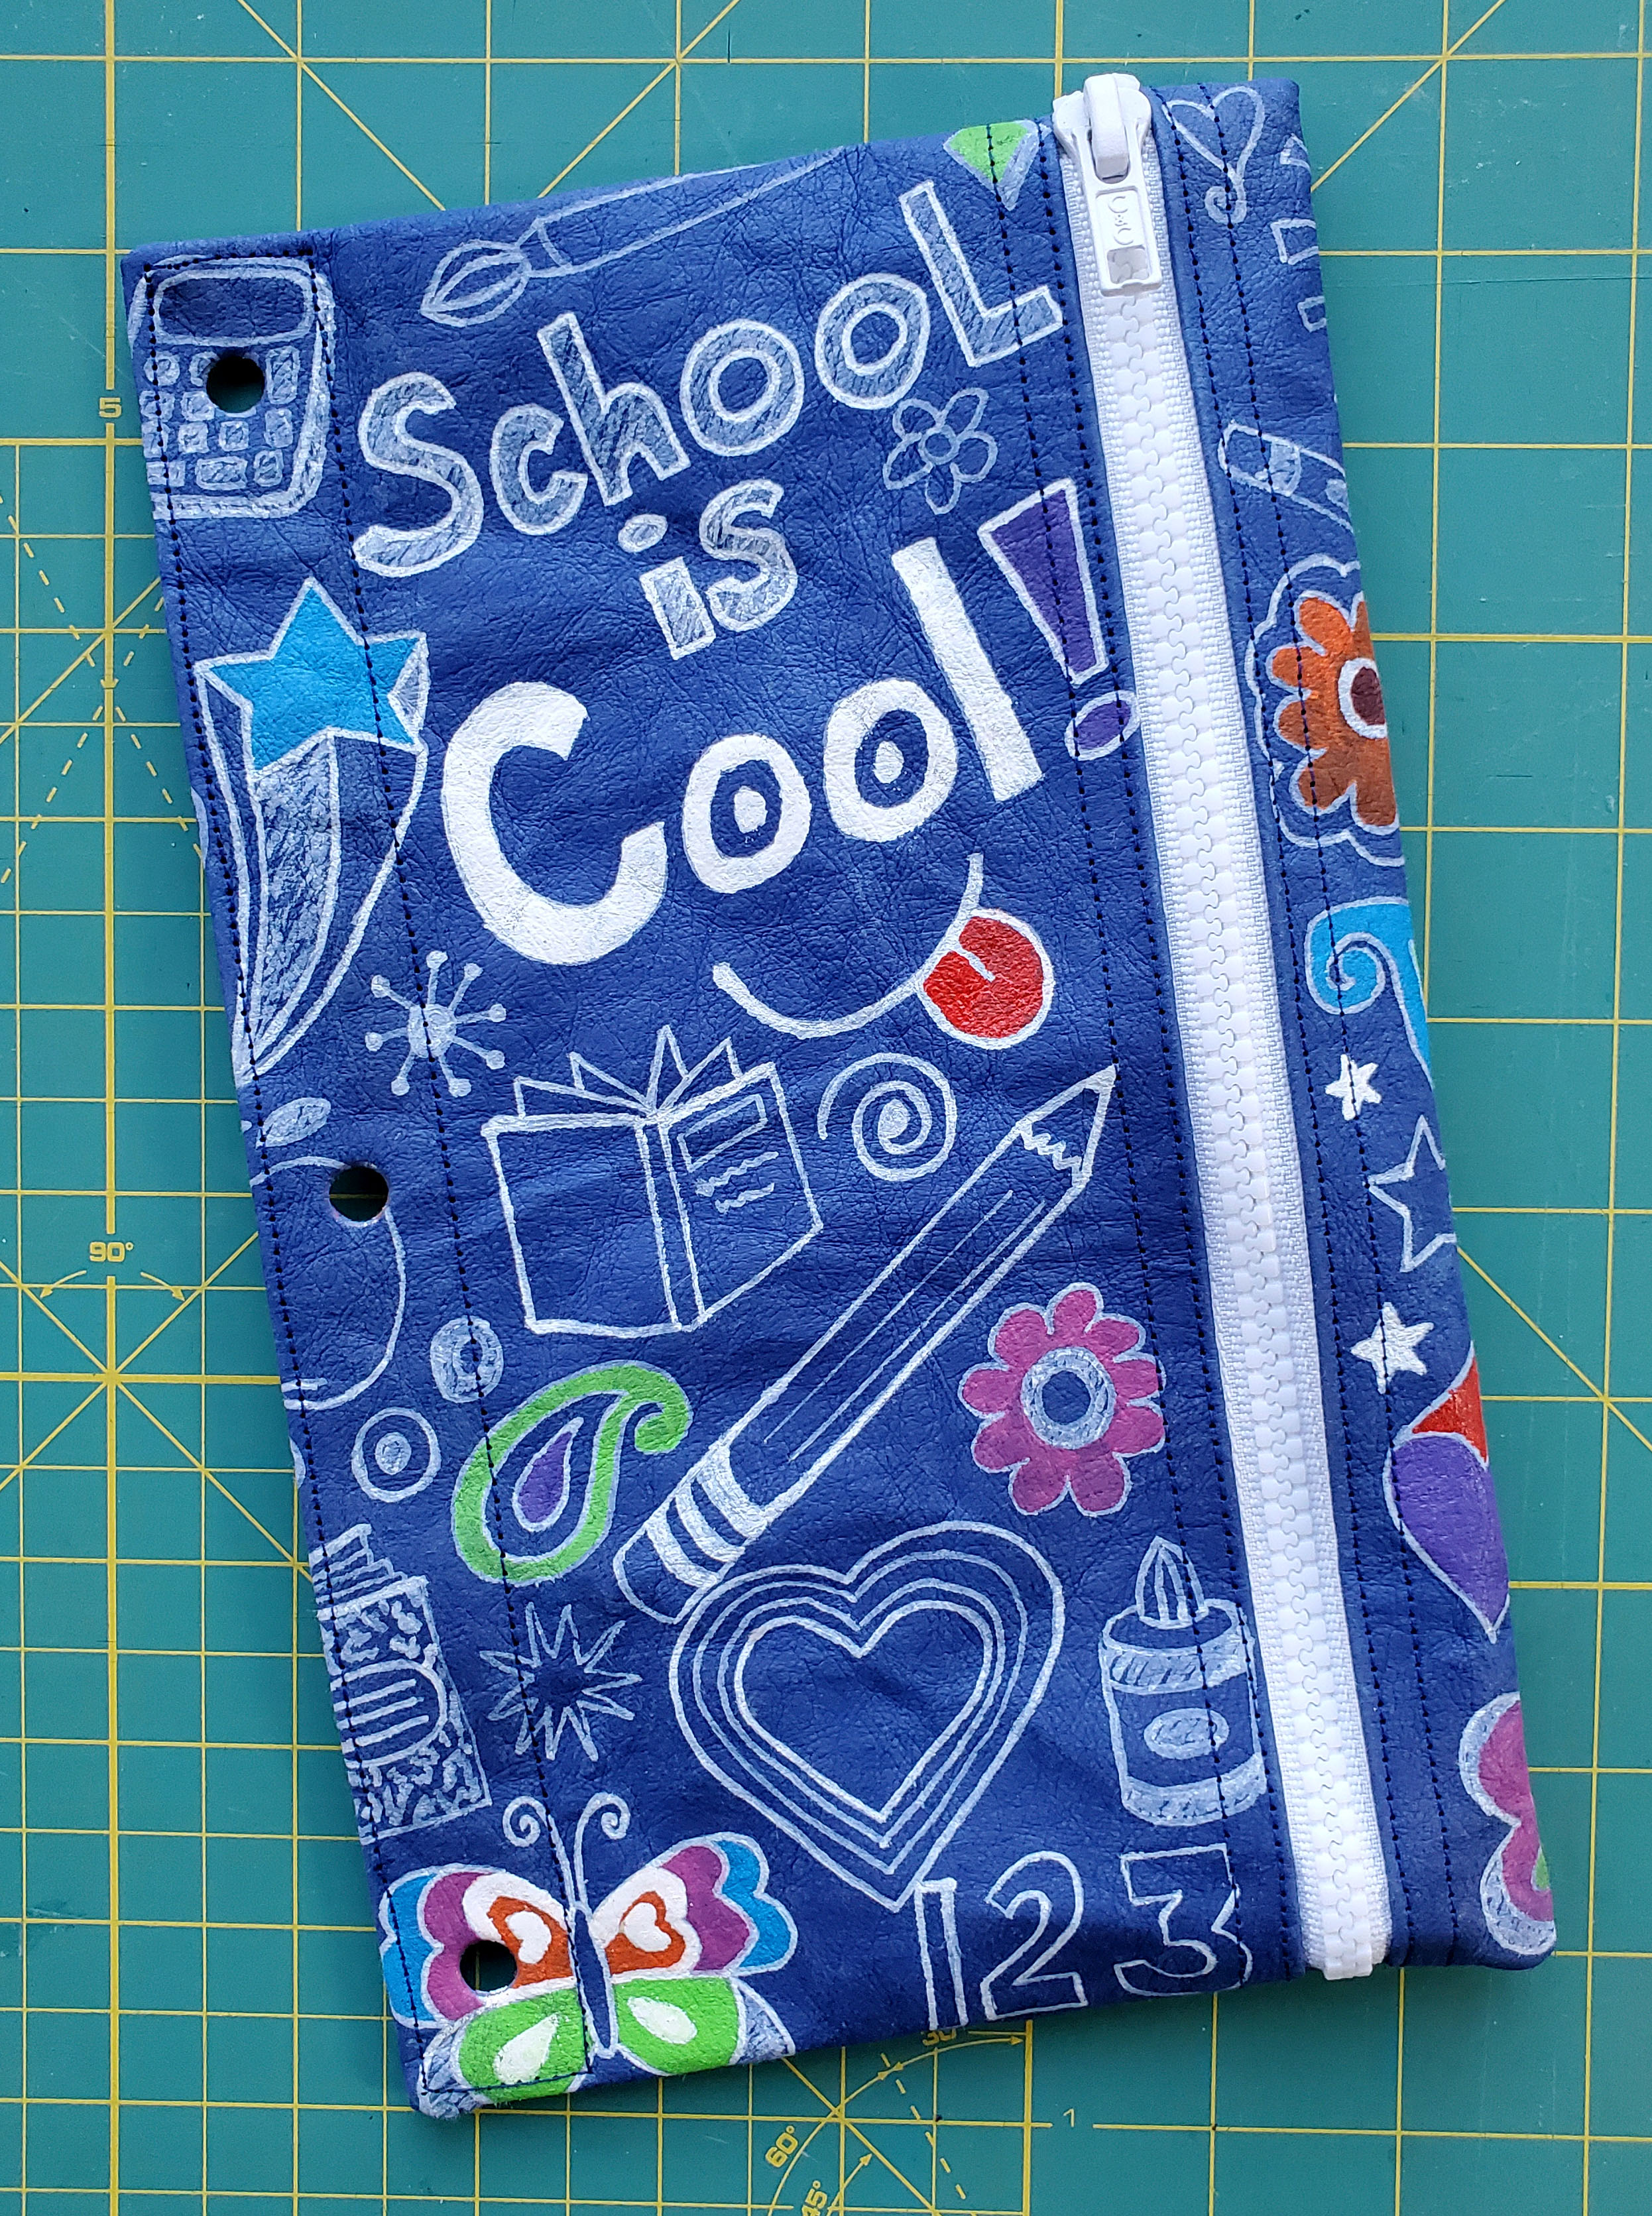
16. OPTIONAL: Add Grommets. Your binder pouch will definitely hold up as is, but if you want to give it a polished look, you can add grommets to the hole punches. Since kraft-tex is so tough and inelastic, cut the tiniest slit from the hole punched just enough so that you can slide the grommet half through the hole.
 17. Put the grommets in with a grommet plier and you’re ALL DONE!

Great job! I hope you love your kraft-tex binder pouch and make one for all the students in your life! I would love to see your handiwork so please don’t forget to tag us on Instagram, @ctpublishing, and use the hashtags, #krafttexbinderpouch, #krafttex, and #ctpublishing. Now, get back to class!

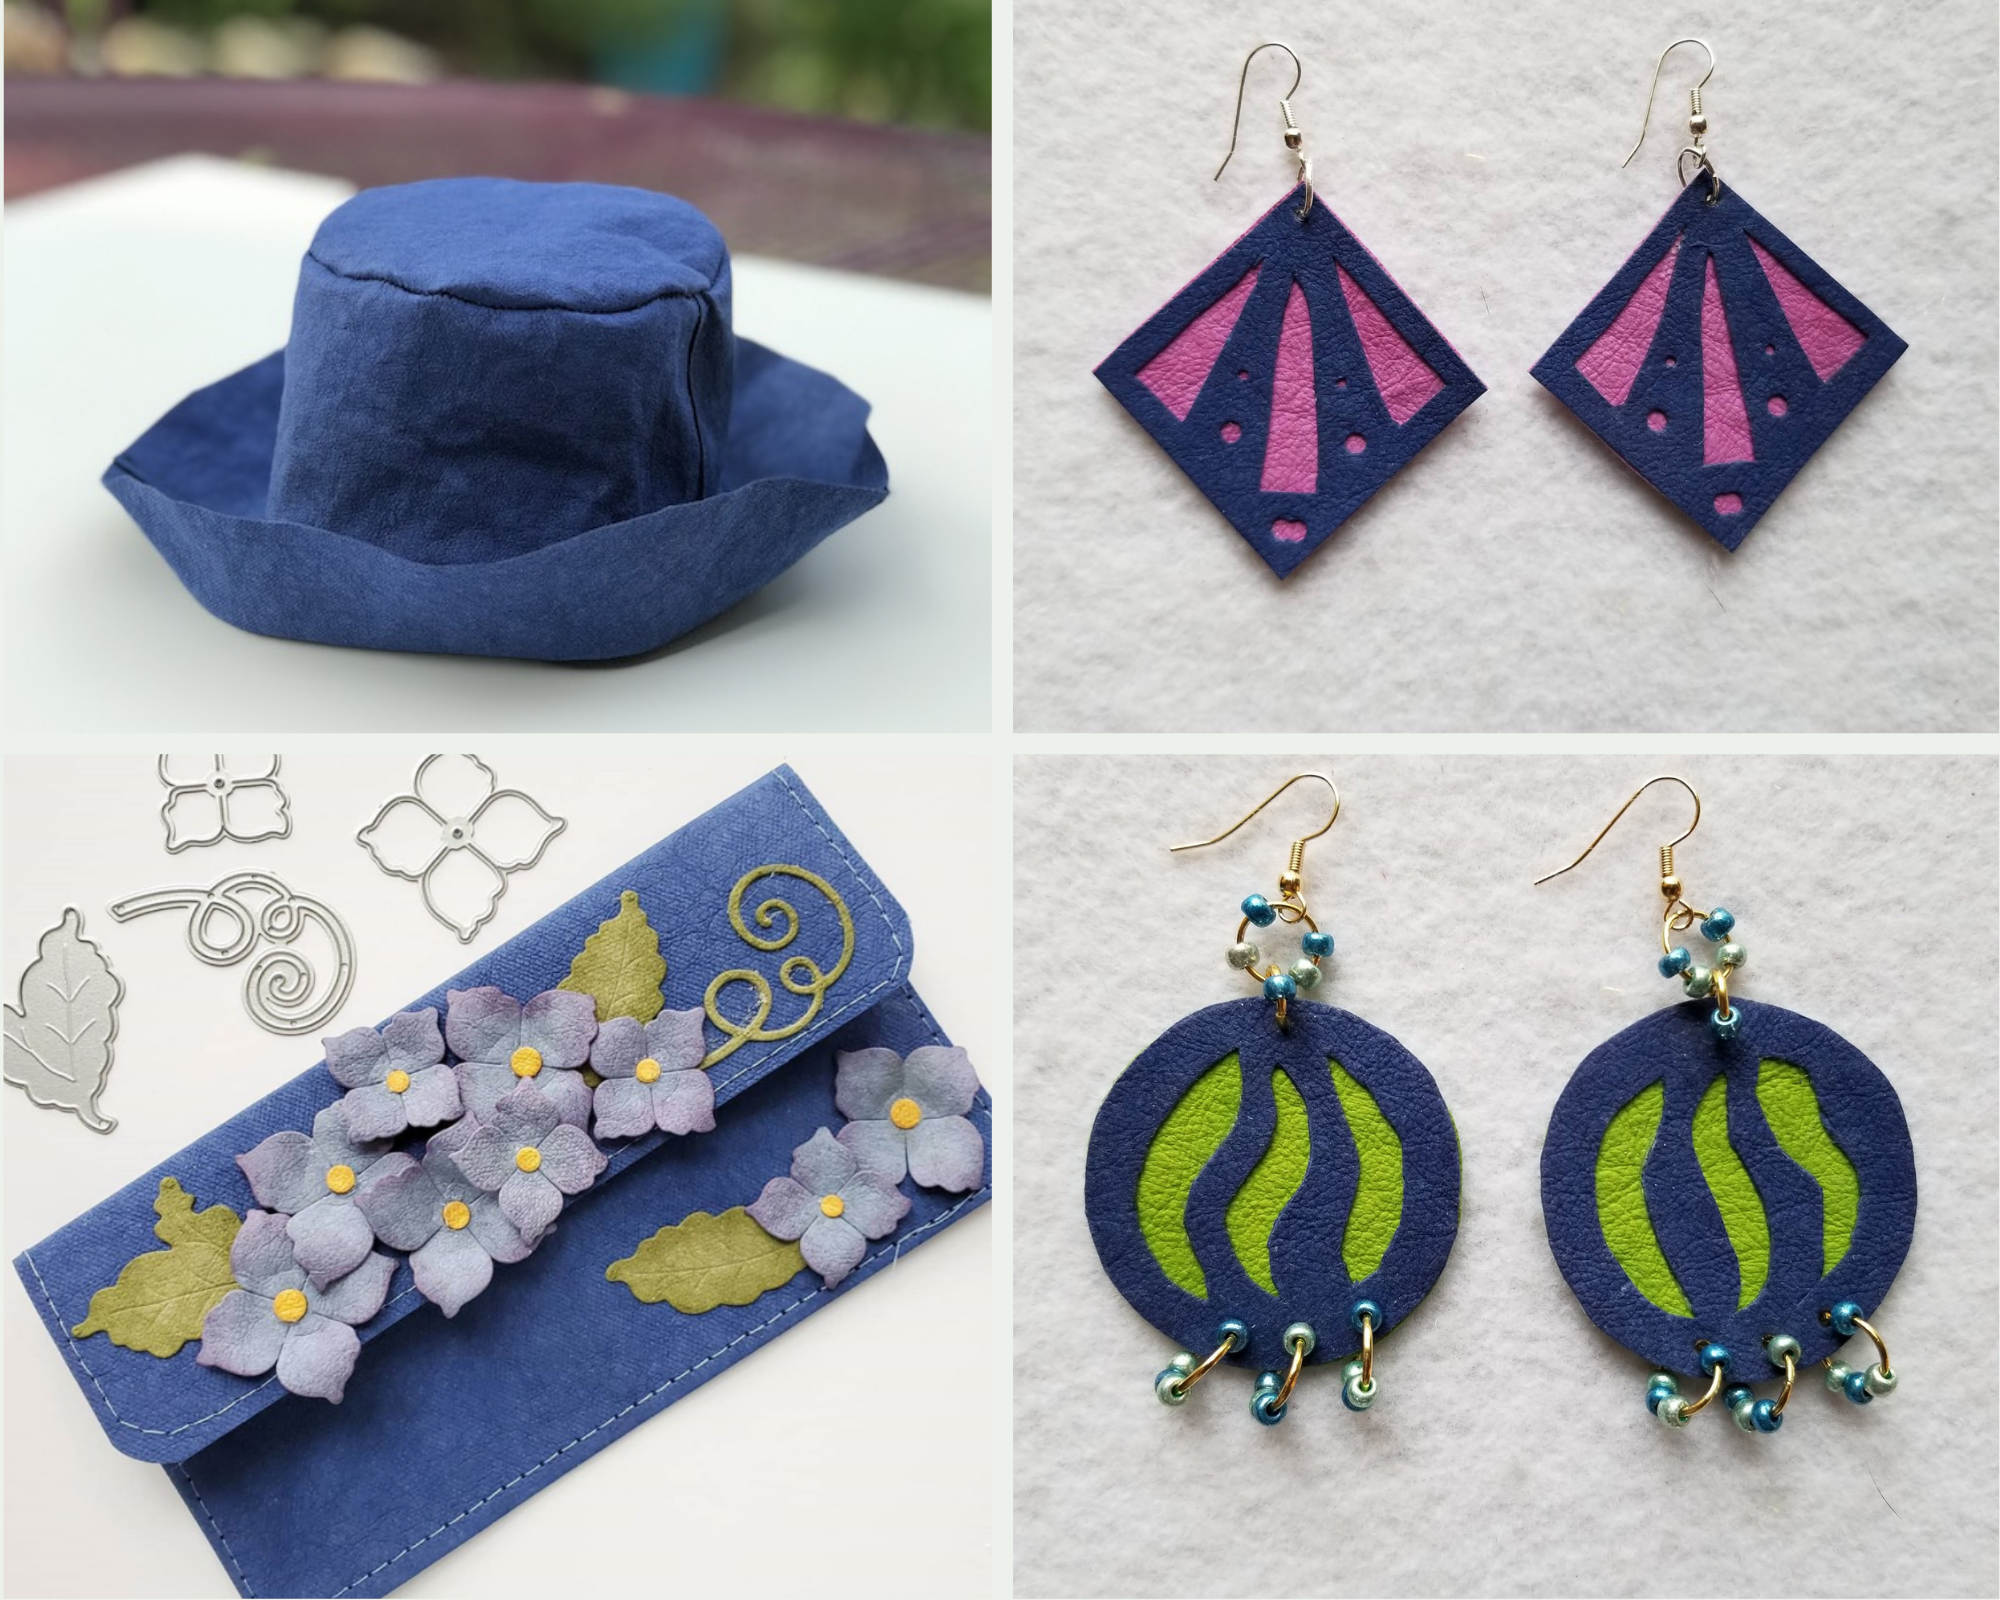
kraft-tex Ambassadors
Our talented kraft-tex Ambassadors made beautiful creations with Sapphire kraft-tex from bucket hats, journals, air pod cases, and more.
Visit and support our kraft-tex Ambassadors by clicking on the links below to view their patterns, photos, and more!
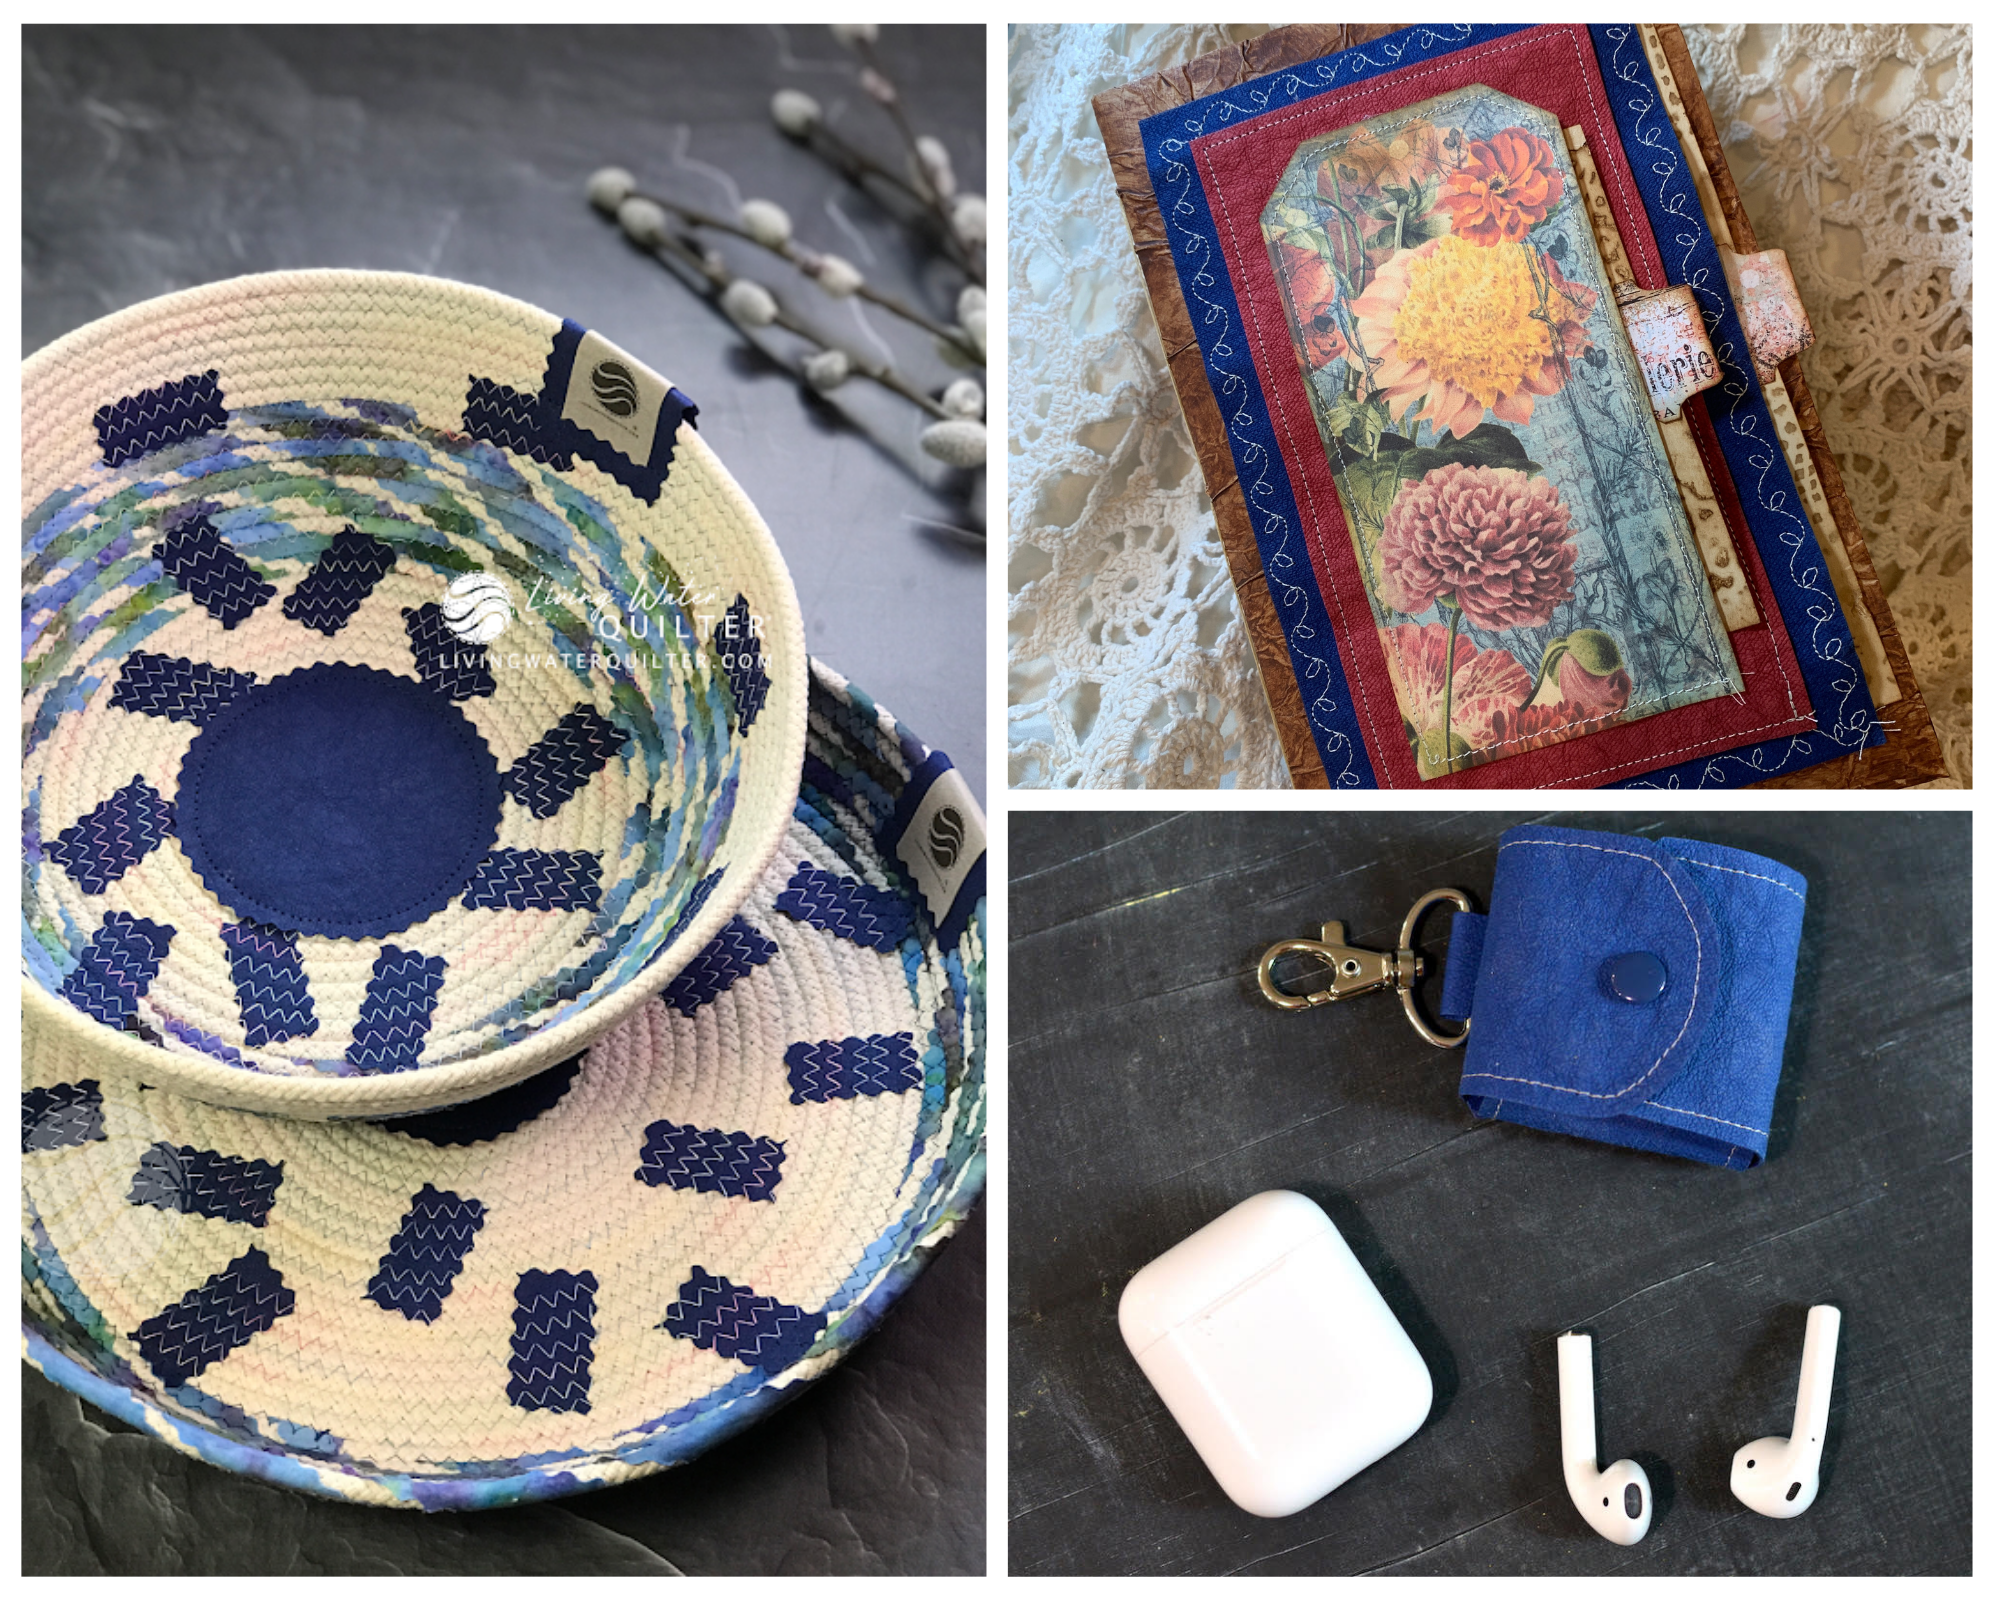
1. Handmade for the Holidays by Living Water Quilter
2. Sapphire kraft-tex Journal Cover by Gayle Agostinelli
3. DIY AirPods Case with kraft-tex by Lindsay Sews
4. How to Make a Bucket Hat with kraft-tex by Lynn Woll from Create Whimsy
5. Snap Pouch for Cash, Coupons, & Receipts by Lolly Palooza
6. Pop Art Earrings by Sew Little Time
7. How to Make an EPP Travel Case by Chardel Blaine from Create Whimsy
8. Sew a kraft-tex Storage Caddy by HaberdasheryFun
9. kraftex Composition Notebook Holder
-


