

Doll Days! Blog Tour Kickoff
Posted by Erin Hentzel on Jun 13th 2016
Hi there and welcome! I’m thrilled to be here to share my new book Doll Days! Sew an Everyday Wardrobe for 18" Dolls with you and share a quick tutorial to kick off the Doll Days! blog tour.
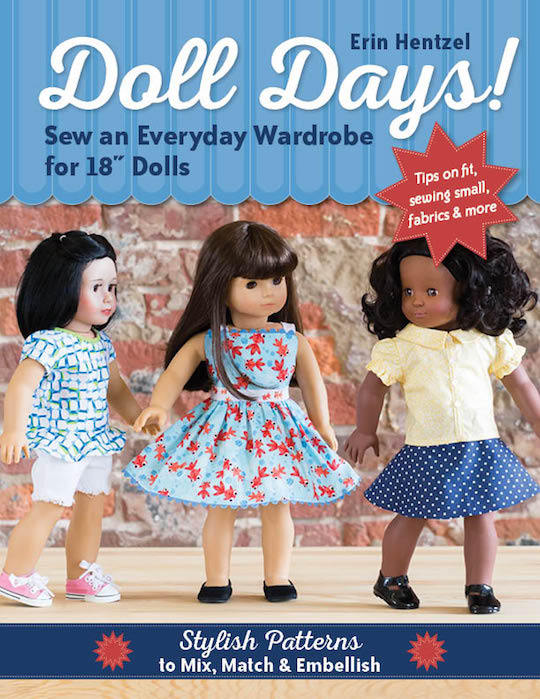
Doll Days! is a fabulous doll clothes pattern book, inspired by vintage styles and designed with modern flair for 18" dolls, such as the American Girl Doll. The patterns are appropriate for confident beginners and up and include many tips and tutorials that help sewists to move beyond the basics. The designs are extremely versatile, and it’s easy to embellish, as well as mix and match, for unlimited possibilities. If you’re anything like me, you sometimes get bored sewing the same exact design more than a few times. It’s easy to create little variations with the patterns in Doll Days! It seems the more I embellish and vary the designs, the more ideas pop into my head.
Join in and sew along during the blog tour as I share several tutorials and bonus patterns for how to do even more with your Doll Days’ patterns. I’m sure it will get your creative juices flowing, too!
Today, I’m sharing two things with you: my method for tracing pattern pieces and a tutorial for embellishing the Modern-Vintage Sundress.
Since the patterns are printed on both sides of the pullout page, you’ll need to trace or copy the patterns. Your local copy shop can easily do this for you and usually charges less than a dollar for two pages.
However, I recommend tracing the patterns. I never cut up my patterns. Ever. I keep them in pristine condition by tracing them and using the tracings to cut out my fabric. I also never use white paper patterns. Not only is it bad for your fabric scissors to cut into the paper, but it’s also harder to pin paper to fabric and the patterns never stay really flat with the fabric when pinned together.
You can be much more accurate when cutting out your fabric pieces if you use patterns traced onto a pattern tracing material, such as Swedish Tracing Paper. This is what I do for all my patterns, especially PDF patterns, and even for tissue patterns that I purchase. It’s easy and they last a very, very long time.
Supplies
Swedish Tracing Paper or Pellon 830 Easy Pattern
Pencil
Wonder Clips, binder clips, or paper clips
Acrylic ruler and/or French curve (optional)
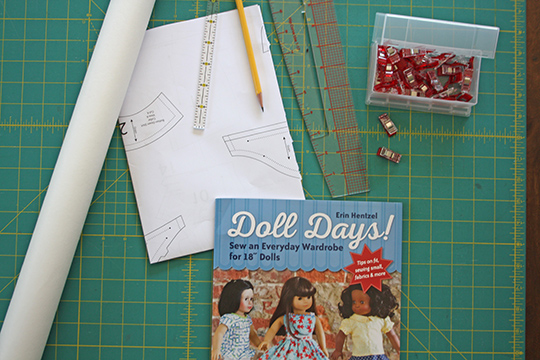
The Swedish Tracing Paper is by far my favorite tracing material. It costs about a $1.25 per yard and it’s transparent, which makes it ideal for fussy cutting. It also arrives in a roll, so it doesn’t get folds or wrinkles in it. If it does get wrinkly, you can simply iron it.
Tracing Patterns with Tracing Material
Place your pattern sheet on a work table.
Cover the pattern page with the tracing material. Keeping the edges even, you can place clips, such as Wonder Clips, binder clips, or paper clips along the edges to keep it from slipping or shifting as you trace the patterns.
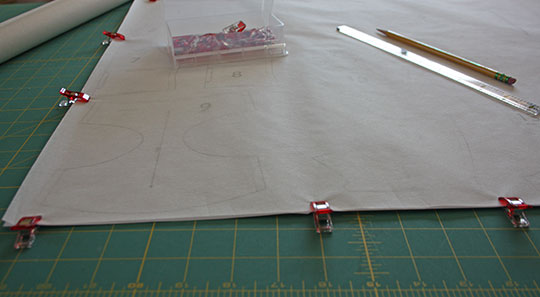
Note: You could also use pattern weights (or tuna cans) or even pin the two layers together along the edges. Be careful to avoid pinning on the cutting line of any of the pattern pieces though—this may cause the paper to rip over time.
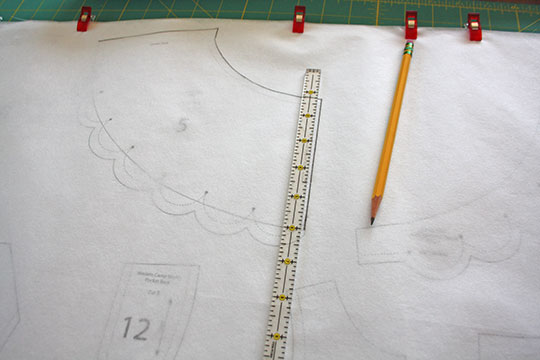
Using a pencil and ruler, trace each pattern you need (or trace all of them and make a complete set). Be sure to copy all the markings, labels, cutting instructions, and project name onto the tracing.
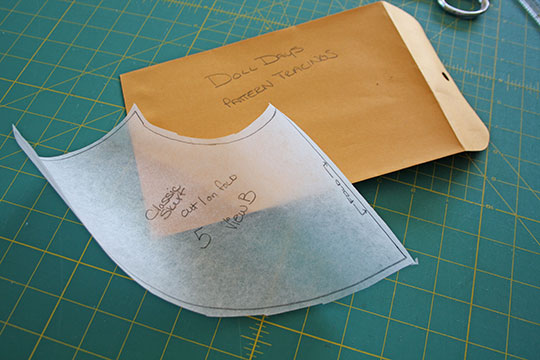
After I finish using my tracings, I keep them together in a manila envelope labeled Doll Days pattern tracings, which can easily be tucked into the back of my book.
One thing I love about using the tracings is that I don’t have to be overly cautious when working with them. I know that if I do accidentally cut off a corner or otherwise ruin it, then I can just make a new tracing.
Thanks for reading along with me as I explain how I use Swedish Tracing Paper to trace my patterns. Once I discovered it, I never looked back. All my paper patterns are in their original shape.
Now that you’ve traced the patterns, you’re ready to get sewing! Let’s make this dress together!
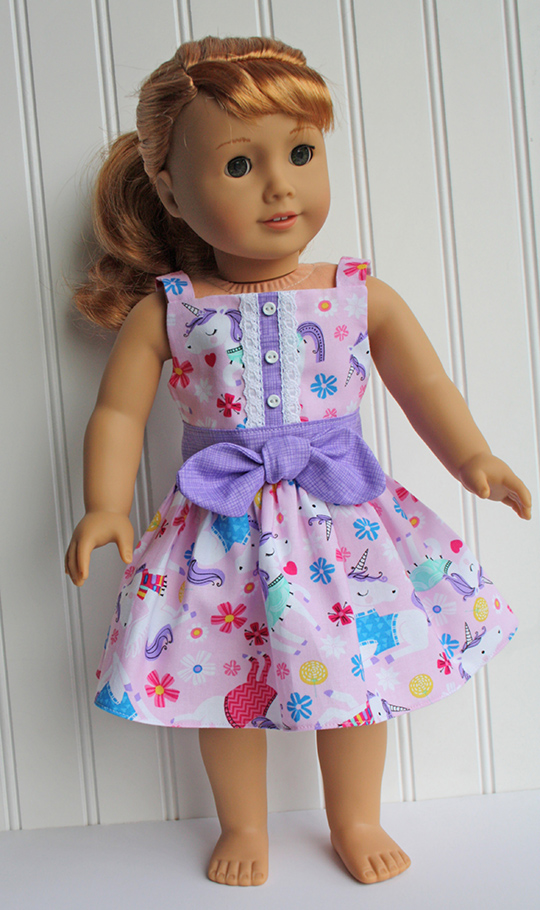
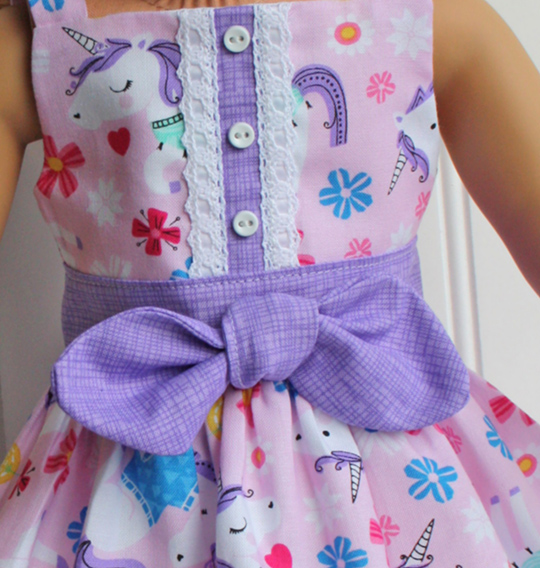
This dress is made using the Modern-Vintage Sundress pattern with some embellishments on the bodice and waistband. I've used Unicorns in Sweaters fabric from Timeless Treasures for the body of the dress. And, as a bonus, I’ve created a pattern for my knot bow that I love using to embellish all sorts of things. Download it here.
Supplies
- Pattern pieces and supplies for the Modern-Vintage Sundress, View B (except the rickrack)
- Download the free bonus pattern for the knot bow and print at actual size
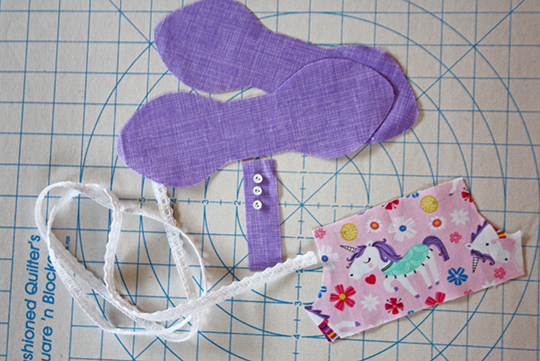
- Bow and inset: large scraps of the same fabric used for the waistband and straps
- 3 tiny buttons
- ¼ yard of crochet lace
Cutting Instructions
In addition to the pattern pieces given for view B, also cut:
Bow pieces (2)
Center inset: 1" x 3 ¼"
Sewing Instructions
Before sewing any pieces together, embellish the bodice front.
1. Center the small strip of fabric along the front of the bodice and baste it in place.
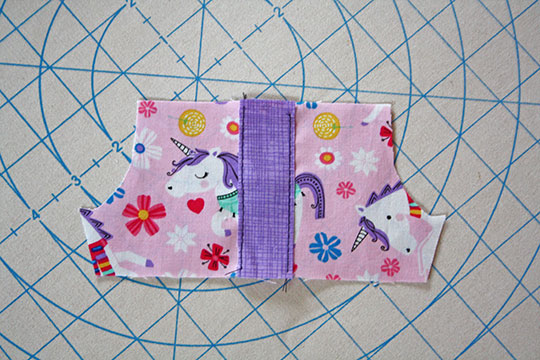
2. Cut and sew the crochet lace to each side of the fabric, completely covering the raw edges of the inset.
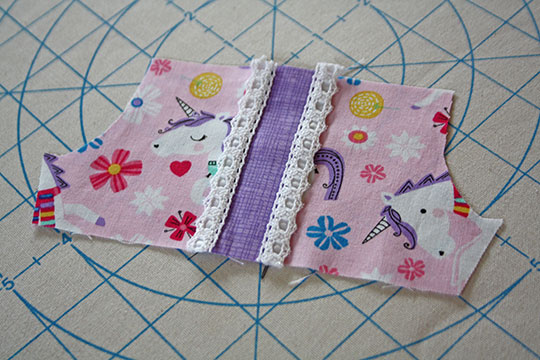
3. Continue to sew the sundress as instructed for View B on pages 23–24 of Doll Days!, omitting the rickrack trim on the bodice.
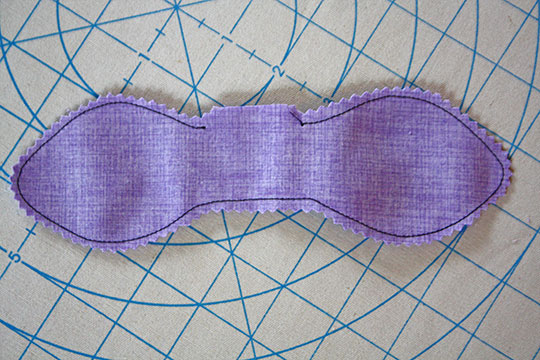
Make the Knot Bow
1. Pin and sew the bow pieces with right sides together and a 3/8" seam allowance, leaving an opening along a straight edge. Clip the curves.
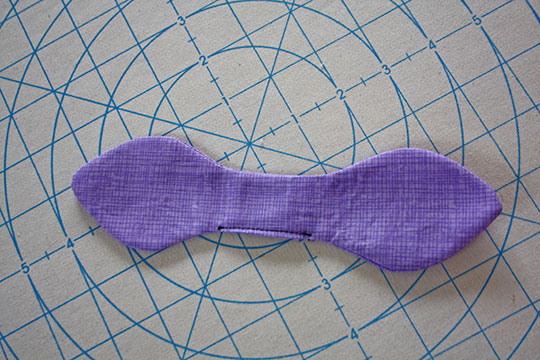
2. Turn the bow right side out through the opening. Press well, pressing the raw edges of the opening to the inside. Sew theopening closed.
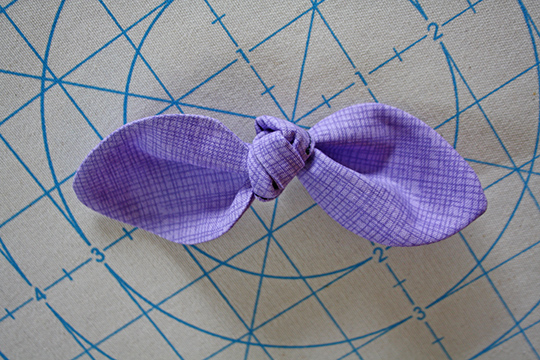
3. Tie the bow into a knot to finish.
Finishing
Once you’ve sewn the sundress completely, hand sew the three little buttons onto the bodice inset.
Attach the knot bow with a safety pin or hand sew it in place to finish.
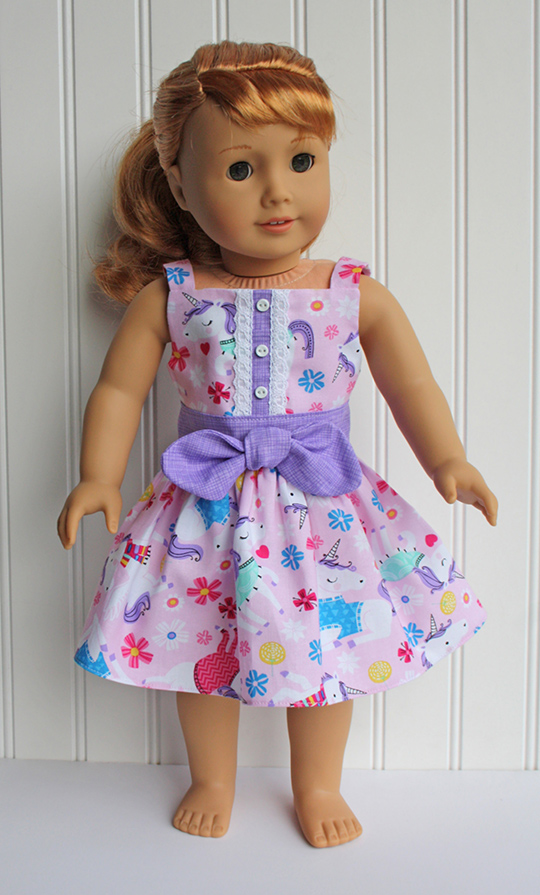
This is such an easy way to change things up and achieve a completely new look for the Modern-Vintage Sundress pattern! I hope you enjoyed sewing along.
I also hope you’ll continue to follow along with me on the rest of the Doll Days! blog tour. I will have several more sew along tutorials for bonus patterns and embellishments. I am really looking forward to sharing more bonus patterns and reading what other bloggers think of my new book.
Here’s the complete schedule:
June 13 Kickoff! Erin (me!) on the C&T blog
June 14 Amanda on Jedi Craft Girl
June 15 Erin (me!) on Dear Stella
June 16 Karen on Karen Mom of Three
June 17 Erin (me!) on Sew Mama Sew
June 20 Lindsay on Lindsay Sews
June 21 Jane on Janie Carroll Designs
June 22 Bonnie on Fishsticks Designs Blog
June 23 Tracy on Generation Q Magazine
June 24 Rachael on RJR Blog
June 27 Cherry on Cherry Blossoms Studio
June 28 Final stop! Erin (me!) on Avery Lane Sewing
You can also join the Doll Days! Sew and Share event on the Avery Lane Designs Facebook page for chances to win fabulous prizes! Share your designs and see what others are sewing with their copy of Doll Days! For a chance to win a copy of Doll Days!, enter here: a Rafflecopter giveaway. Winner will be announced on the blog in one week. US winner will receive a hard copy; international winner will receive an ebook. Head on over to the other stops for more chances to win!
Congratulations to Deborah B, winner of this giveaway!


