

Designing with Hexagons
Mar 23rd 2020
The content below is from One-Block Wonders by Maxine Rosenthal— learn the basics of good quilting design! P.S. Scroll to the bottom of the post for a giveaway.
Hexagons
Cutting Process
You can cut hexagons with either a 60° triangle ruler or a rectangular ruler that features a 60° angle line.
1. From the stacked and pinned fabric, cut 6 strips 3 3⁄4˝ wide.
2. Lay out the 33⁄4˝ strip horizontally, keeping the 6 layers neatly aligned.
60° TRIANGLE RULER
1. Place the ruler close to the selvage with the ruler’s 33⁄4˝ mark at one cut edge and the point of the triangle ruler at the other edge.
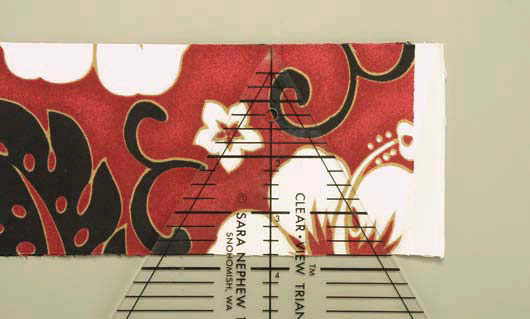
60° triangle ruler aligned on fabric
2. The long edge of the ruler produces the 60° cutting edge. Once you have made that first cut, pivot the ruler to place a 60° line along the top edge of the strip. Cut the triangle. If your ruler has only one 60° line, turn over the ruler to place the line on the top edge.
Lining up a small ruler
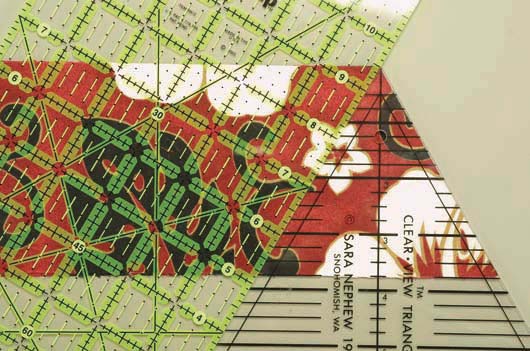
3. For the next cut, place the 60° triangle ruler on the strip so an upside-down triangle in the fabric is skipped. Be sure that the right edge of the ruler is against the right edge of the fabric, the point of the ruler is on the top edge of the fabric strip, and the lower edge of the fabric is along the ruler’s 33⁄4˝ mark.
4. Make the right-handed cut, then gently place the small ruler against the triangle ruler. Remove the triangle ruler and make the second cut. In this way, you have cut 2 triangles at the same time.
Cut 2 triangles
Sewing Hexagons
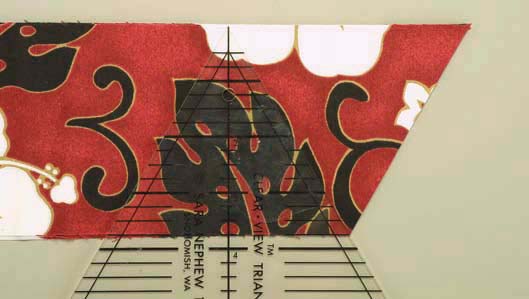
Because you have cut equilateral triangles, you can assemble the hexagon in 3 different ways with each triangle point in the center of the hexagon.
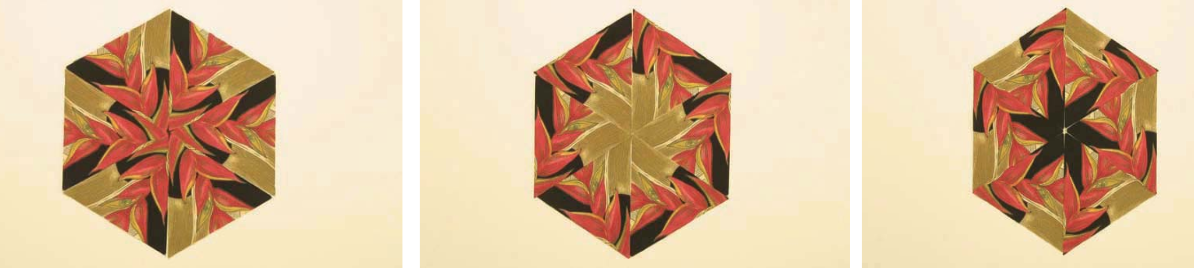
Same triangle, 3 different hexagons
Designing with Hexagons
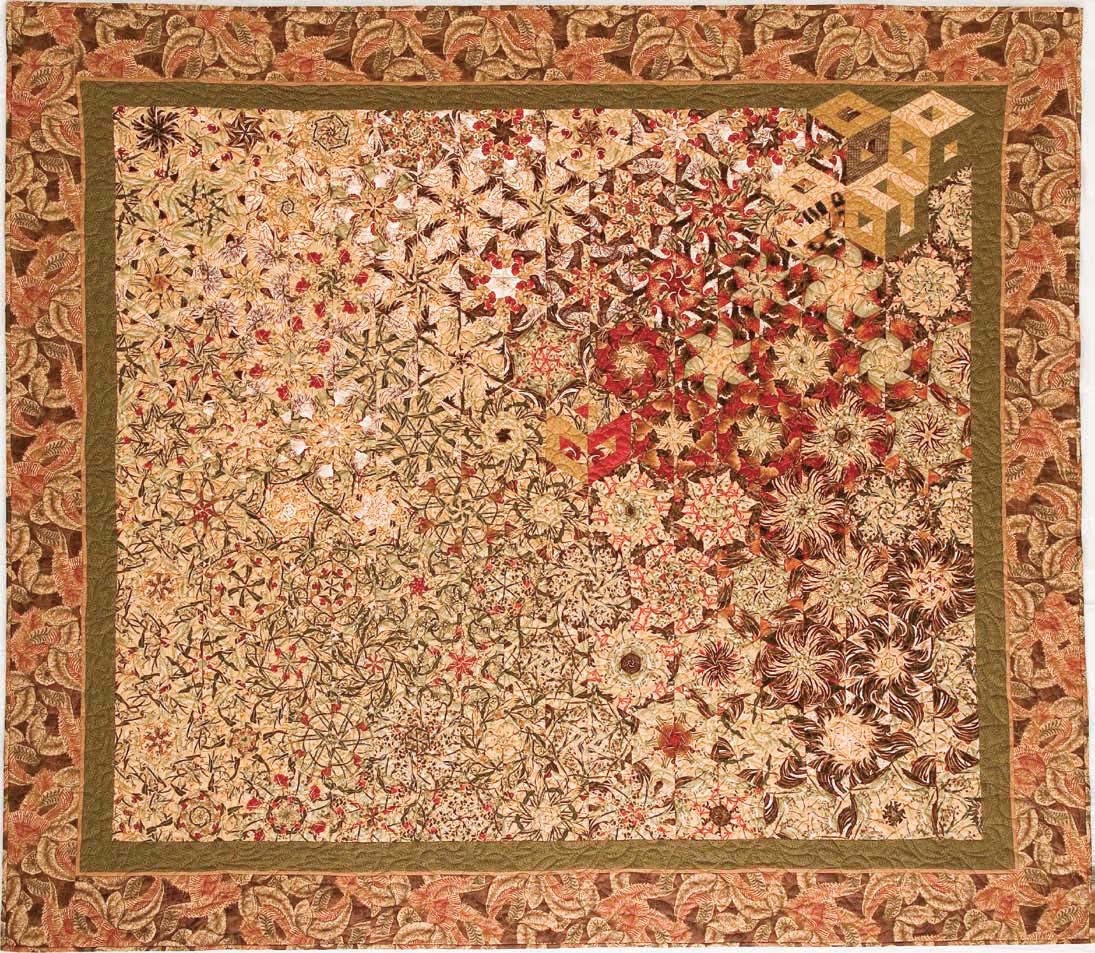
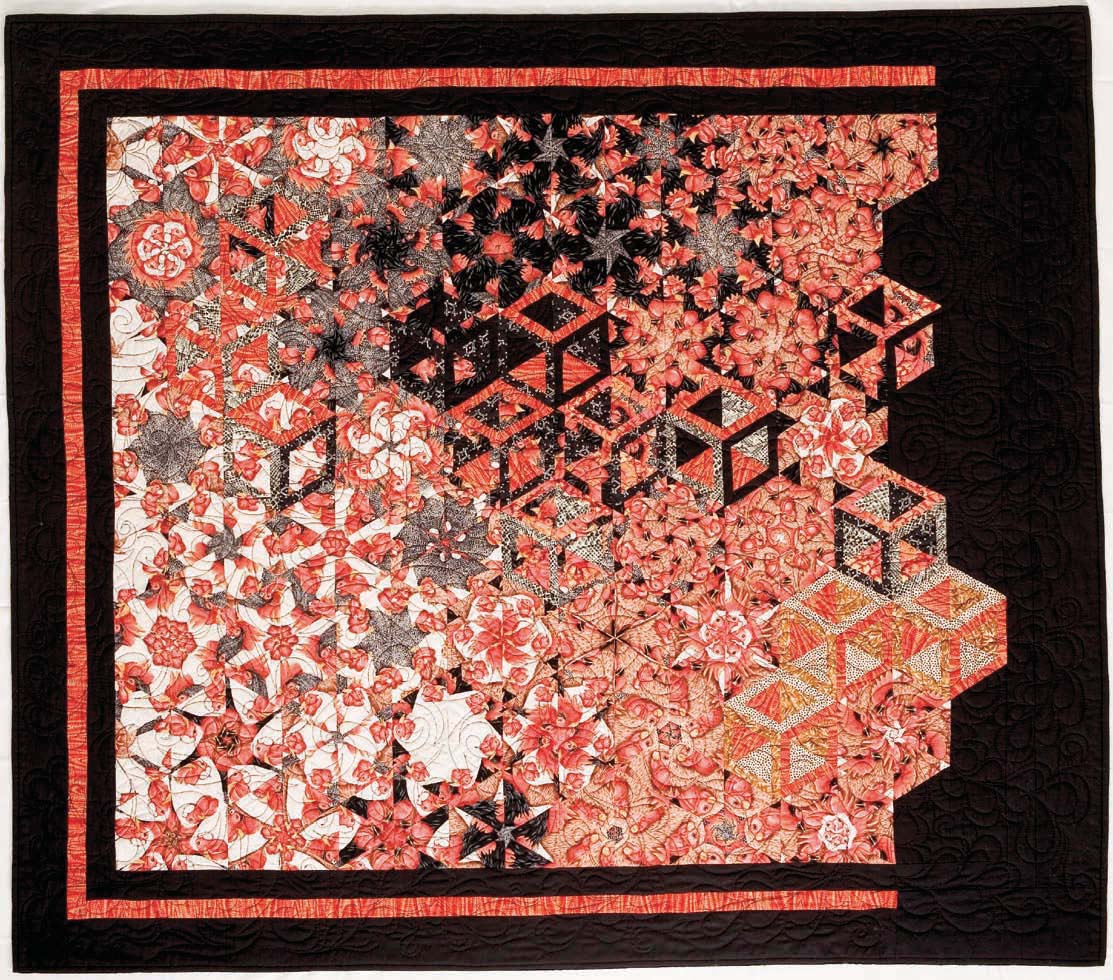
The color and print in the fabric does the design work. The shape of the images on each kaleidoscope comes from the fabric. Shapes change just as they do with each twist of an actual kaleidoscope. For example, leaves on the fabric may have been transformed into curves that fit together and form a flower shape, or simple lines may have been changed to form stars. By using relatively small triangles, the individual colors of the fabric have been separated and disassembled.
DIVIDE THE HEXAGONS INTO COLOR STACKS
Look at each hexagon block to determine its overall color. Make stacks of the different colors that have emerged from your fabric. Keep these colors together to form the palette for your quilt design.

Adding stacks
You will probably have some blocks that don’t fit easily into any stack of color. This will most likely occur when there is an equal amount of two or more colors in a block, so one color is not prominent. As you separate colors, more stacks will begin to emerge. These additional stacks will provide a good transition from one color to the next. Add an extra stack of color wherever it makes sense to you; what started as three stacks might become four or five.
Separating the stacks by color and density of color is a starting point. Like an artist lays colors on a palette, you are doing the same with the colors in the hexagons.
TO THE DESIGN WALL
Now let’s move from paint to painting. It is time to go to the design wall. Hexagons are a very special shape. They form a honeycomb, and they snuggle neatly together with no space between them. This means that all the shapes on the design wall will make up the quilt, with no additional fabric. Beginning with your favorite stack of color, put all the hexagons from that stack on the design wall.
Place hexagons on design wall
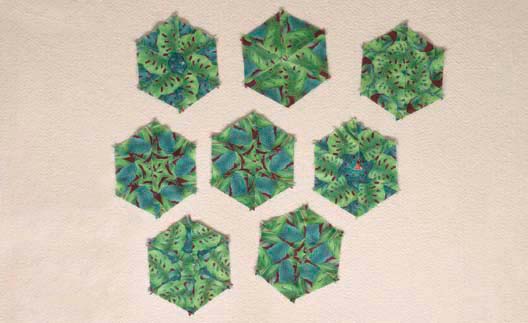
Put your favorite color in the center of the design wall, which is the center of the quilt. These hexagons may not stay there, but it is a good starting place. Place hexagons on the wall with either the point at the top or a flat edge at the top. It does not matter which orientation you use, but remember to be consistent throughout. As hexagons are combined, some will be more color intense than others, even though they came from the same stack. These more intense colors belong together. In the photograph, all of one stack was put on the design wall.
Enter our giveaway for a chance to win an eBook copy of One-Block Wonders
-


