

At the Urn of the Season- From Seasons of Wool Appliqué Folk Art
Mar 31st 2020
Happy Spring! The following information is from Seasons of Wool Appliqué Folk Art by Rebekah L. Smith-- learn how to make this finished pillow-cover wooly (15" x 30")!
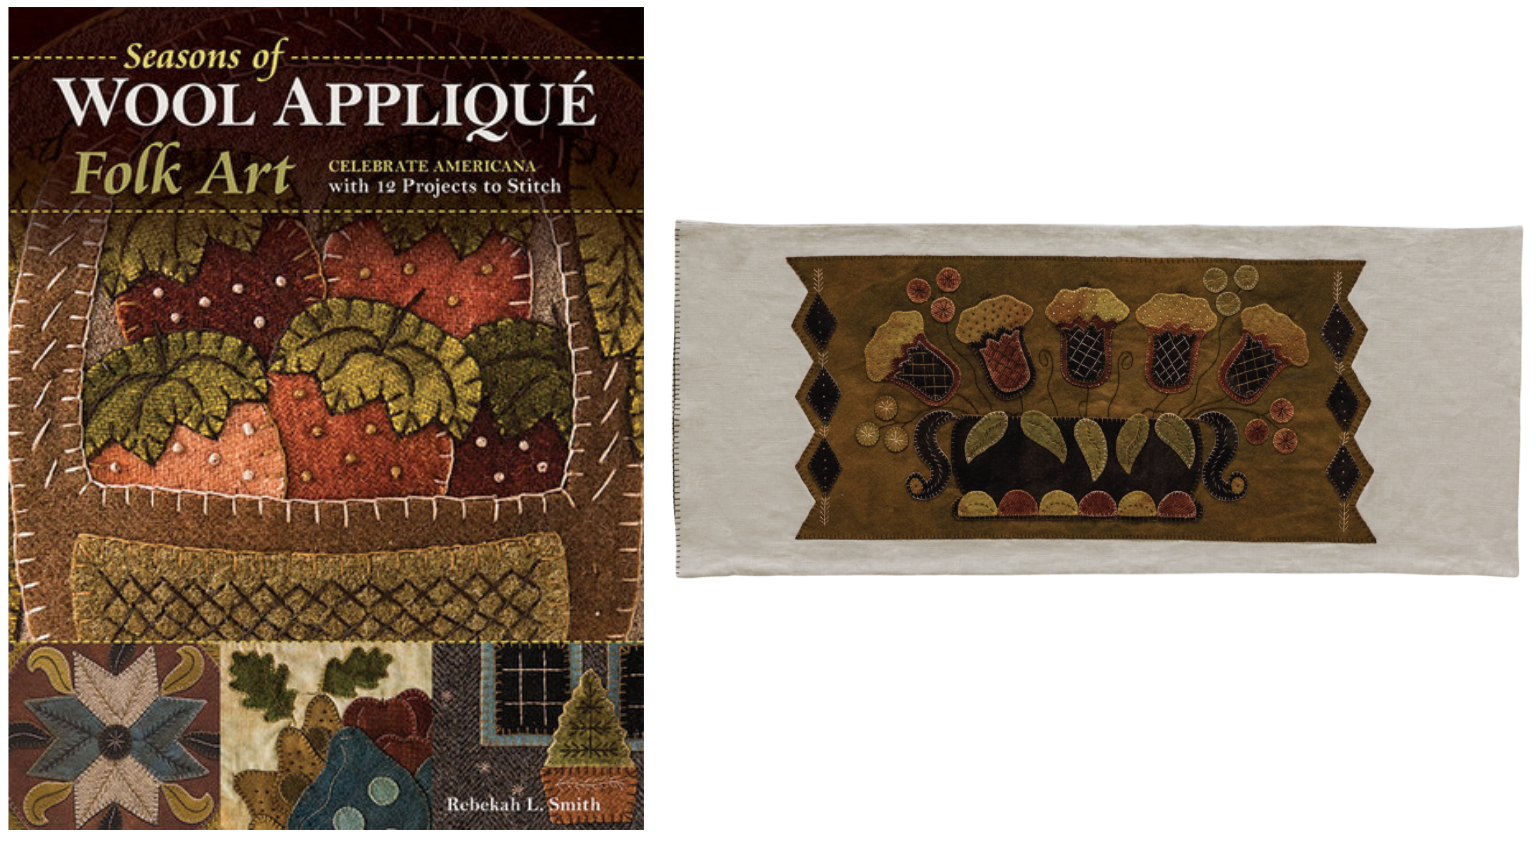
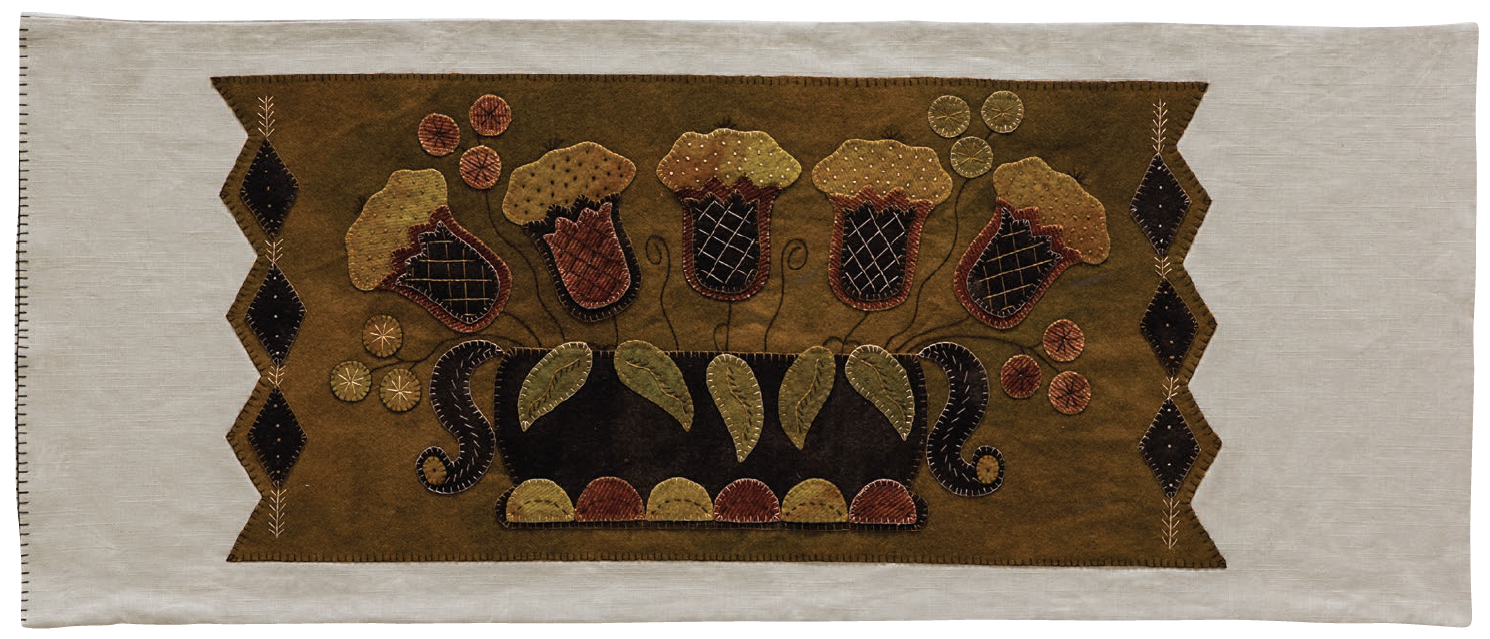
At the Urn of the Season
In spring we finally put away our winter blankets and wool coverlets. It’s time to bring out the fresh spring bedding and brighten up our spaces with thoughts of longer days and the sweet scents of flowering branches. This project emulates the pots of flowers that begin to appear on porches and doorways as we welcome the spring rains and the warmer weather.
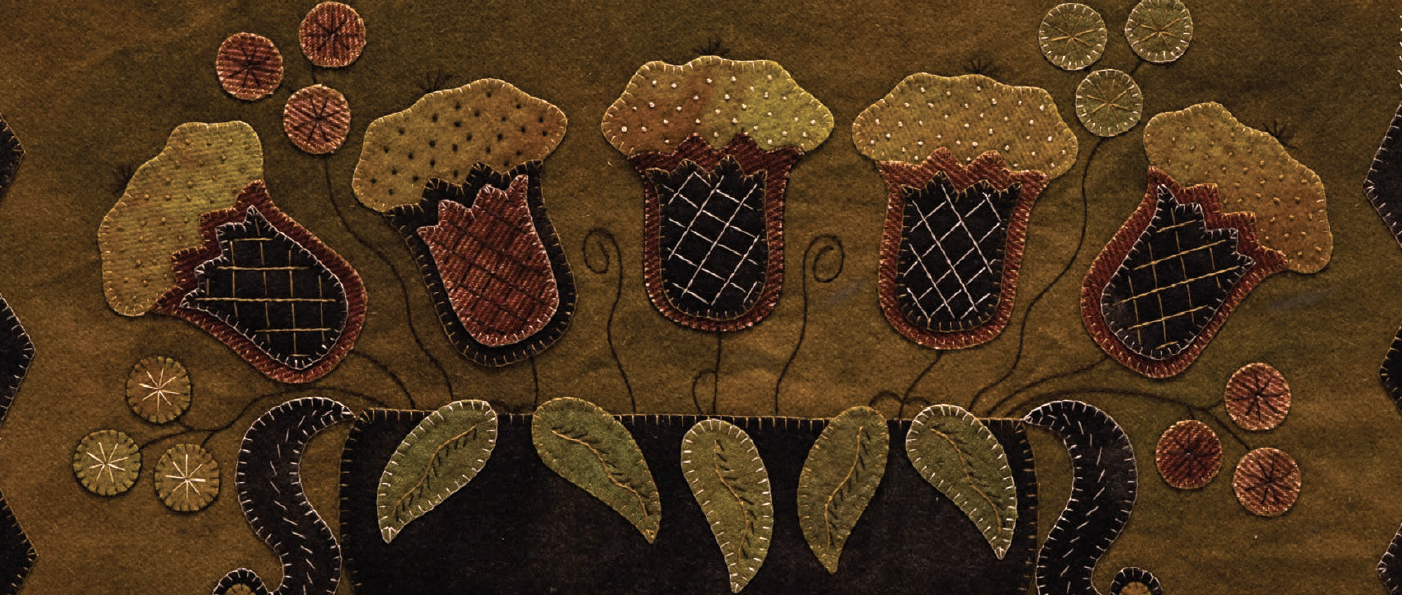
The tulip has long been one of my favorite motifs to use in painting and stitching. There are so many varieties and forms Tulips are simple harbingers of spring that can be interpreted for folk art. Filling a wooly urn planter with these delightful blossoms is the perfect way to bring them into your home’s decor. I have attached mine to a bolster cover as a pleasing addition to our springtime bed linens.
Materials
Getting Started
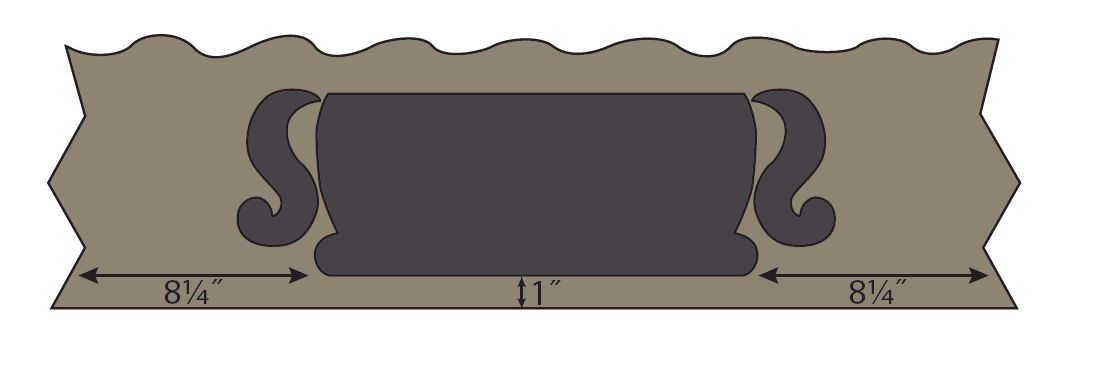
1. Cut out the wool appliqué pieces using the patterns (pullout pages P3 and P4). Trim the zigzag edges of the background wool.
2. Lay out the whole project to be sure you have all of the wool pieces.
Sewing Fun
1. Using the blanket stitch, position and appliqué all of the wool pieces, starting with the urn. Place the urn 1˝ up from the bottom and center it from side to side, 81/4˝ from each edge
2.Add the embellishment stitches.
3.Using a steam iron on the wool setting, press the finished piece on the wrong side.
4. Appliqué the entire finished piece to a bolster cover, pillow cover, or any other item of your choosing.
Giveaway!
Enter our giveaway to win a free ebook copy of Seasons of Wool Appliqué Folk Art
-


