

A Leaving-Home Sewing Kit
Posted by Barbara Emodi on Sep 15th 2017
September is National Sewing Month. It is also the month when many families launch their children into independent lives. One of the things I am sure young adults miss most when they leave home is the on-call sewing services of someone to sew that lost button back on or to repair that hem.
But not to worry. If your children no longer have you close, they will always have what you taught them, and that includes respect for the usefulness of sewing.
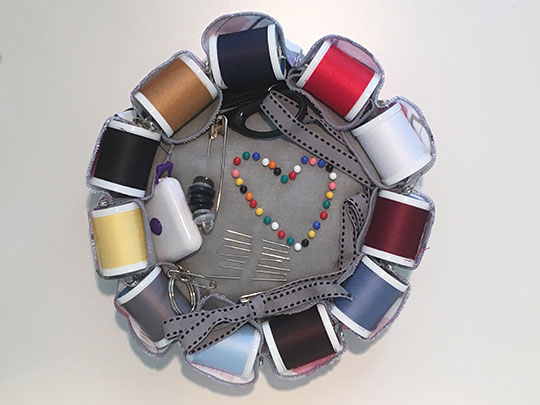
Here is a little going-away gift I love to make—a sewing-kit pincushion as handy as it is a reminder of home.
The ingredients could not be simpler.
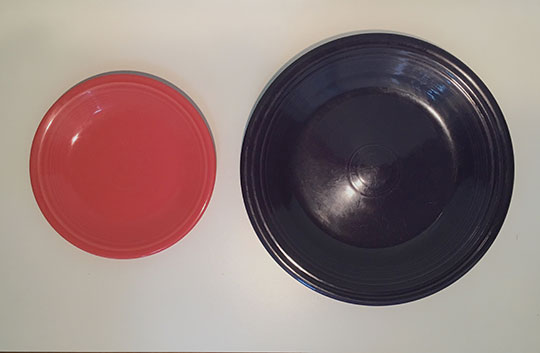
The pattern:
Two plates from your cupboard. I use a dinner plate and a side/bread-and-butter plate:
The materials:
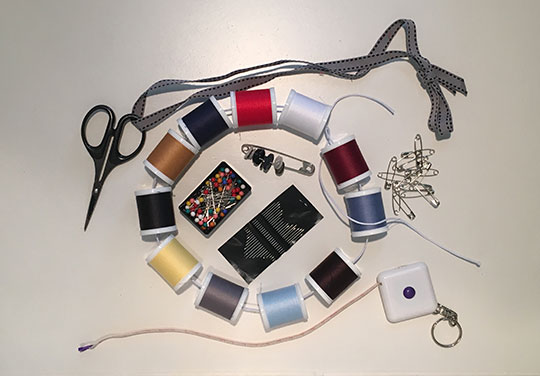
• Two squares of fabric, larger than your dinner plate (for the sewing kit pictured, I used a washer linen for the top piece and a cotton print for the bottom)
• Small quantity of batting for stuffing the cushion
• Spools of thread in colors that reflect the recipient’s wardrobe (I used 11 spools for my project)
• Round elastic, about 2 feet
• Pins
• Sewing needles
• A small retractable tape measure
• Small scissors
• Ribbon to attach the scissors to the pincushion
• One large diaper-sized safety pin
• An assortment of odd shirt buttons and other useful buttons (I collect spare buttons often attached to purchased garments)
• About 14 average-sized safety pins
The equipment:
To finish the edges of the fabric circles:
Option 1: pinking shears
Option 2: a serger and thread. (I finished my edges with a narrow overlock with regular thread in the needle and Wooly nylon thread in the loopers.)
The instructions:
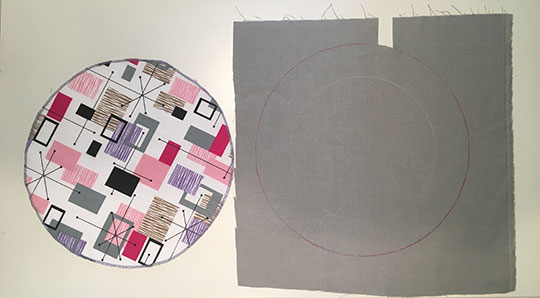
1. Using a dinner plate as a template, trace a circle on each of the two pieces of fabric. One will be the top and the other will be the bottom of the pincushion.
2. Using the side plate as a template, trace a smaller circle in the middle of the top fabric.
3. Finish the edges of the circles:
If pinking the edges to finish, simply cut out the circles along the marked lines.
If serging the edges, cut out a little rectangle along one edge of the marked circle (this will allow you to get your serger blade in close to the markings) and serge.
This is what one finished circle looks like serged and the other circle set up to be serged:
4. Pin the two circles together, wrong sides together. Sew around the smaller marked circle in the center of the fabric (the one marked with the side plate that will become the pincushion), leaving a small opening for stuffing.
5. Stuff the circle lightly and complete the stitching to close the pincushion.
6. Thread the spools on the round elastic and tie in a bow to make a ring.
7. Slip the ring of threads in between the two open layers around the edges of the pincushion.
8. Safety pin the layers of fabric together around the pincushion between each spool of thread, fluting it. I think at this stage the spools make the pincushion look like a flower.
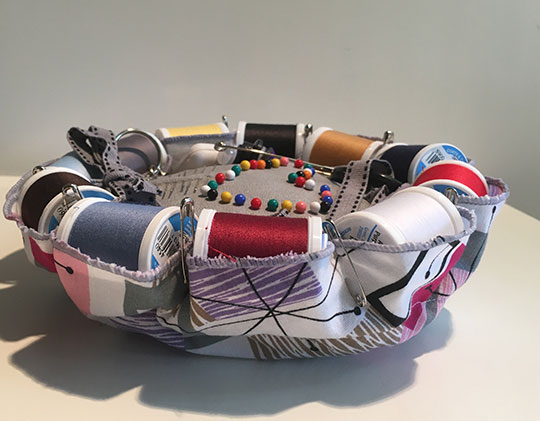
9. Tie the ribbon and pin the end of the ribbon on the outside edge of the pincushion next to the spools and tuck the scissors into the fold. Pin on the retractable tape measure and tuck it in too.
10. Thread the buttons onto the large safety pin and attach to the pincushion. Add pins and sewing needles and whatever else you can think of that might be useful.
Now there you go, the seeds for another generation of sewists well planted.
P.S. Did you enjoy this tutorial? Keep an eye out for a garment-sewing book of knowledge from Barbara Emodi, coming out in Spring 2018.


