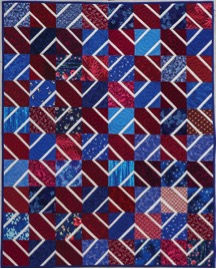
Just a Square

40” x 50”
Class Description:
Give a simple quilt block a touch of magic—the add-a-strip way! In this class you will learn how to insert two 1” strips into a block,resulting in blocks that create a secondary design.This strip-a-dee-do-dah quilt, which is simple to piece but looks complex, can be pieced with skill levels from beginner to intermediate.
Class Length:
6 hours. That can be broken down into two 3-hour classes.
Class Supply List:
- Magic Add-A-Strip Quilts by Barbara H. Cline
- 6" x 24" rotary ruler
- Rotary cutter and mat
- Pins
- Sewing thread to match fabric
- 1/4˝-wide presser foot (accurate seam allowances are a must)
- Scissors
- Seam ripper
- Double-sided tape
- Iron and ironing board
Classroom Preparation:
Each student will need their own sewing station with a sewing machine.
Class Agenda:
Before class:
1. Have students purchase fabric (p. 14).
2. Have students precut their fabric using the fabric directions on page 14.
3. Copy the Just a Squarepattern (p. 58) to make a template for students before class. Referring to Slicing with a Template (p. 10), use the template taped to the backside of a ruler.
In class:
1. Show students how easy it is to slice the tips off the square blocks. Emphasize howimportant it is to keep each sliced block with its other half. If there is a design in the fabric, it keeps the fabric design flowing through the block and the blocks in the correct orientation.
3. Demonstrate how to sew the 1" strips into the blocks by referring to page 9 and how to slice, stitch and press, trim, stitch and press.
4. Assemble the quilt top
- Referring to the quilt layout diagram (p. 15), arrange the squares accordingly, alternating the red and blue blocks as shown.
Sew the blocks into rows. Press the seams in alternate directions from row to row so the seams will nest when you sew the rows together. Then join the rows.


