

The Further Adventures of Felt Wee Folk
Posted by Salley Mavor on Apr 20th 2016
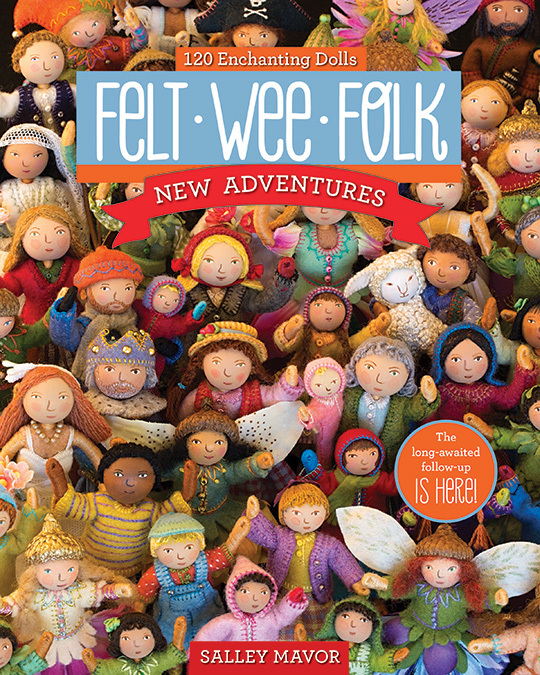
It’s been an exciting year since C&T released the new edition of my how-to book Felt Wee Folk—New Adventures. I love hearing from people who are just discovering the book, as well as seasoned makers who are re-experiencing the joys of creating their own wee folk worlds.
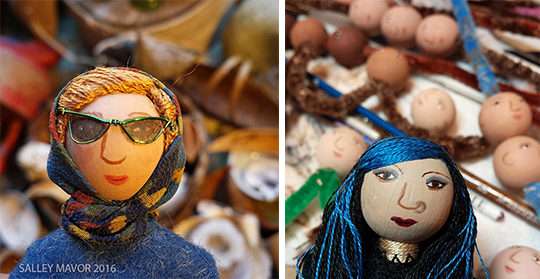
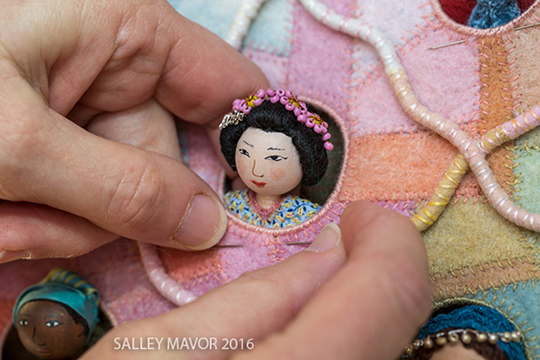
I’ve been busy making pieces that take the wee folk concept in a new direction and want to share the process with you. My latest series of embroidered bas-relief pieces feature head and shoulder portraits of different people from around the world, using themes of history, style, and cultural identity. Their faces are painted 20mm wooden beads, with wigs and adornments, similar to the doll heads in Felt Wee Folk.
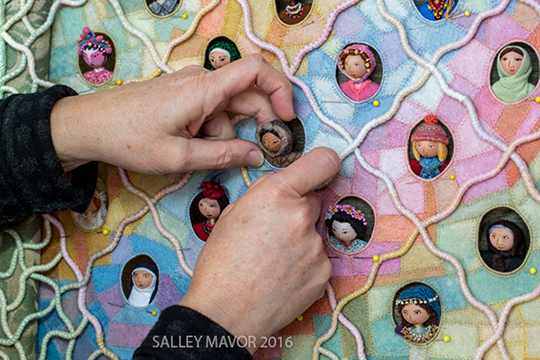
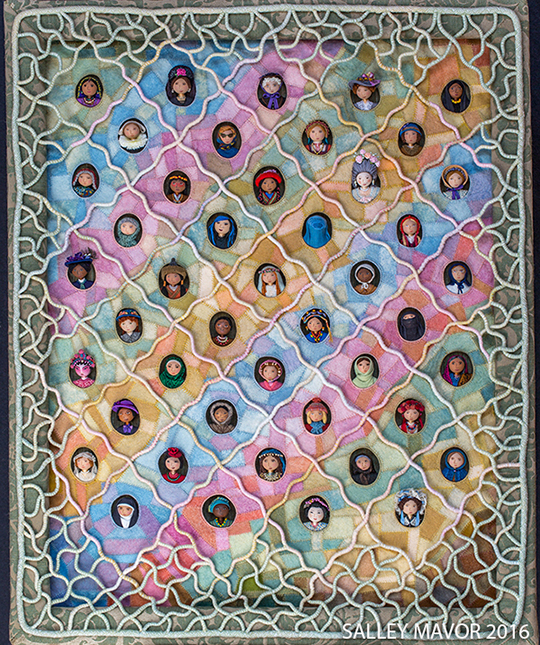
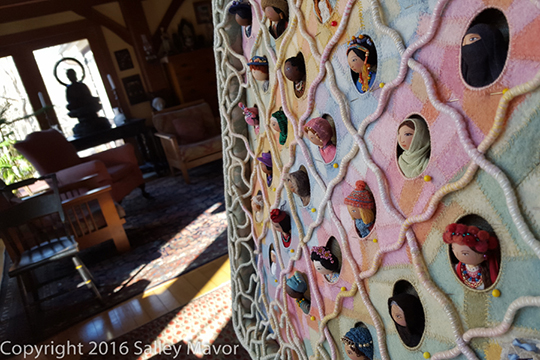
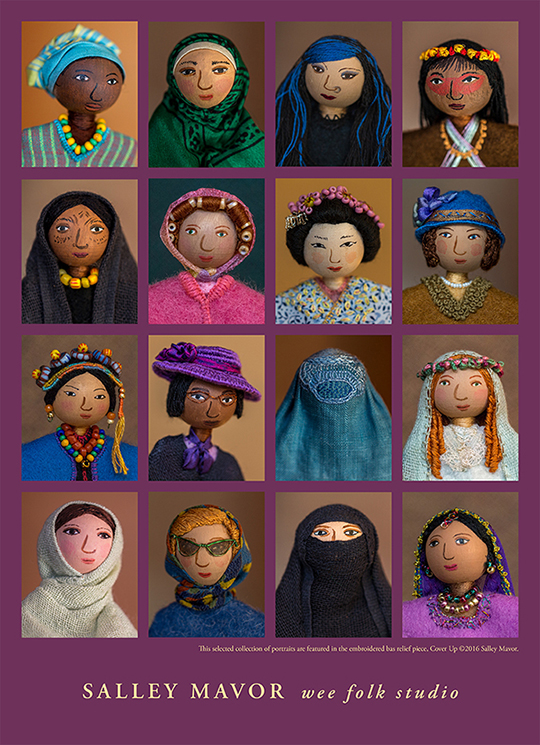
My newest piece, Cover Up (24" x 30"), focuses on women’s head coverings that illustrate the conventions of a particular time, social class, or place in history. They all wear some kind of scarf, head piece, or mask that serves as a marker, whether of self-expression or dictated by religious or cultural tradition. There’s a wide array, from exaggerated fashions to veils and makeup that hide women’s individual identities from sight.
I loved the research phase of the project and spent many days hunting for images of women from around the world, each wearing a covering that reveals something about the culture she comes from. I found reference materials on the Internet and practiced painting likenesses on wooden bead heads with tiny brush strokes. I used bits and pieces of felt, fabric, and lace to construct their attire and cotton floss and wool thread to embroider different hairstyles.
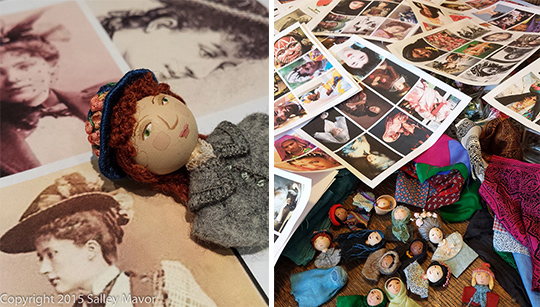
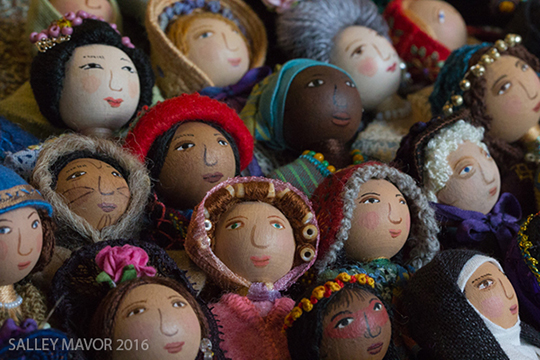
The possibilities were endless, and I could have kept making new characters for a long time, but I had to narrow it down to fashions that I thought would best represent a variety of cultures and periods of history. In a lot of cases it came down to choosing portrayals that had characteristics I found personally intriguing. Who could resist making a Marie Antoinette–style hairdo, an Afghan burka, or a Goth girl? Some depictions are identifiable by their national costumes, tribal markings, or regional headdresses, and others are less distinguishable and open to interpretation, but they are all distinct individuals who fit into a collective portrait of women across time.
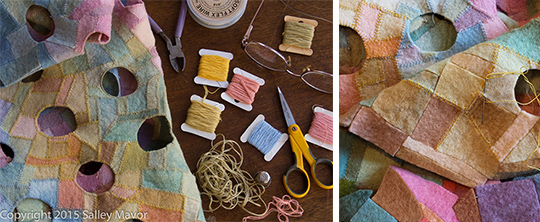
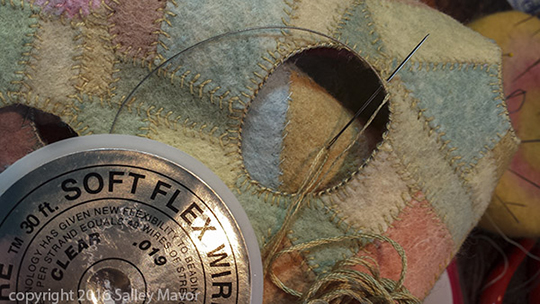
To make the background, I grouped my felt scraps in piles and pieced them together crazy-quilt style in diagonal strips according to their hue. I find large solid colors too overpowering and simplistic, whereas breaking up the field into small parts brings a softer, more impressionist appearance. I used plant-dyed wool/rayon felt that I bought years ago. Unfortunately it is no longer being produced, so every little piece in my stash is as good as gold.
The random-shaped felt pieces are held together on the back with a simple slip stitch. On the top side, I used a fly stitch to join and decorate the edge between the pieces. My husband Rob filmed me stitching at various stages of the project, which he put together in this video.
I outlined the openings with Soft Flex beading wire and embroidery floss, which gives the holes some structure, as well as a nice clean edge.
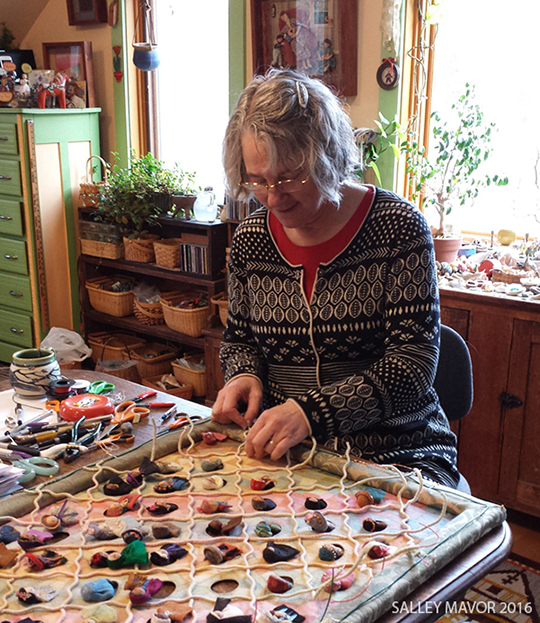
During the month-long period of stitching together the felt pieces, I occasionally shuffled around the portraits to see how they looked in the holes. When the whole felt background was finished, I sewed it to the back of a stretcher frame that I had covered with upholstery fabric.

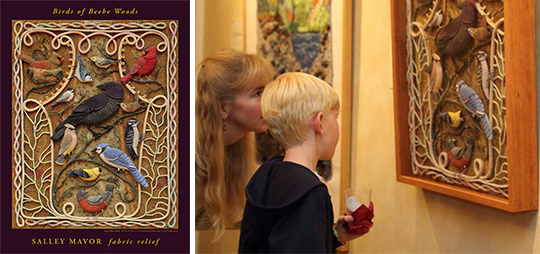
The next phase in the project involved making a felt-covered wire border, which is a technique I’ve recently developed. The idea originated with a desire to form and stitch lines that have a three-dimensional quality. I’ve used wire in my work for many years, but mostly in miniature. To change the scale, I cover larger gauge, insulated electrical wire with strips of embroidered felt. With this new way of working, I can incorporate bolder, linear patterns and designs, like in my 2012 piece, Birds of Beebe Woods.
Cover Up's border started with a sketch of a vine-like pattern. As usual, plans changed once my hands began the process of shaping and articulating the wire lines. It ended up looking more like a lattice-topped pie or a chain-link fence.
I sewed strips of felt to lengths of insulated electrical wire and embroidered stripes of pastel shades of variegated floss. Straight lines seemed too rigid and unwelcoming, so I wiggled the wires and arranged them in a diagonal grid.
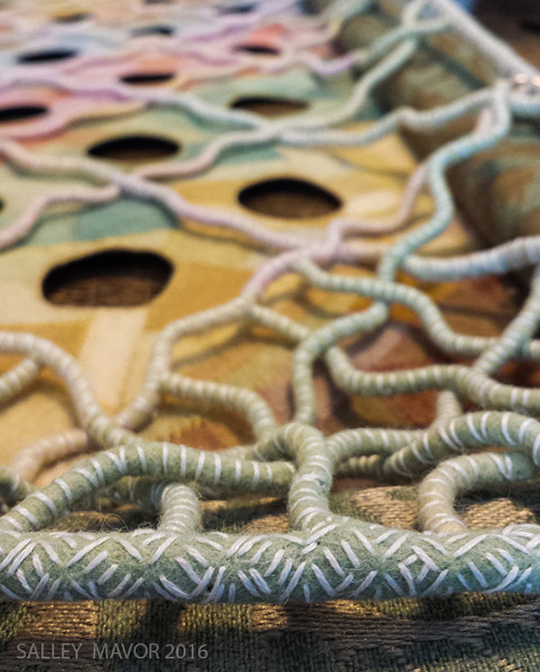
For the lattice pattern, I used many worm-shaped lengths of covered wire. I don't know how to explain the part about joining the wire ends. Let's just say that it involves poking wire through felt and lots of fussy sewing to keep the wire from pulling out. When the border was finished, I spent a long time repositioning the doll heads until I was satisfied with the arrangement. I then secured each portrait inside their hole with a few stitches on their shoulders.
Perhaps I should mention the time commitment, because people are always curious. This size (24" x 30") piece usually takes three or four months of solid work. But I must add that I believe that time alone doesn't give a piece of art its value. Like other artists who do labor-intensive work, I am not deterred by the prospect of spending countless hours on a single piece, as long as it holds the promise of transcending the effort involved.
We all have a personal narrative to share and it is my hope that this project inspires others to tell a story of their own by expanding on the basic instructions in Felt Wee Folk—New Adventures.
During the months-long project, I shared behind-the-scenes images with my Facebook, Instagram, and blog followers, including individual images of the women. The response to the photos was so enthusiastic that I decided to print a poster which shows enlargements (200%) of a selected collection of these portraits. The 12" x 17" poster is available in my Etsy shop.
Cover Up and other embroidered bas-relief pieces will be included in my exhibit Intertwined—Needle Art of Salley Mavor at the Bristol Art Museum, Bristol, RI.


