


Straight and Square!
Happy September, everyone!
As much as I love summer, I am always happy for fall to arrive. Bye-bye shorts and flip-flops! Hello comfy jeans, long-sleeved shirts and gorgeous sweater weather. Crisp mornings and cool evenings and dusting off the crock-pot for what is known in my house as “soup season.” I love it!
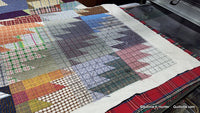
I also greet the season with autumn-themed sewing. I’ve got some string-pieced pumpkin blocks under way for a future project, and I just finished the quilting on this barn-raising rendition of Scrappy Mountain Majesties made with recycled plaids, stripes, and prints from shirts and other articles of 100% cotton clothing. I’m mad for plaid!
This is a simple little post to share how I like to square up a quilt after quilting and before putting binding on. If I want good square corners and straight edges on my quilts, that means I have to have to do some trimming BEFORE the binding goes on so the binding has straight edges to follow.
I know there are some folks who apply binding FIRST and trim second, but I prefer to do it the other way around so I KNOW things are straight.
Let’s face it. No matter how careful we are with that quilt top, fabric is fluid. It stretches, it shifts, and fullness can sometimes be pushed to the outside edges of the quilt just a bit, no matter how we basted, whether quilting by domestic machine or mounted into a longarm machine.
I found this to be especially true when working with homespun like plaids from clothing.
Sometimes fabric has a life of its own… it’s like nailing pizza dough to a tree!
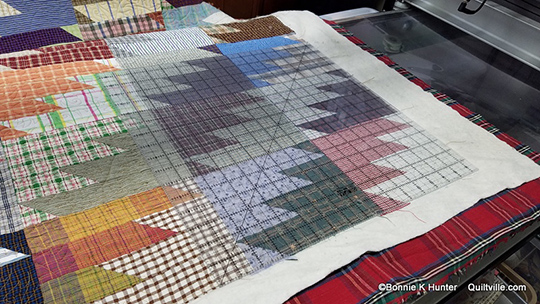
While I use the table side of my longarm to trim my quilts, you can do the same with a folding banquet table, and in a pinch I’ve even placed my rotary mat on the floor and got in a bit of quilter’s yoga while doing this trim up.
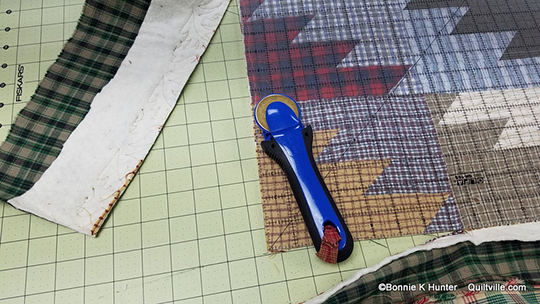
You will need TWO rulers for this process. I use a 15" square and a 24" long ruler.
Put a new blade in your rotary cutter. You are going to be going through many layers, and a new blade will make the job easier.
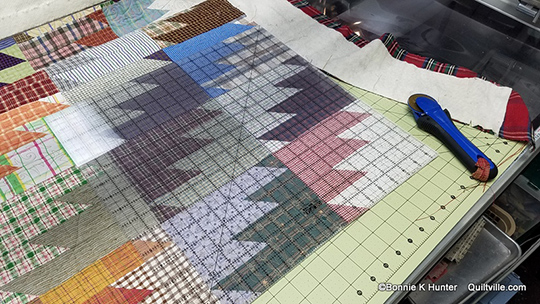
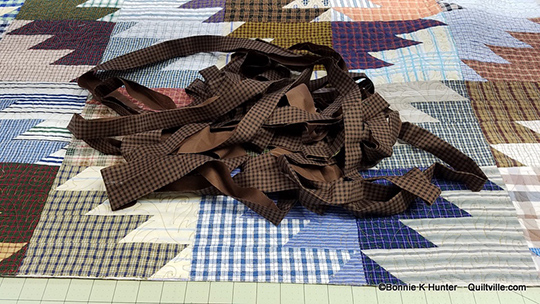
Place the large square ruler in one corner of the quilt. Trim this corner square. Please note that the rotary mat will slide on the table to wherever I am cutting. Move the mat as you go.
Move the mat and ruler to the other end of the quilt and trim up THAT corner next. Don’t worry about the side yet.
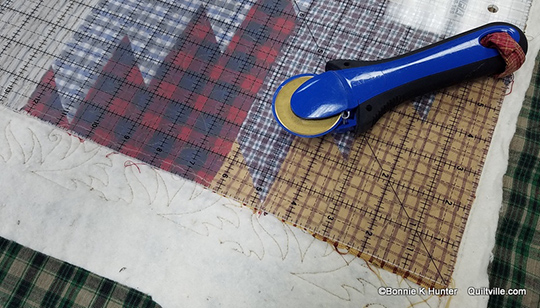
See what I mean about these corners? I’ve got just a bit of creep here, and I need to trim it off and make it even.
Second corner is now square! Time to trim the side from corner to corner.
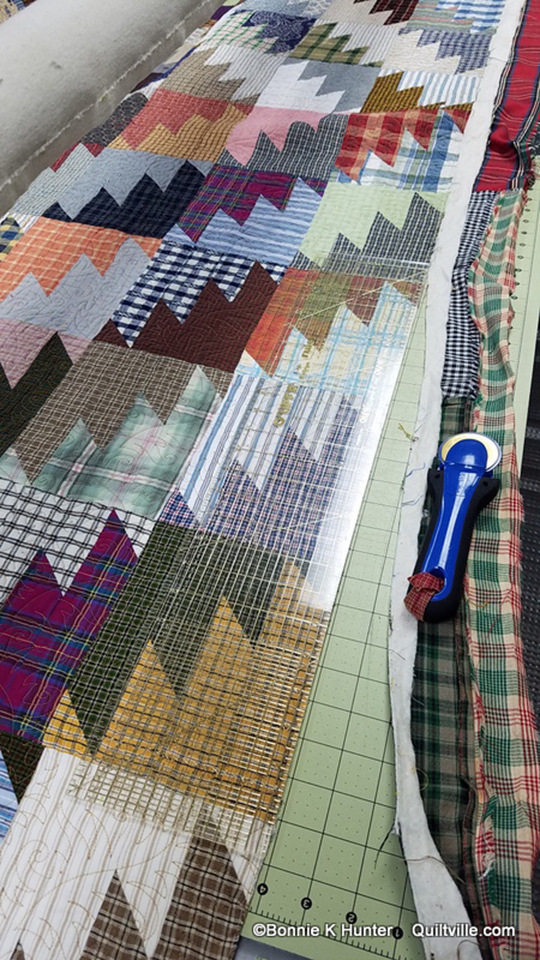
Use the long 24" ruler to trim the edge of the quilt between the two trimmed corners, moving the mat beneath the quilt as you go. You’ll notice the wobbles will be gone, and the quilt will look so much better!
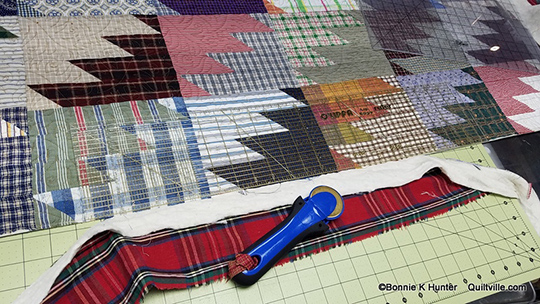
Finishing this side!
Continue to first square up the corners and then trim between them up the sides all the way around the quilt. You will have gorgeous square corners so the miters on your binding will fall where they should at the correct angle. There will be no lumps, bumps, or wavers along your nice straight sides.
This job now awaits me! I like to use a 2" strip width for my French-fold binding which gives me a 1/4" finish front and back. Because a lot of my quilts either have no borders and end with the piecing or have pieced borders that frame the quilt with no solid border beyond, a 1/4"-finished binding means the points in my patchwork are not being cut off with a wider binding.
AND! Binding with 2" strips instead 2 1/2" strips uses 20 percent less fabric! Cha-ching!
If you check out my new book release, Addicted to Scraps from C&T Publishing, you’ll find that these quilts also are finished with 2" strips for a 1/4"-binding finish. Give it a try!
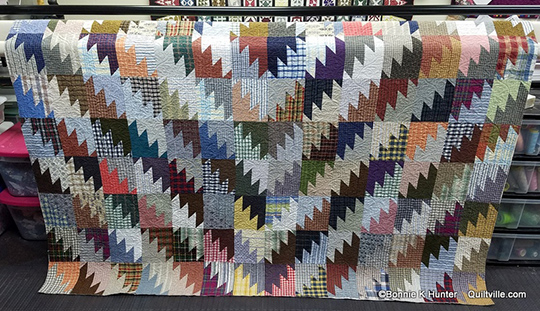
If you’d like to make your own Scrappy Mountain Majesties quilt, you’ll find the pattern under the free patterns tab at the top of my blog. Great way to bust a batch of 8 1/2" squares, and there are many layouts to choose from.
Now go trim up that quilt!
Bonnie K. Hunter is the author of several C&T Titles including Scraps & Shirttails, Scraps & Shirttails II, String Fling, Adventures with Leaders & Enders, and More Adventures with Leaders & Enders.
Bonnie is also the Addicted to Scraps columnist for Quiltmaker magazine, giving hints, help, and tips in every issue to help put your own Scrap User's System to good use, making more quilts in less time.
Follow Bonnie's Daily blog at http://quiltville.blogspot.com
Facebook: http://facebook.com/quiltvillefriends
Facebook Group: Quiltville's Open Studio
Instagram: @quiltville_bonnie


