


Sew Illustrated Coasters—Free Project
This project is taken from Sew Illustrated—35 Charming Fabric & Thread Designs.
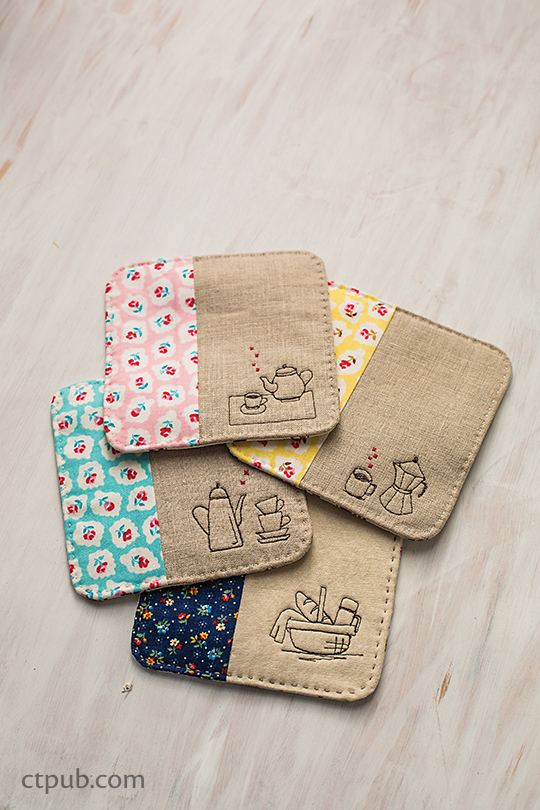
Designed and made by Minki Kim | Finished size: 5 ̋ × 5 ̋
Coasters are the perfect small project to begin your adventures in sewing illustration. You can begin with small images, using thread only, and create a whole stack of charming works of art for your home. All you need to start is a bit of linen and some scraps of your favorite fabrics. You will enjoy seeing the coasters in use around your home, and they also make wonderful gifts.
MATERIALS AND SUPPLIES
For 1 coaster:
Linen, cotton prints, and cotton batting: Scraps (see Cutting for sizes)
Fabric marker: Frixion pen or water-soluble marker
Machine-sewing thread: Neutral (white or ivory) for piecing and dark 40-weight for outlining
Hand-embroidery thread: Bright and neutral to match linen
Hand-sewing needles: Regular and embroidery
CUTTING
Linen: 1 piece 3 5/8̋ × 5 ¾ ̋
Cotton print: 1 piece 2 5/8 ̋ × 5¾ ̋ for front, 1 piece 5¾ ̋ × 5¾ ̋ for backing
Cotton batting: 1 piece 5¾ ̋ × 5¾ ̋
Tip: If you are making multiples, cut out enough fabric for a complete set of coasters and then sew them together assembly-line style.
Instructions
If you choose different techniques for transferring and appliqué than those used here, the materials and steps may vary slightly from those described in this project. Seam allowances are ¼̋ unless otherwise noted.
MAKE THE COASTER TOP
Place the cotton print for the front of the coaster and the linen right sides together and sew along a long edge. Press the seam allowance toward the print side.
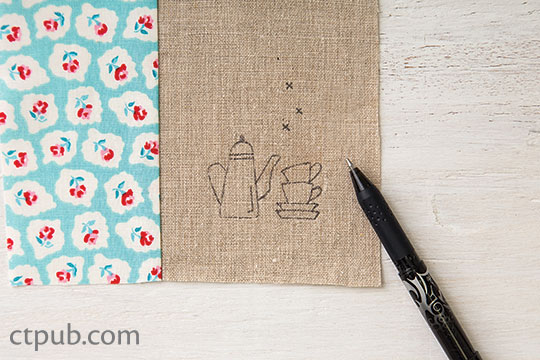
SEWING ILLUSTRATION
Transfer technique shown: Frixion pen.
1. Transfer the Coaster design (download here) of your choice using your method of choice.

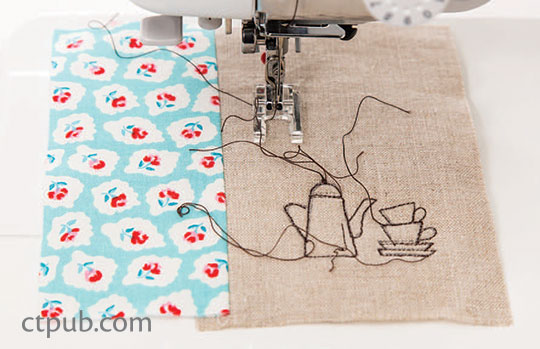
2. Place the batting on the wrong side of the coaster front. Having the batting underneath stabilizes the design as you sew.
3. Prepare your machine with an open-toe appliqué foot (if you have one) and dark thread. Set the stitch length to about 1.6.
4. Start on one of the larger elements in the design—in this case, on the long edge of the coffee pot. Carefully sew along the design.
Remember, it doesn’t have to be perfect; that’s part of the charm.
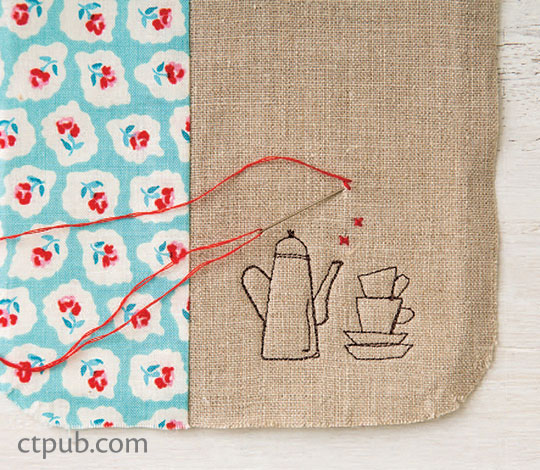
5. Hand stitch a few little cross-stitches with 2 strands of embroidery thread in red or a color that complements the cotton print fabric.
FINISH IT UP
1. Use something round (the round end of a 1½ ̋ spool of thread works well) to mark rounded corners onto both the front and back pieces of the coaster. Trim.
2. Place the coaster front and back right sides together and pin. Sew around the coaster, leaving about 2½ ̋ open along the straight side with the cotton print.
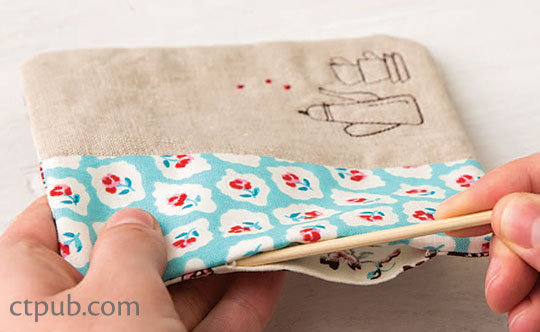
3. Turn the coaster right side out and press flat. Use a chopstick or other similar object to help push out the corners to make them perfectly round. Turn under the seam allowance for the opening and press well. Hand stitch the opening closed.
ADD EMBELLISHMENTS
1. Thread an embroidery needle with 2 strands of embroidery thread. Stitch around the edge of the coaster, about 1/8 ̋ from the edge, with a running stitch. Alternatively, topstitch around the coaster using your sewing machine.
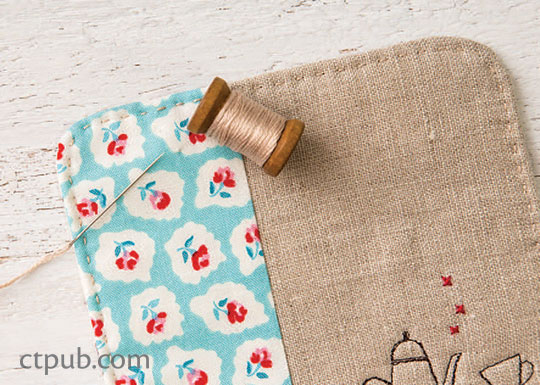
2. If you are hand stitching, bury the knot so that it doesn’t show on the back.
Enjoy your new coaster with a cup of coffee or tea. You deserve it!


