


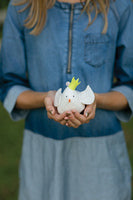
Peaceful Dove Pincushion Project
My favorite holiday bird may just be the dove. Doves look so lovely and regal with their all-white coats of feathers. This project will teach you how to make your own peaceful and regal dove pincushion. It’s the perfect home for all your sewing pins and needles. It could also be the cutest ornament in town!
what do i need?
*10˝ × 10˝ piece of white felt
*Small scraps of felt for hat and beak
*Erasable pen (I use FriXion erasable markers because they erase with the heat of an iron.)
*Hot glue gun
*Fiberfill stuffing
*Basic sewing supplies
Prepare the Pieces
*Use the patterns to cut all the pieces of your dove.
Let's Make It
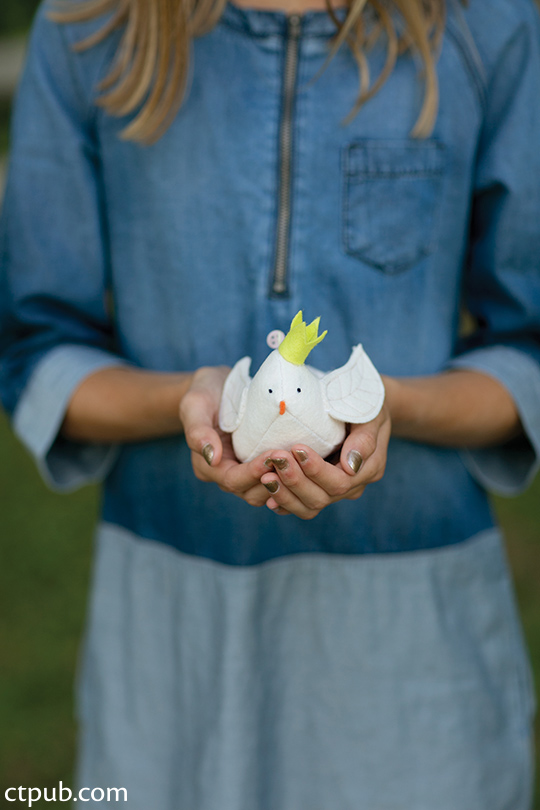
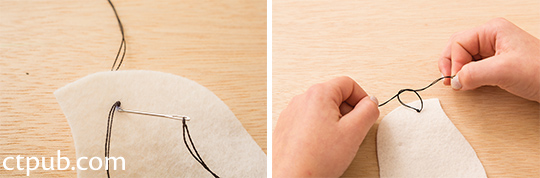
1. Referring to the pattern, mark an eye on each body section with an erasable pen.
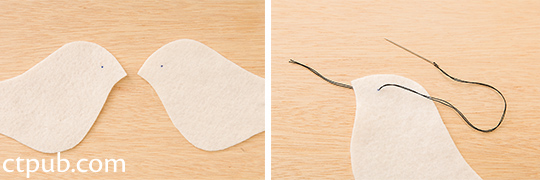
2. Thread a needle with black embroidery thread and tie a knot around 4˝ from the end of the thread. Bring the needle through the eye spot from behind the felt.
3. Tie a knot in the thread and,with the point of the needle on the eye spot,ease
the knot down the needle so that it is as close to the felt as you can make it.
4. Push the needle down through the felt beside the knot.
5. Tie a double knot in the thread using the needle thread and the thread tail. Turn the crown right side out and carefully press all the edges with the iron.
6. Repeat Steps 2–5 to make an eye on the other body section.
7. Place the 2 upper bird body pieces right sides together and pin around the top curve. Use an erasable pen to draw a stitch line ¹⁄8˝–1/4˝ from the edge of the felt. It will really help with this little sewing project.
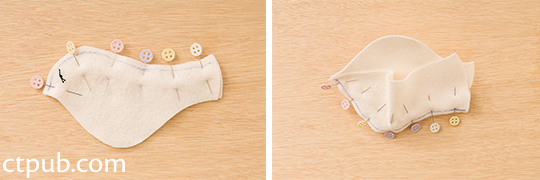
8. Sew only the top curve along the drawn line.
9. Line up a side of the first bird body with the side of the bird belly and pin together. Draw a stitch line again with an erasable pen.
10. Carefully sew along the line.
11. Attach the other side of the bird to the other side of the belly in the same way. Be sure to leave the tail open.
12. ![]()
![]()
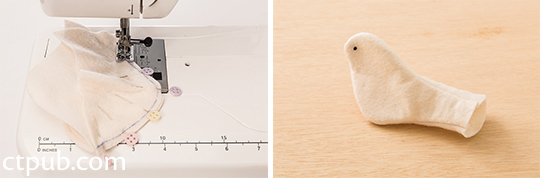
![]() Turn the entire bird right side out.
Turn the entire bird right side out.
13. Stuff with small tufts of fiberfill stuffing.
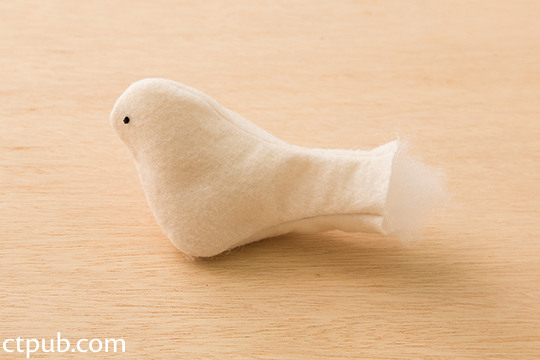
14. Sew the tail closed with the edge of the presser foot on the edge of the fabric. I like to use my pinking shears to snip the bird's tail to give it a more feathery look.
The Wings
1. Using the pattern as a guide, draw the detail onto 1 side of each of the wings with an
erasable pen. Pin the 2 wing pieces together.
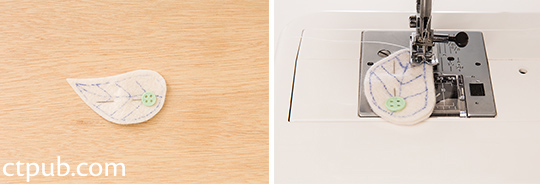
2. Stitch along the drawn lines in a soft color.
3. Do the same thing with the other wing pieces.
4. Use the iron to remove the pen marks when you are done.
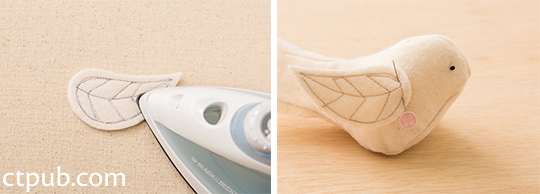
5. Position the wings on each side of the body and pin in place.
![]() 6. Carefully hand stitch the wings
in place around the curve with a simple
whipstitch.
6. Carefully hand stitch the wings
in place around the curve with a simple
whipstitch.
Here's how to whipstitch:
Thread a sewing needle and then tie a knot at the end of the thread.
Bring the needle up from behind the bird wing. Push it down through the main bird body piece fabric that you are attaching. Try to make your stitches nice and small and make sure that each stitch is beside the last stitch.
Bring the needle up and through the edge of the wing again,and then back through the bird body again.
Continue like this until the wing pieces are attached.Sew a couple of stitches in place to secure the stitching. Push the needle through to the back of the wing and tie a knot close to the fabric.

7. Cut the felt beak and attach it to the bird with a drop of hot glue.
8. Use a dab of hot glue to secure the crown in a round shape.
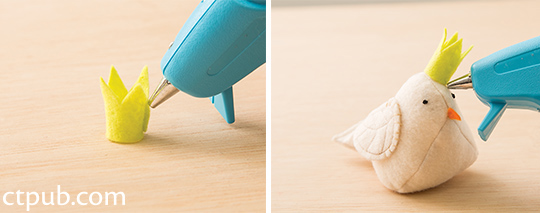
9. Use another dab of hot glue to attach the crown to the bird. I love a jaunty little crown, don't you?
This holiday project was taken from We Love to Craft–Christmas by Annabel Wrigley.


