


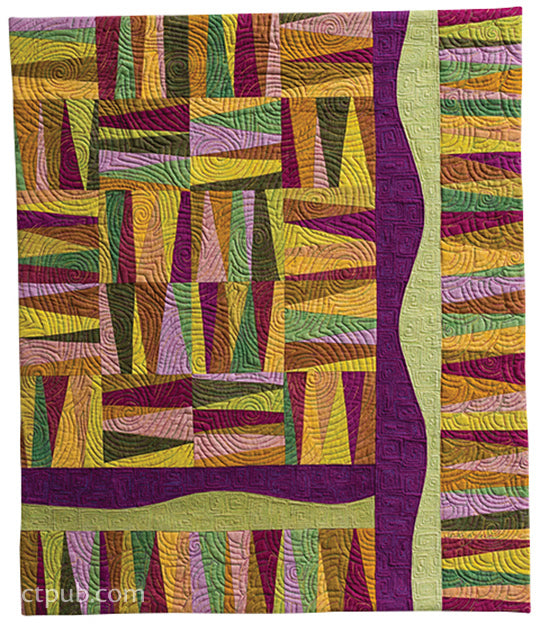
Making Improvisational Angled Stripes
Please enjoy the following excerpt from Artful Improv by Cindy Grisdela.

Sew all seams with the fabric right sides together using a 1/4 ̋ seam allowance; then press the seams to one side.
1. Decide on your colors. Select 6 fabrics, including 4 or 5 that coordinate and 1 or 2 that contrast for spark. For this example, I used a warm analogous color recipe of red and orange, plus complementary green and blue for contrast.
2. Cut 6 rectangles about 6 ̋ × 8. ̋ Arrange the colors in a pleasing order. Consider alternating lighter colors or values with darker ones, so you don’t end up with all your darks or all your lights in a row.
3. Stack the rectangles evenly, aligning the edges.
4. With the long sides on the top and bottom, use your rotary cutter and ruler to make 5 angled cuts through all the fabric layers, giving you 6 fabric stacks per set. Aim for a variety of widths with each cut, but make sure no piece is less than 3/4 ̋ wide.
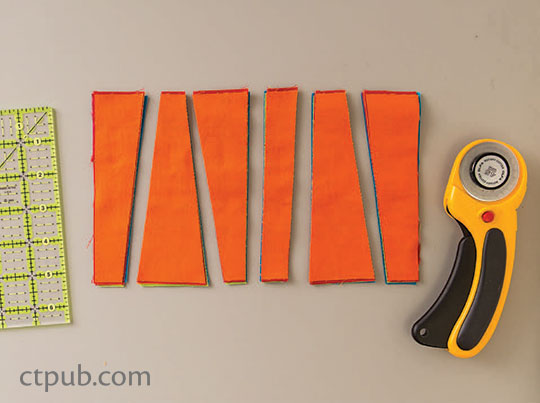
Stack and cut fabrics.
5. Working from left to right, take the top piece of the first stack and move it to the bottom of the stack.
6. Take the top 2 pieces from the next stack to the right and put them on the bottom of that stack.
7. Take the top 3 pieces from the next stack to the right and put them on the bottom of that stack.
8. Take the top 4 pieces from the next stack to the right and put them on the bottom of that stack.
9. Take the top 5 pieces from the next stack to the right and put them on the bottom of that stack.
10. Leave the stack farthest to the right as is. You will have a different top fabric on each stack, and the colors in each stack will be shuffled.
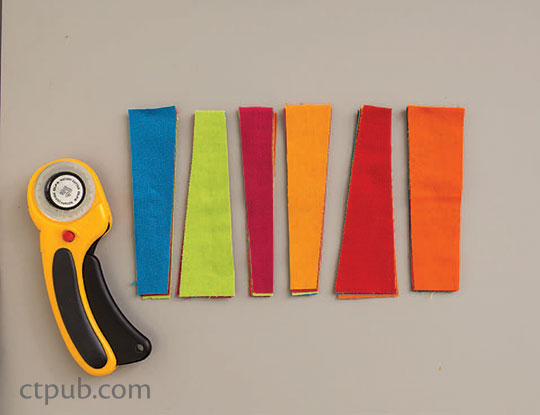
Rearrange the fabrics.
11. Starting on the left side, take the top pieces of fabric from the first 2 stacks and sew them together along their common edge. Take the new top pieces and continue chain sewing all the top pieces from those 2 stacks together so they will stay in order. Don’t worry if the ends don’t match exactly; they will be trimmed later.
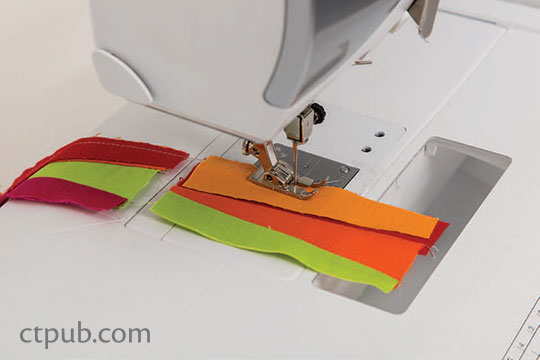
Chain stitch the strips together.
12 . When all 6 pairs are sewn together, press the seams to one side, cut the thread between each pair, and restack the pieces in the order you sewed them.
13. Take the top fabric from the next stack to the right and sew it onto the first completed unit. Press the seam to one side when you are finished. Chain sew the rest of the pieces in the stack to your units from Step 12.
14. Continue adding the next piece in the sequence to the sewn units until you reach the last stack; then repeat until the units are all sewn. You now have 6 fabric units, with 1 of each of the 6 different colors in each unit. Trim the units to a uniform size.
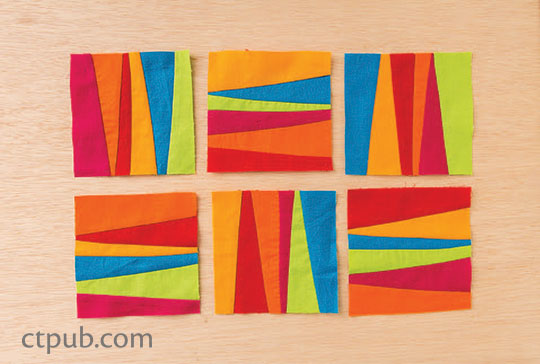
Stitched and trimmed blocks.
These units can be used as they are to create a design, or you can slice off narrow strips to use as details in other compositions.
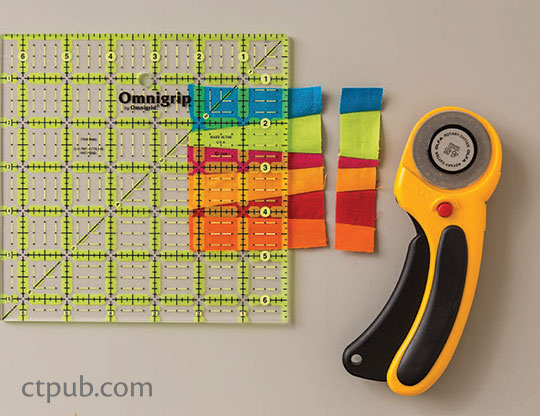
Narrow strips cut from Angled Stripe units are useful to add interesting detail to other designs.
For more great improv instructions, pick up a copy of Artful Improv: Explore Color Recipes, Building Blocks & Free-Motion Quilting.


