

Make Watercolor Ribbon with Transfer Printing!
Posted by Betsy Olmsted on Nov 15th 2016
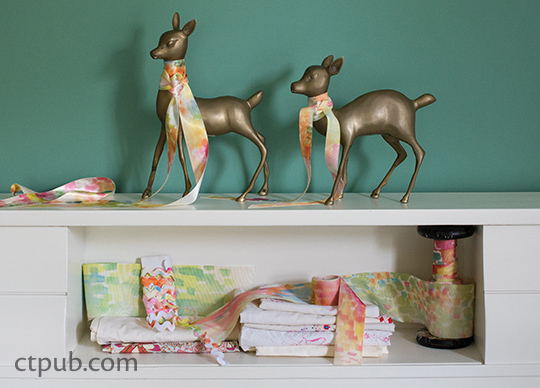
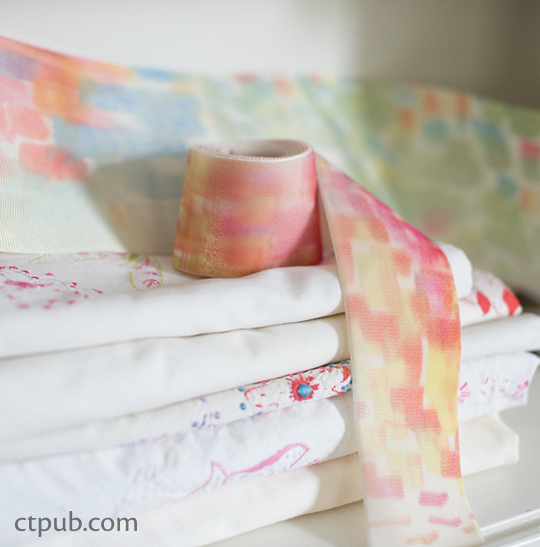
These beautiful, one-of-a-kind watercolor-looking ribbons can be used to wrap a special package, tie in hair, wear as a belt, or make a bracelet. They add a personal decorative touch to a special event or party. For an array of textures and widths, try printing on different types of ribbon.
Materials
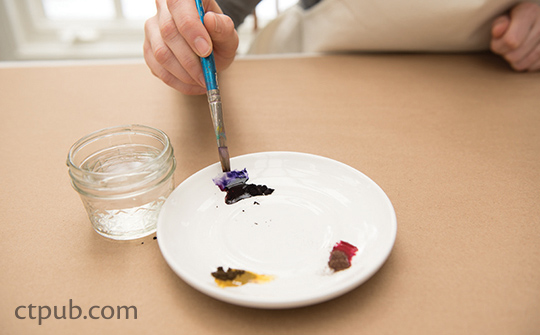
Mix the transfer dyes. Measure about 1⁄8 teaspoon dye powder onto a saucer or into different compartments of a paint palette. Add a few drops of water to each color.
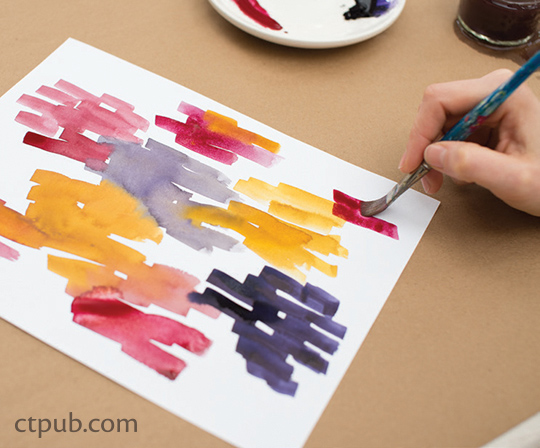
Color Blocking
Using a flat-tip brush,paint colors next to each other in sections. Allow them to overlap along the edges; some blending is okay.
NOTE: Be sure to wear a dust mask when you are mixing the powders, and work in a well-ventilated room when transferring the designs to fabric.
TIP: Paint lots of sheets at a time. Use the sheets over and over until the dye is too faint.
Printing the Ribbons
1. Paint a few color block designs.
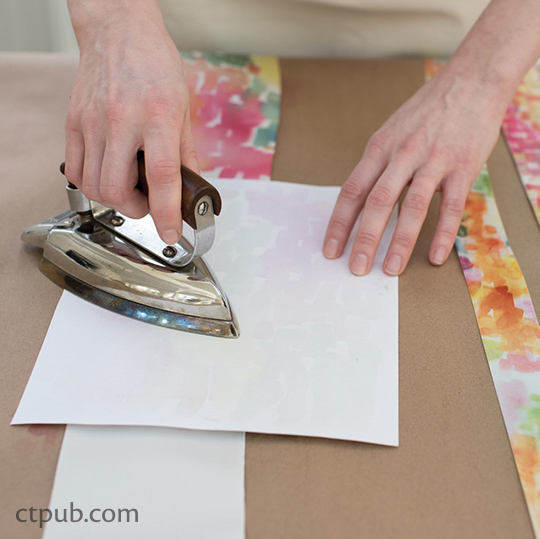
2. Set the iron to the appropriate heat for your fabric. Place the dry artwork facedown on the fabric.
3. Place the ribbon flat on the worktable.
4. Place the transfer artwork facedown across the ribbon and press with the iron until the desired color is achieved. Move the iron over the paper,especially if the iron has steam vents. Start on a low heat setting. If the design is taking a long time to transfer, then continue to turn up the heat a half setting at a time until the desired color is reached. This could take from a few seconds to a few minutes, depending on the fabric and heat settings. Do not turn the heat too high or the fabric could melt or slump. As you iron, peel up a corner to see how the transfer is progressing.
TIPS
• If possible, use a dry iron instead of a typical steam iron. The markings on the underside of the steam iron can transfer to your fabric if you don’t move the iron around.
• Dye paintings need to be completely dry before transferring. Ironing wet paper will spread the dye across the paper, ruining the fabric.
5. Continue moving and turning the transfer paper down the ribbon until you have printed the desired length.
Find more fantastic projects like this one in Hand-Printing Studio.


