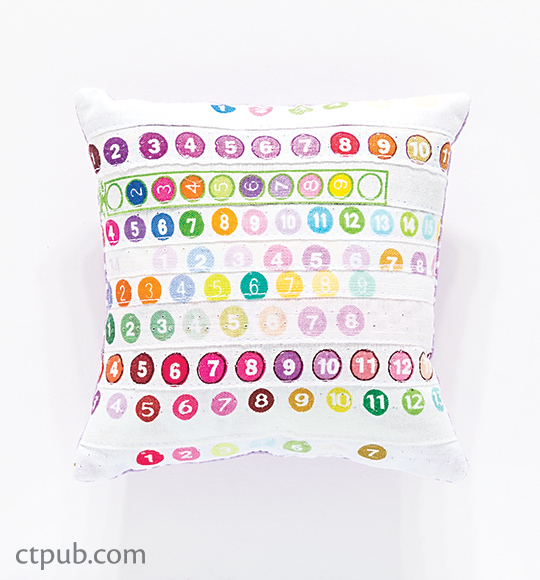
Make Every Scrap Count Pincushion
Posted by Deirdre Quirk on Feb 23rd 2017
Today we're sharing a free project from Riel Nason's popular and inspiring book, Modern Selvage Quilting! Read on for project instructions.
Finished Size: 4 1/2˝ × 4 1/2˝
Technique: Overlap Method
Keep this little pincushion in your sewing room as the perfect reminder to save your selvages. It features just the numbered dots for a great, graphic look.
Materials
Tip: This pincushion is the perfect place to show off selvages with novelty-shaped color windows! They can really add interest to a small project like this.
- Solid fabric: 1 square at least 5˝ × 5˝ for back
- Narrow-cut selvages: 9–11 strips, each at least 5˝ long with numbered color windows showing
- White fabric scrap: 1 rectangle at least 1˝ × 5˝
- Small amount of polyester stuffing or other filling of your choice
- Glue stick
- White thread
Cutting
SOLID FABRIC FOR PINCUSHION BACK
Cut 1 square 5˝ × 5˝.
NARROW-CUT SELVAGES
Cut 9 strips 5˝ long to start. Cut additional strips, if needed, as you go during construction.
WHITE FABRIC SCRAP
Cut 1 rectangle 1˝ × 5˝
Construction
Use a 1/4˝ seam allowance throughout.
Make the Front
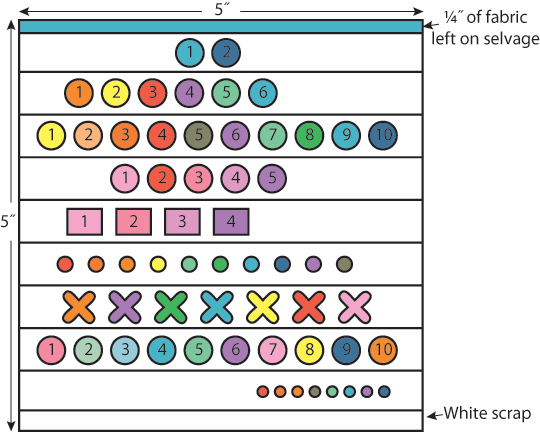
1. Referring to the Overlap Method (editor's note: Overlap Method can be found in Riel's book, Modern Selvage Quilting), use the scrap rectangle and the selvages to make a selvage block 5˝ × 5˝. Because the narrow-cut selvages are edged with only 1/4˝ of colored fabric, each colored section will be covered up when you overlap the adjoining strip.Only the white selvage parts will show on the front of the pincushion. It will likely take 9 or 10 selvages to complete the block. If it takes more or fewer strips,that’s fine.
2. Glue, sew, press, and trim.
Tip: When trimming the block to size, it is okay (and best) to keep the 1/4˝ of colored fabric on the last (top) selvage. This bit of fabric will be stitched into the seam, so it will not show on the finished pincushion.
Sew the Pincushion
1. Place the selvage pincushion front and the 5˝ square back right sides together. Sew around the outside with a 1/4˝ seam, leaving a 1˝ opening on the bottom edge. Backstitch to secure the seam on both sides of the opening.
2. Trim corners at a diagonal and turn right side out. Use a pen (with the cap on), knitting needle, or another blunt-tipped tool to push the corners all the way out.
Finish the Pincushion
1. Fill with polyester stuffing or whatever filling you’ve chosen.
2. Use a ladder stitch to hand-sew the opening closed.
Load with pins and enjoy! Then find more selvage projects to sew in Modern Selvage Quilting.