

Make a Lovely Printed Linen Cowl
Posted by Jen Fox and Sarah Case on Feb 26th 2018
This beautiful free project comes from Transfer Embellish Stitch by Jen Fox and Sarah Case. Enjoy!
Finished size: 17 ̋ × 53 ̋ (or longer based on width of fabric used)
Motif: Intersect • Transfer method: Reusable Stencil • Embellishment technique: deColourant
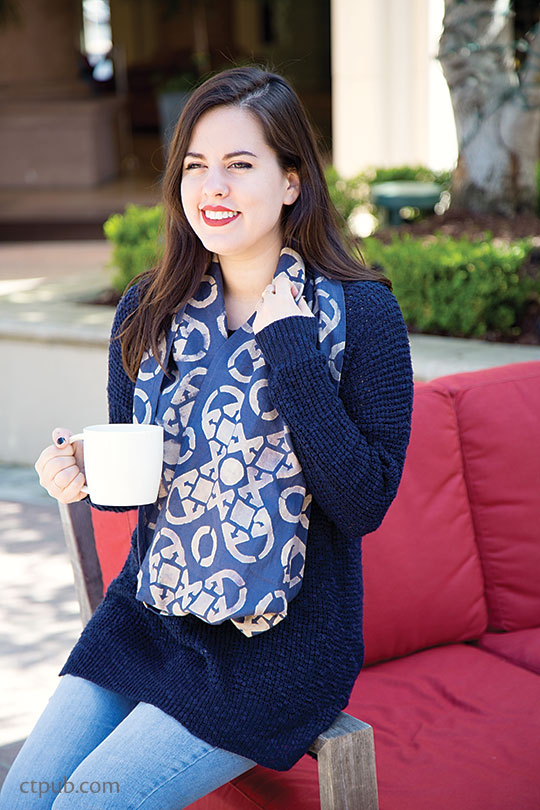
A lightweight linen cowl is an outfit-making accent by day and a cozy barrier against a chill at night. Since the motif will be visible on both sides of the fabric, it can be wrapped and worn however you like and will look great from all angles. Try excluding the snaps for a simple scarf.
Design Basics to Consider
This project is successful because of the repetition of the motif. The motif itself has many repetitive elements, which are reinforced by the actual layout of the motifs on the scarf.
MATERIALS
Transfer method: Reusable Stencil
- Quilter’s template plastic (or other translucent plastic sheet)
- Tape
- Fine-tip permanent marker
- Craft knife
- Cutting mat
Embellishment technique: deColourant
- deColourant
- Foam craft brush
- Plastic garbage bag
- Iron
- Laundry detergent
- Repositionable spray adhesive
Project
- Solid-colored, 100% linen fabric: 54 ̋–60 ̋ wide, 1/2 yard
- Coordinating thread
- 4 sew-on snaps
- Safety pin or marking pencil
CONSTRUCTION
Creating the Design
1. Make a plastic stencil of the Intersect motif (download here). Use a repositionable spray adhesive on the back of the plastic stencil to minimize seepage and adhere the stencil to the right side of the linen.
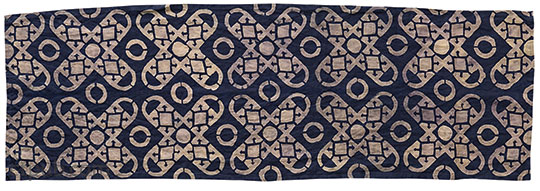
2. Following the layout shown, begin with the center motif. Use deColourant and the stencil to create the design on the right side of the linen. Wipe the stencil between every couple of motifs to remove any deColourant that has bled to the wrong side of the stencil. Use the circles in the motif to help guide your placement; the circle of each motif will overlap the circle of the previous motif. After every few applications of deColourant with the stencil, let the paste dry and iron the fabric to reveal the pattern. Work out from the center until the entire linen piece has been covered. Fig. A
TIP: Use a hair dryer on low heat to speed up the drying time of the deColourant.
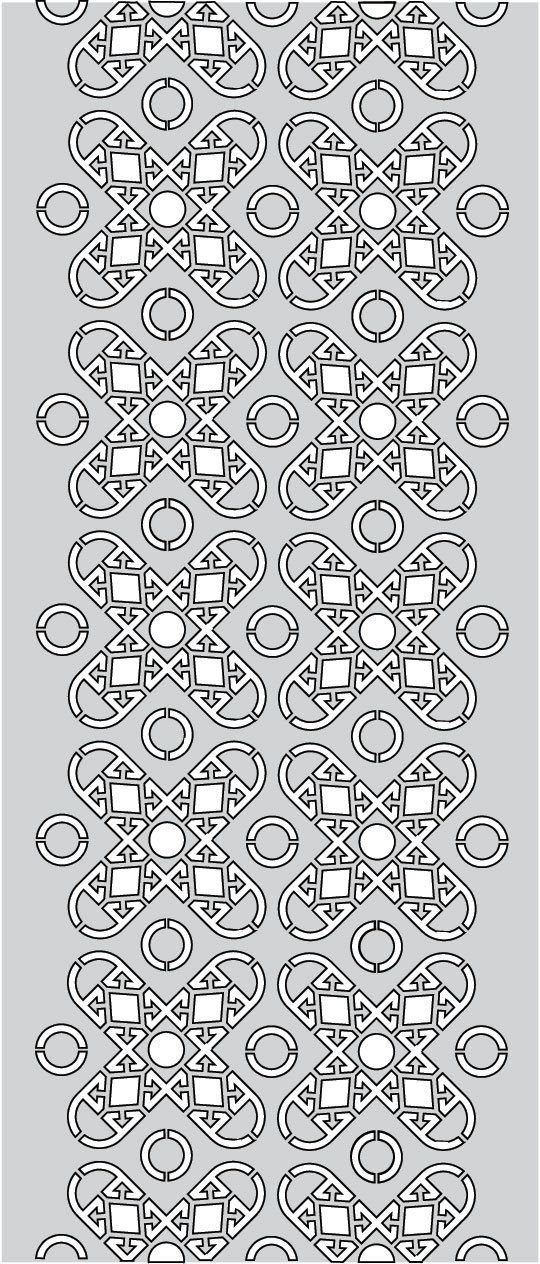
Fig. A. Begin with the motif at the center of the fabric and work your way out so the motifs appear symmetrically on the cowl.
Sewing the Cowl
1. Press the fabric and square up the raw ends if needed. Press each raw edge under 1/4".
2. Press each edge under another 1/4". Open the folds and trim off the fabric corners along the trim line as shown. This will reduce the bulk of the corners and make the fabric lay nicely. Fig. B
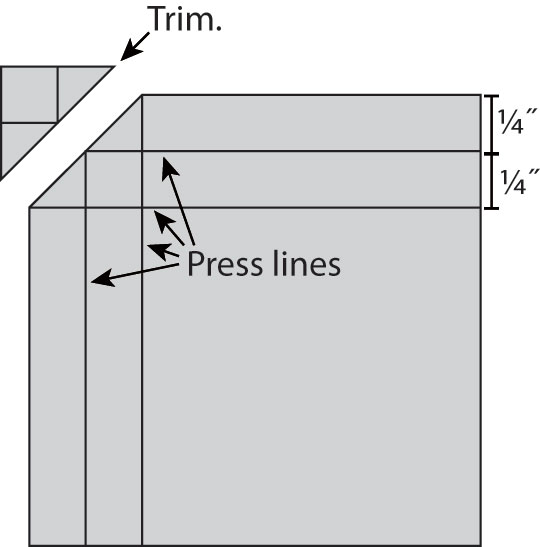
Fig. B
3. Now press the cut corners under 1/4". Fig. C
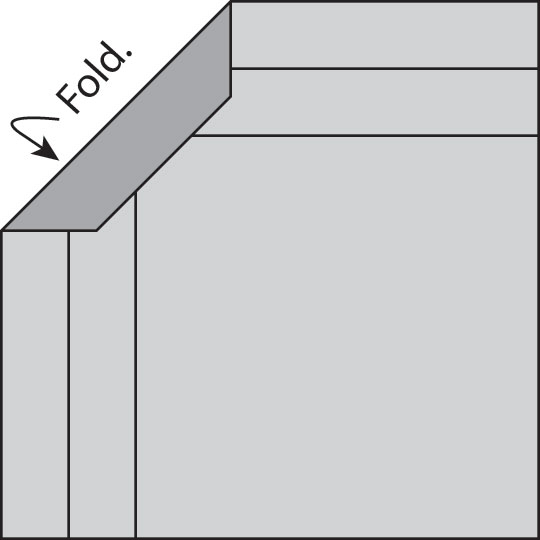
Fig. C
4. Fold along the press lines. The corners should now be mitered. Stitch around each edge close to the inner folded edge. Figs. D & E
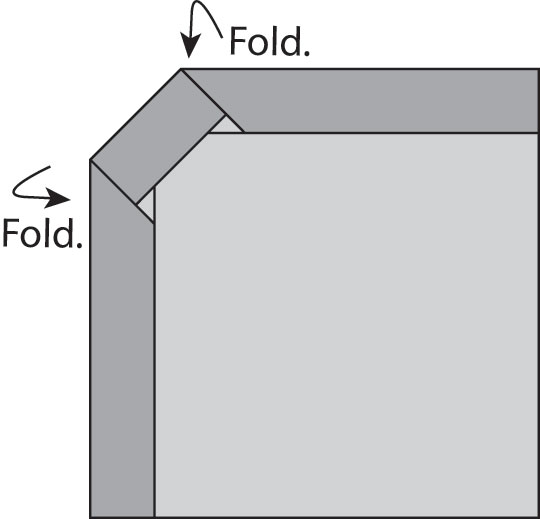
Fig. D
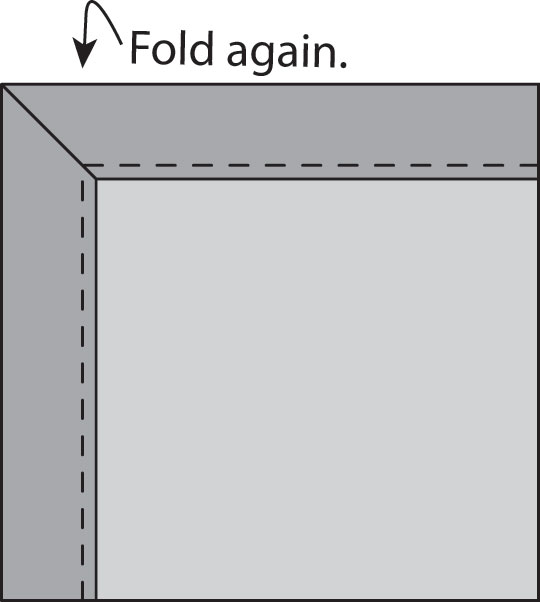
Fig. E
5. With a safety pin or marking pencil, mark the locations for the snaps on the short ends of the cowl: 2 will be 1 ̋ from the corners, and the other 2 will be evenly spaced in between.
6. Sew on the snaps just as you would sew on a button. Thread a hand sewing needle with a length of thread approximately 24 ̋ long and knot the 2 ends together. Insert the threaded needle into the fabric where your cowl is marked, but only go through one layer of fabric so the stitches aren’t visible from the right side. Working your way around the snap, secure each hole of the snap about 4–5 times, and tie a knot at the end.
7. Wash the cowl before wearing to remove the deColourant. Enjoy!
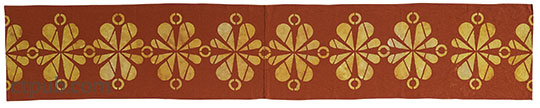
Inspiration Project: Linen Cowl using Compass motif, Single-Use Stencil transfer method, and deColourant embellishment technique
Find out how to make the inspiration project and more great embellished pieces in Transfer Embellish Stitch!


