


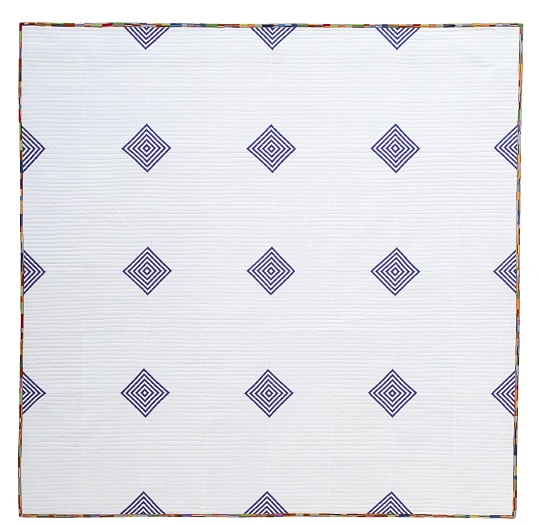
Little Cabin Floor Quilt
Please enjoy this fun, free project taken from Stripe Quilts Made Modern: 12 Bold & Beautiful Projects • Tips & Tricks for Working with Striped Fabrics by Lauren S. Palmer.
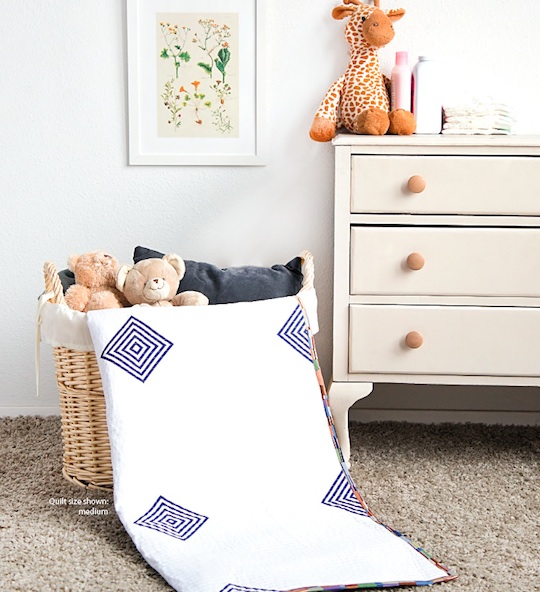
Little Cabin Floor Quilt
LEVEL: Easy FINISHED BLOCK: 7½˝ × 7½˝
A shout-out to My Old Kentucky Home. Inspired by geometric floor tiles, these simple quilt blocks are arranged to form little Log Cabin blocks at each intersection. Narrow even-width or irregular stripes work best. Choose a coordinating solid that contrasts well with the striped fabric.
Materials
- 3½˝ × 3½˝ square clear acrylic quilting ruler (recommended)
- Removable fabric marker (recommended)
Note: Because the striped blocks are cut on the bias, the number of squares you will be able to cut from a yard of fabric will vary depending on your personal cutting style. Fabric requirements vary much more when cutting on the bias as opposed to with the grain, so an extra 1/4 yard has been added to the striped fabric requirements in this project to account for these variations. You may want to purchase more than the listed yardage, particularly if you’re a beginning quilter.
Fabric requirements
Small (45 1/2" square):
- 1/4˝ navy-and-white stripe: 7/8 yard
- Solid white: 2 yards
- Binding (For double-fold binding): 1/2 yard
- Backing & Batting: 54˝ × 54˝ each
Medium (60 1/2" square):
- 1/4˝ navy-and-white stripe: 1 1/4 yards
- Solid white: 3 yards
- Binding (For double-fold binding): 5/8 yard
- Backing & Batting: 69˝ × 69˝ each
Large (90 1/2" square):
- 1/4˝ navy-and-white stripe: 2 1/2 yards
- Solid white: 6 3/4 yards
- Binding (For double-fold binding): 7/8 yard
- Backing & Batting: 99˝ × 99˝ each
Cutting List
Before cutting any fabric, refer to "Cutting Tips for Fabric," below. To cut, first unfold and press the striped fabric, including the factory fold. Work with a single layer of fabric and cut only 1 square at a time for accuracy.
Small (45 1/2" square):
- 1/4˝ navy-and-white stripe: 32 pieces of bias-cut 3 1/2" x 3 1/2"
- Solid white: 8 strips 8" x WOF, subcut into 36 squares 8" x 8"
- Total pieced blocks needed: 32
- Binding (For double-fold binding): 5 pieces 2 1/2" x WOF strips
Medium (60 1/2" square):
- 1/4˝ navy-and-white stripe: 60 pieces of bias-cut 3 1/2" x 3 1/2"
- Solid white: 13 strips 8" x WOF, subcut into 64 squares 8" x 8"
- Total pieced blocks needed: 60
- Binding (For double-fold binding): 7 pieces 2 1/2" x WOF strips
Large (90 1/2" square):
- 1/4˝ navy-and-white stripe: 140 pieces of bias-cut 3 1/2" x 3 1/2"
- Solid white: 29 strips 8" x WOF, subcut into 144 squares 8" x 8"
- Total pieced blocks needed: 140
- Binding (For double-fold binding): 10 pieces 2 1/2" x WOF strips
Cutting Tips for Fabric
Navy-and-White Stripe
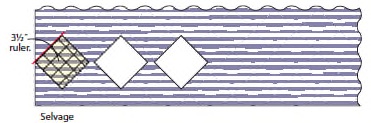
- Begin at a corner of the fabric, and line up a 31/2˝ × 31/2˝ square ruler with the diagonal running along the intersection between 2 stripes. Cut around all 4 sides of the square ruler, taking care not to cut too far past the corners.
- Continue cutting 31/2˝ bias A squares from the striped fabric until you reach the corresponding number of squares needed for your quilt size. Take care to cut all the striped squares the same, so that the central Log Cabin design will match up during piecing. It’s important that your ruler be clear so you can see through it to ensure that the stripes are lined up precisely before cutting.
Solid White
- Cut B squares from WOF strips.
Construction
Seam allowances are 1/4˝ unless otherwise noted.
Piecing Blocks
Tip: Bias-cut fabrics behave differently than fabrics cut on the straight grain. Because the grain along the cut edge is crossed and not square, the resulting cut fabric is very stretchy and prone to distortion.
- Before you begin sewing, set aside 4 of the 8˝ × 8˝ white B squares for the corners of the quilt top.
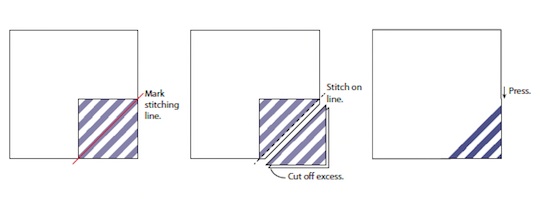
- Place a striped A bias square on a corner of a white B square, right sides together, with the stripes oriented as shown. Use a removable fabric marker to draw a diagonal line from corner to corner.
- Stitch on the marked diagonal line to join A to B. Use a rotary cutter to trim away the corner, leaving a 1/4˝ seam allowance. Press.
- Repeat Steps 2 and 3 to sew the remaining navy striped squares to the white squares.
Quilt Construction
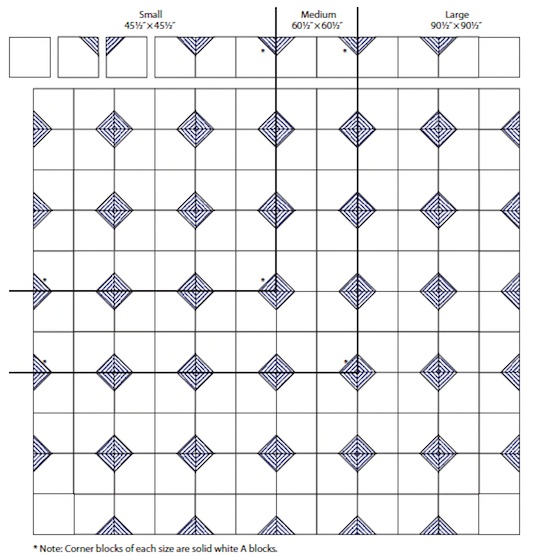
- Arrange the pieced blocks as shown in the quilt assembly diagram, and add the 4 white A squares set aside in the beginning as the 4 corner blocks.
- Sew the blocks together into rows. Press the seams in each row in the opposite direction of the seams in the previous row.
- Join the rows together and press after attaching each row.
Finishing
- Layer the backing, batting, and quilt top. Baste if needed. Try simple straight-line quilting or a spiral.
- Bind using double-fold binding.
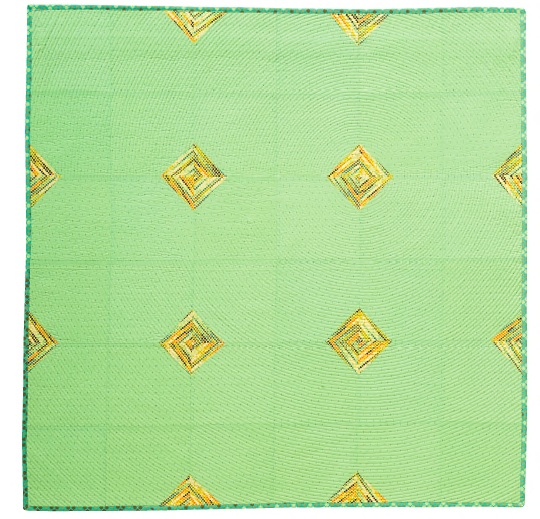
ALTERNATE FABRICS Try using an irregular stripe cut from various parts of the fabric.
For more great projects like this one, check out Stripe Quilts Made Modern.


