

How to Quilt Curly Feathers
Posted by Deirdre Quirk on Aug 8th 2018
Looking for some quilting inspiration? Look no further! This fantastic feather tutorial is taken from Visual Guide to Free-Motion Quilting Feathers by Natalia Bonner.
Some examples of the Curl Feather are Curl Pod Feather with Ribbon Candy Fill, Hook Feather, Seedling Feather, and Sunflower Medallion Feather (images left to right, top to bottom, starting from upper left).

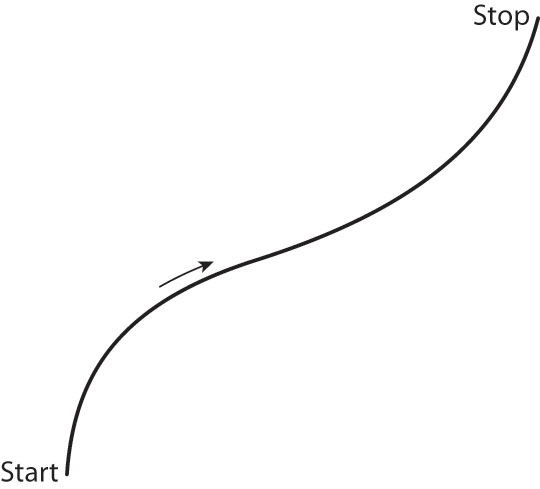
1. Stitch a single spine. I generally start at the bottom of the feather and stitch to the top. At this point you can either stitch back down the spine or cut the threads and start again at the bottom of the spine.
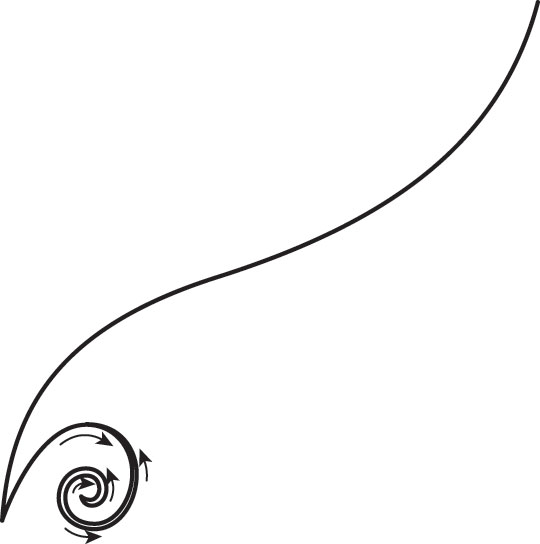
2. At this point you can either stitch back down the spine or cut your threads and start again at the bottom of the spine. Starting from the bottom point of the spine, stitch a single curl feather on the right side; you’ll stitch to the inside of the curl and then all the way back out along the same line. If you veer off the original line a little bit, it gives the feather a more casual and modern look.
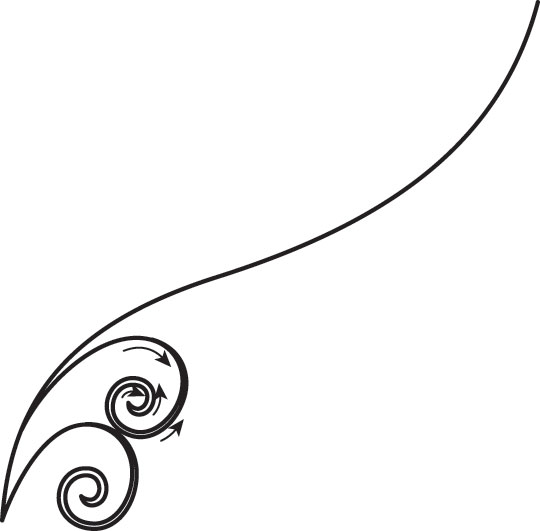
3. Stitch a second curl feather on the top of the first one, stitching in the same manner; there can be a small space between the first and second feather.
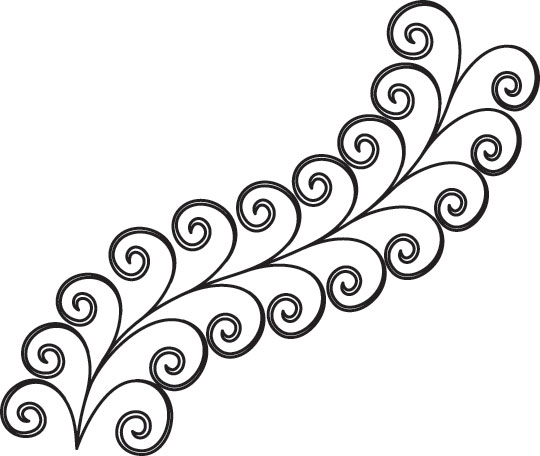
4. Stitch a third curl feather in the same manner as the first two feathers, and repeat this pattern until all the feathers on the right side of the spine are complete.
5. Stitch the feathers on the left side of the spine in the same manner.
Tip: When machine quilting feathers, you often need to join segments of feathers together, especially when quilting a medallion or a border—it can become tricky to fit feathers together. This is what I love about modern feathers: they don’t all have to be the same size. Let go of perfection. You’ll enjoy these feathers so much more. If you’re having a hard time fitting in the feathers and gauging spacing, I recommend using a blue water-soluble marker and marking the feathers. When you’re about 3 ̋ from the feather or edge you will be meeting, draw the feathers in to fill in the space before you stitch them. Although you are drawing them first, you can erase or re-draw as needed. This will help you learn to gauge the spacing—and also give you practice getting nice feather shapes.


