Have a Little Fun with Labels!
Posted by Diane D. Knott on May 4th 2017
We’ve all been told the importance of documenting basic information on our quilts by using labels. Depending on who you ask, you will get a variety of answers as to what specific information you should include. Beyond who made the quilt, the date, and location, it’s really up to the quilter to decide what should be included.
I like to think of quilt labels as more than just information; I like to include fun design elements from the front of my quilts as well. For my book Scrap Quilt Secrets, I chose a variety of fun label ideas to record the quilter and the date. Here are a few examples:
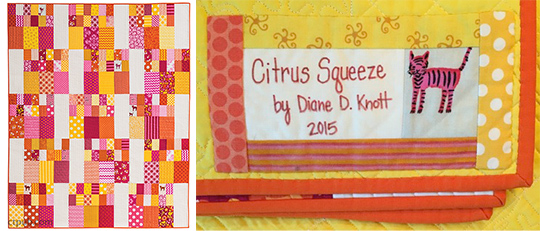
This label used a fussy-cut piece of the fabric from the front of the quilt. I fussy cut several of these cute tigers for the front, so why not add one to the label as well? A simple border of scraps from the front frame this cute little guy.
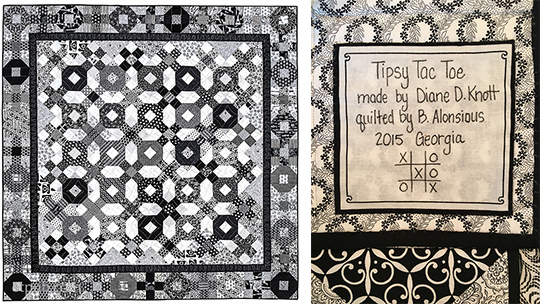
This label has a simple game drawn onto the preprinted label. Because the name of the quilt is Tipsy Tac Toe, I thought it would be fun to add the motif to the label as well. I’m no great artist but this gets the point across!
When making the border for this bright quilt, I contemplated using variegated thread for machine stitching the flowers onto the background. I tried a practice flower to see if I liked it. I didn’t! But I thought it would be silly to toss it, so I bordered it and added some hand stitching, and it makes a perfect label!
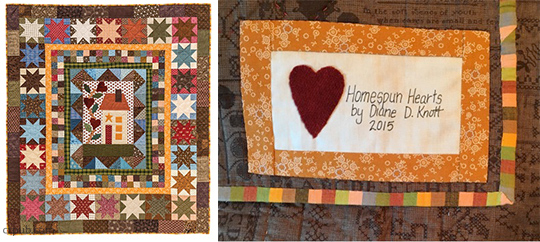
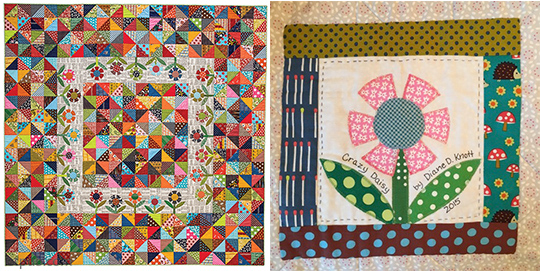
If the quilt has appliqué on the front, I really like to add a small appliqué element to the label. This quilt features some wool appliqué, so I added a small wool heart and a simple fabric frame to a very basic label. It also comes in handy if the front loses a heart—there’s an extra on the back!
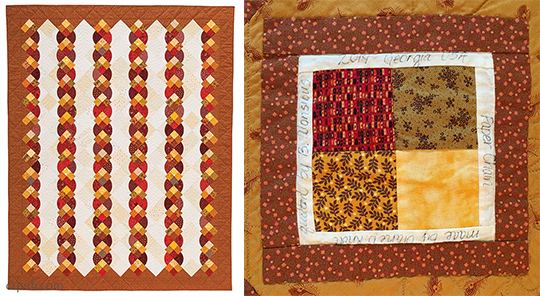
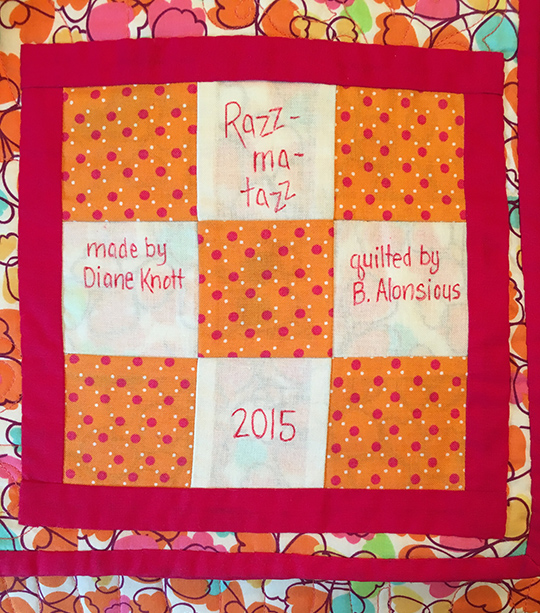
An extra block is always a great way to label a quilt! This nine-patch was left over after piecing and made a perfect home for the basic information printed on the light squares. I have used this method many times. If the fabrics don’t show the words, add a small border like I did here for Paper Chain.

Don’t have a whole block left over? Use up some smaller elements, like these cornerstones, or sew some scraps together to make smaller blocks and sandwich the label between them. It makes a small label easier to find, and it’s a fun element that is unexpected.
Sometimes, the label can just be fun for no reason at all! I chose to add prairie points from leftover binding fabric on this quilt. The preprinted label border was a nice frame for the information, but I was in the mood to make prairie points, so I did!
Tips for writing on fabric labels:
- Use a fine-tip permanent ink pen.
- Type and print the words on paper first, then trace them onto the fabric.
- Press the shiny side of freezer paper to the back of the fabric to stabilize it while writing.
- Practice on scraps or muslin first.
- Test your pen to make sure it’s working well before starting.
- Write in pencil first, then trace in permanent ink pen.
- Press the quarter-inch seam allowance under well with an iron prior to pinning.
- Use an appliqué or slip stitch to attach the label to the quilt, using care not to sew all the way through to the front of the quilt.
- Match your thread to the label edge, changing colors if needed.
- Relax and have fun!
I hope these ideas get your imagination going. Have fun labeling your quilt, and don’t forget to add a little something unexpected!
Enjoy every stitch,
Diane