

Flip & Fuse Is So Flip & Easy
Posted by Marcia Harmening on Nov 18th 2015
Don't run away! Appliqué is not an evil word! Check out this quick and easy "Flip & Fuse" method to turn under all your raw edges and stitch appliqué pieces in place without threading a single needle.
1. Begin by selecting a lightweight fusible interfacing. I have two products I like to use: Pellon® 911FF Fusible Featherweight, which comes on a bolt in a width of 20”, and C&T's Wash-Away Appliqué, which comes on 8 1/2" x 11" pieces of paper that fit in your printer. The Pellon product is less expensive, but you will have to trace your appliqué pieces. The C&T product works in your home printer eliminating the need to trace, but it costs more. Both products are wonderful–it just boils down to time vs. money.
2. Pin the fusible interfacing on top of a fabric piece so the glue side of the interfacing is toward the right side of the fabric. The side with the printed or traced line should be on top.
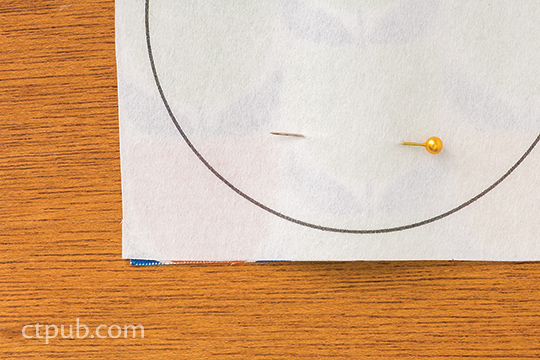
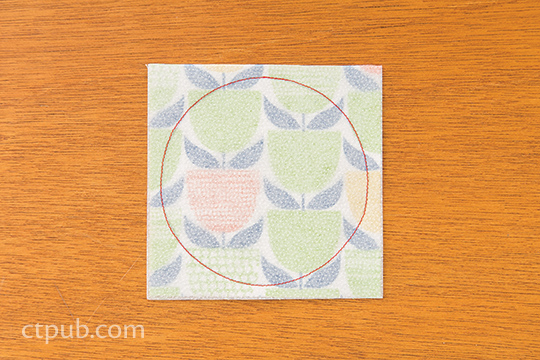
3. Sew the two pieces together on the line.
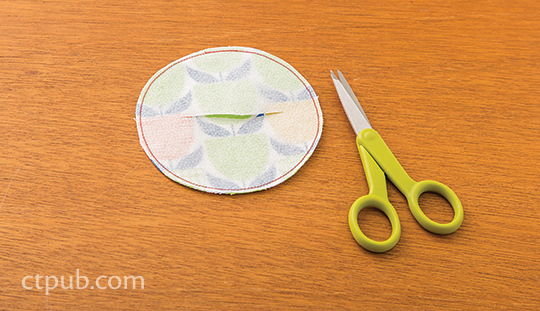
4. Trim the excess fabric and interfacing 1/8" beyond the stitching line. Cut a long slit in the interfacing, being careful not to cut the fabric underneath.
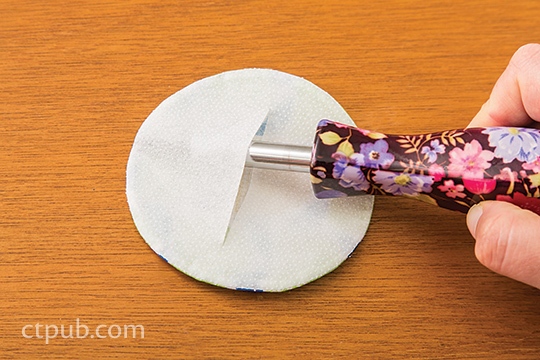
5. Turn each unit right side out by pulling the right side of the fabric through the slit in the interfacing. The fusible side of the interfacing is now on the outside. Stick a blunt instrument or your fingers through the slit in the interfacing and gently smooth out the seam around the edges by finger-pressing until you are pleased with the shape of the unit.
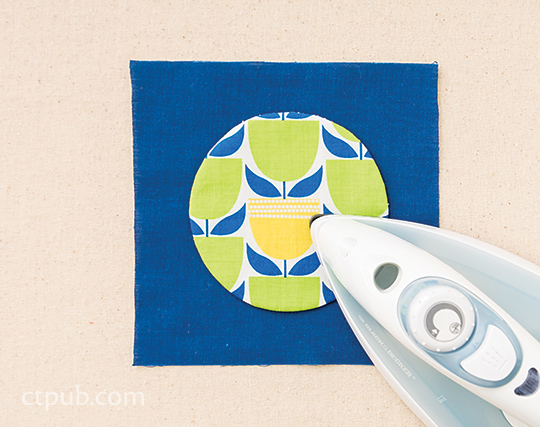
6. Arrange the piece on a background block and fuse in place with a hot iron.
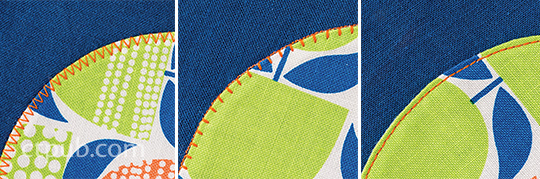
7. Stitch each piece to the background block using a narrow zigzag stitch, a button-hole stitch, or even a straight stitch along the edges.
Learn more fusible appliqué tricks and put those skills to good use with Marcia Harmening's book, Flip & Fuse Quilts!


