Fine-Tuning the Stitch & Flip with Bonnie Hunter
Posted by Bonnie Hunter on Jun 14th 2016
Hello everyone!
I’m back again for a June blog post, hoping to share with you something that makes my quilting life easier as I work from project to project.
On our previous post, Making the Best Cut, Ellen commented: "I love all of Bonnie's tips. Since I read her blog my accuracy has improved significantly. I am however still having trouble with flip and sew corners. No matter how careful I am it seems that I get a wide variety of results and so I am unable to diagnose my own problem. I would like to see any help on these.
Thanks for all the valuable information so far and I'll look forward to more."
Ellen also asked for help cutting with specialty rulers, and I’m happy to cover that in a future post, as soon as my new Essential Triangle Tool by C&T hits the market and we can do a video as well as a photo tutorial. It’s coming!
So today, let’s tackle the first of Ellen’s requests: the stitch & flip corners!
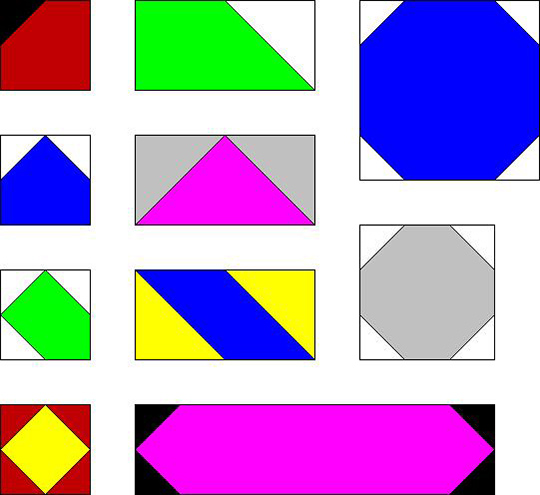
Shown here are some common units now easily made with stitch & flip corners.
I’d love to thank whoever first invented these. Remember life before these? We’d have to cut triangles, octagons, or trapezoids and actually sew cut half-square triangles in place, hoping that things would line up and we’d get the desired result.
Not so easy when sewing a triangle to a trapezoid! When that didn’t work, I resorted to paper piecing the units because it was the only way they would come out accurately.
Then along comes the technique of placing a square on top of the unit, sewing across the diagonal of the square, and folding up the triangle and clipping away the excess beyond the seam. AWESOME!
Only.
There appear to be some issues and some various ways of dealing with these issues.
Here is my experiment:
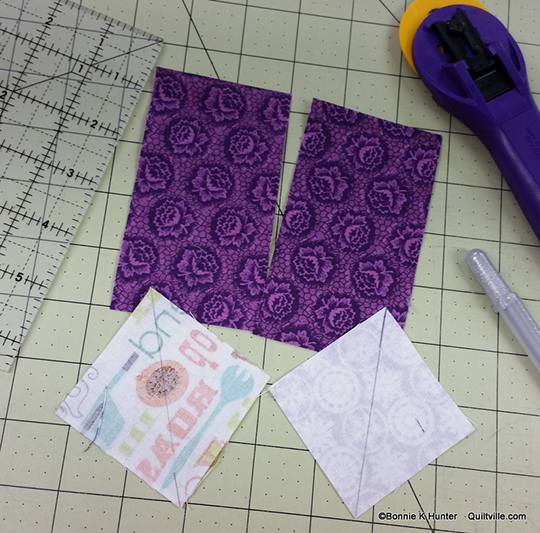
Today I’m starting with two identical units made from 2 1/2" X 4 1/2" rectangles with a 2 1/2" square for each corner.
I have drawn a diagonal line on top of each neutral square.
There are many reasons WHY I draw lines instead of using something that tapes down to my machine bed allowing me to feed a diagonal square from point to point through my machine. The first reason is my vision. I need the line on TOP of my work so that I can get a straight seam. I am sewing blind if there is a line underneath my unit.
Yes, drawing lines takes time, but I can make up for the two seconds it takes to draw a line in the time it takes me to sew it accurately because there IS a line.
The second reason might not be obvious to everyone, but I want you to think here. Most of the time we read the directions, “Draw a diagonal line from corner to corner and SEW ON IT.”
IF you sew ON that line, your unit will ALWAYS be a bit short and will never reach the end of your base unit because the fold has to be made from the LEFT of the thread. If the stitching is on the fold line, you’ve short sheeted your unit!
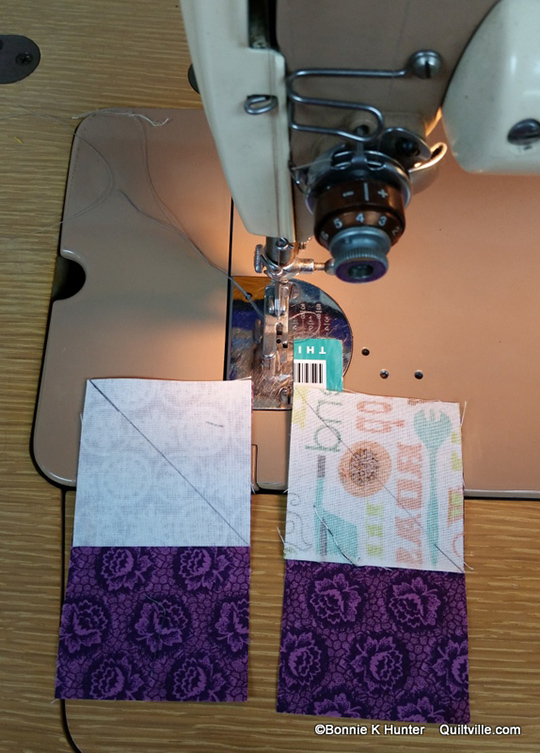
I’ve got two identical units going through the machine. The first one will be sewn ON the line. The second one will be stitched to the RIGHT of the line, just into the seam allowance, with the thread up against the line but not on it.
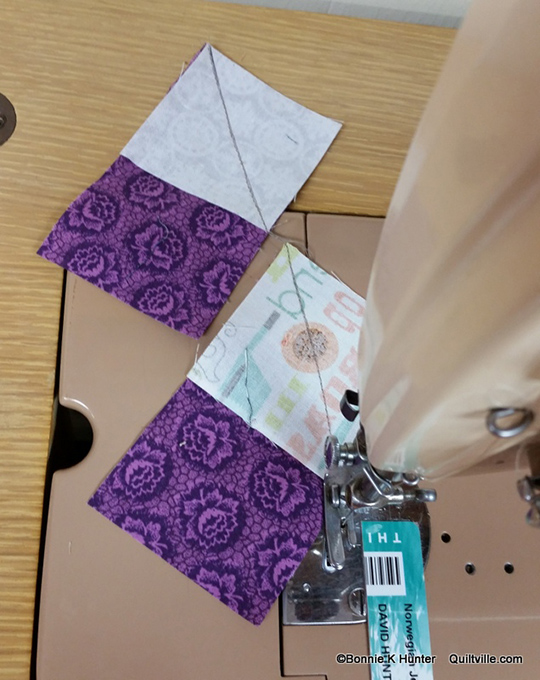
When sewing diagonals like this, I make sure to sew a bit slower and aim for accuracy. It’s important to just breathe, slow down, and watch what you are doing.
If you have a foot that has a 1/4" edge guide that doesn’t like to travel “across country,” you may want to switch to any open-toe foot that gives you good visibility for sewing across the fabric. Here I am sewing on my 1958 Singer 301, and I can see quite well where the needle is as I sew because it has a slant shank for greater needle visibility.
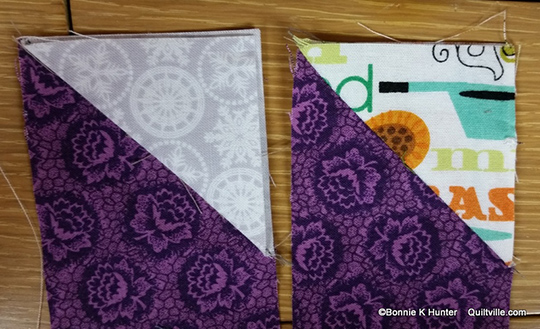
The proof is in the FOLD OVER! Look at the difference!
The one on the left was sewn ON THE LINE. The one on the right was sewn NEXT to the line, to the right of the line just into the seam allowance. Same thread, same machine. BIG difference.
Those patterns that direct you to stitch ON the line may also say that “it’s okay if it doesn’t reach all the way when you fold it over, just leave your base unit in place and only trim out the middle layer.”
I beg to differ, especially if the stitch & flip corner is a light fabric. The dark fabric underneath may show through, dulling the brightness of your lights.
Leaving the background unit in place also adds a lot of bulk in areas where units join to each other. Who wants double the thickness in these areas?
Always remember that the diagonal line is where you want the fabric to FOLD and in order for it to fold there, you need to stitch next to it, not on it.
And then there is that whole issue of the fun of bonus units that are possible—be watching for that in a future post!
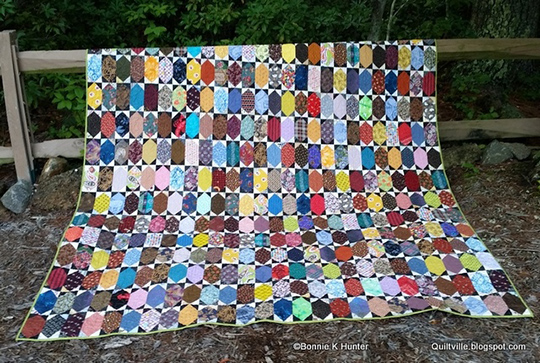
If you want to give stitch & flip corners a try, head on over to my free tutorial for lozenges! You’ll get lots of practice, and sew up a bunch of scraps in the process!
Is there a topic you would like me to discuss or a question you would like answered in a future blog post? Leave me a comment below and we may feature you in a future post.
Bonnie K. Hunter is the author of several C&T titles, including Scraps & Shirttails, Scraps & Shirttails II, String Fling, Adventures with Leaders & Enders, and More Adventures with Leaders & Enders.
Be watching for a new book release from Bonnie and C&T in the fall of 2016!
Bonnie is also the Addicted to Scraps columnist for Quiltmaker magazine, giving hints, help, and tips in every issue to help put your own Scrap User's System to good use, making more quilts in less time.
Follow Bonnie's Daily blog at http://quiltville.blogspot.com
Facebook: http://facebook.com/quiltvillefriends
Facebook Group: Quiltville's Open Studio
Instagram: @quiltville_bonnie


