

Can These Blocks Be Saved?
Posted by Rayna Gillman on Aug 8th 2017
Hi! I'm Rayna Gillman and if you know me, you know how I work.

If not, you need to know that I ditched the patterns 30 years ago and have been working improvisationally (no patterns, no rules, and mostly, no rulers) since then.
I never know what the result will be when I start playing (yes, my work is play). Sometimes I'm really happy with it, and other times I need to get out my rotary cutter and make some changes.
My new book, Create Your Own Improv Quilts: Modern Quilts with No Rules & No Rulers, translates my way of working into a modern setting. Improv, after all, is one of the characteristics of modern quilting. But I have to confess that as I was writing the book and experimenting, not everything was a masterpiece.
So . . . I'll share my journey from bleh to better, as I turn these blocks into something new. Here's the story.
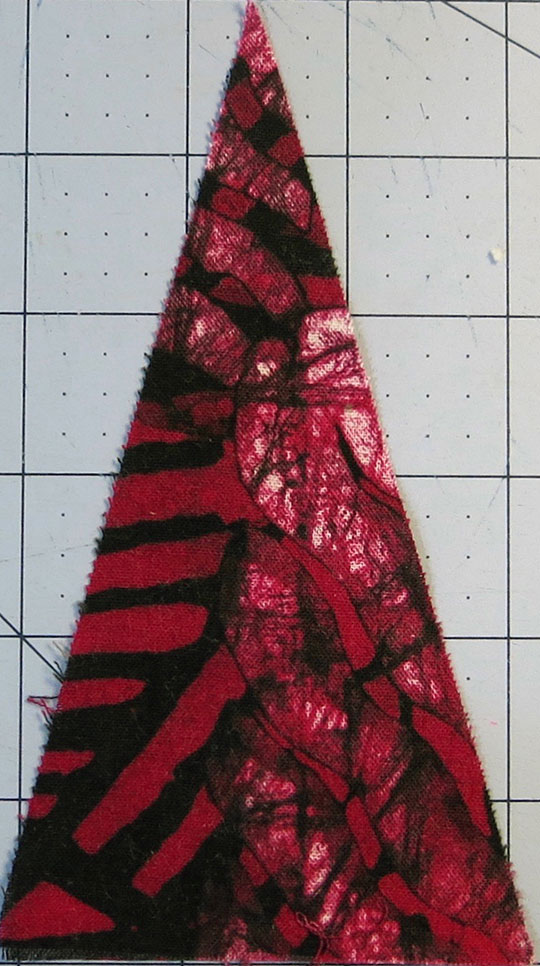
I had an idea for a quilt based on a beaded hanging I saw in South Africa, using isosceles triangles. But my triangle blocks ended up being different sizes, and what I had in mind did not work. In the end, I took apart the quilt top and was left with a pile of random triangle blocks.
*Note: This just reinforced my conviction that it is better to start playing without having a vision than to be disappointed when what you visualized does not work.
I couldn't throw them out. So I asked myself "Can these blocks be saved?" and the answer, of course, was YES!
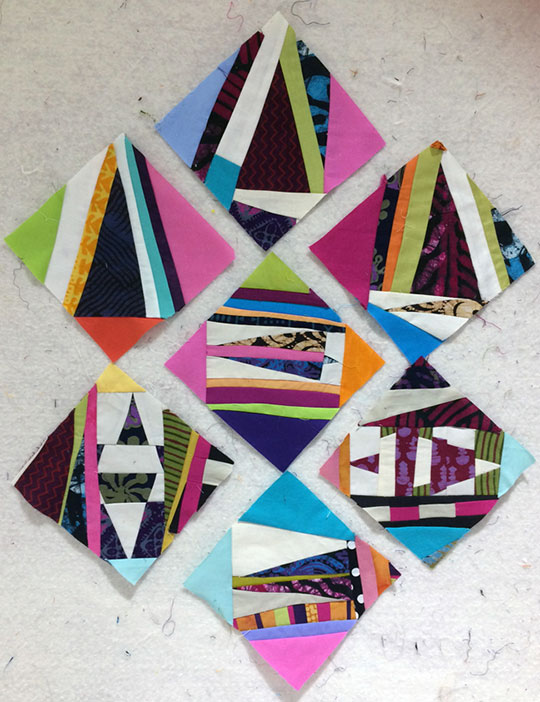
Several days later, I had several new bright and happy blocks that were totally improvised, and I was really happy with the results. Icould picture them in a modern setting. But I needed more.

Fortunately, I had (and still have) plenty of rejects from that project to work with!. As you can see, the results are all slightly different but have a family resemblance because they all started with the same blocks. Many of the fabrics and colors repeat.
Now I have made two more, and auditioned an idea for a layout on my thread-covered design wall.
(If you squint, the wall looks better, and you can even imagine a streak of lightning or two between the blocks.) But I havea long way to go and who knows what form it will eventually take?
So how did I get from there to here?
I used the triangles from the ripped-out quilt, but this will work with scraps and blocks of any size or shape that need improvement . For a modern look, add plenty of solids.
Because I experiment all the time, I tried several ways of reconfiguring the original triangles.
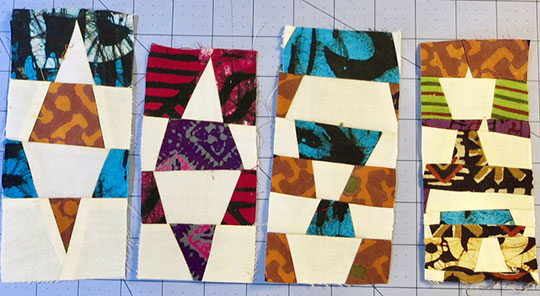
Method A: Slice two horizontally and combine the pieces
1. I layered two different blocks.

2. Sliced them across into four sections (although it could also have been two or three).
3. Alternated the segments and arranged them until they pleased me, then sewed them together.
I repeated the process with several others.
*Note:If you do this, you don't have to use all of the segments from the cut blocks. Put them aside and use them later. I put my leftover sections all into one block, which is on the right in the photo below.
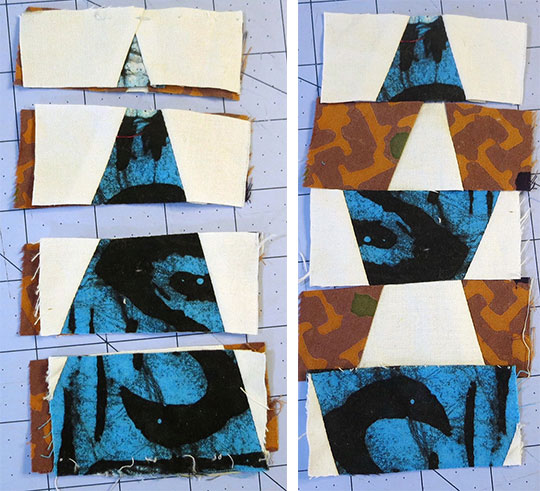
Method B: Slice vertically and rearrange
1. I switched half of each triangle and inserted a strip into the first one. (Not my favorite, but it will be fine when it's used.)
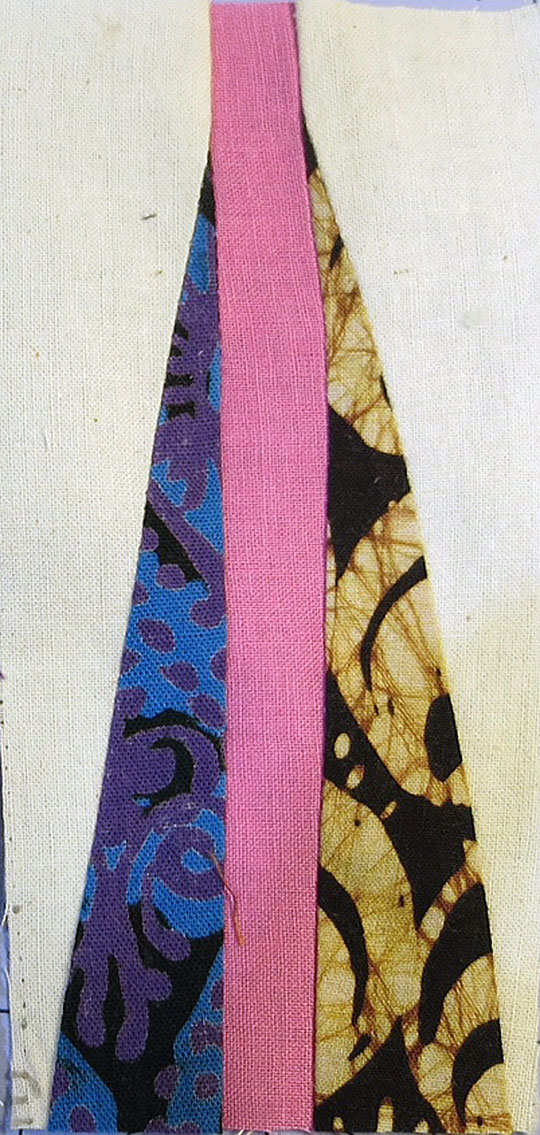
2. Turned half of the other one upside down.
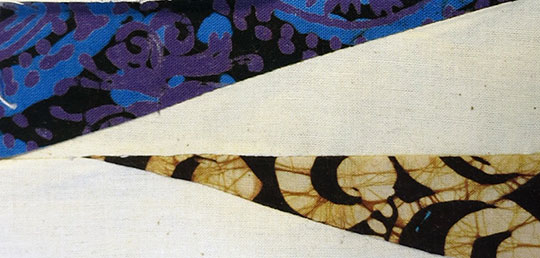
3. Wondered how it would look placed on a muslin background.
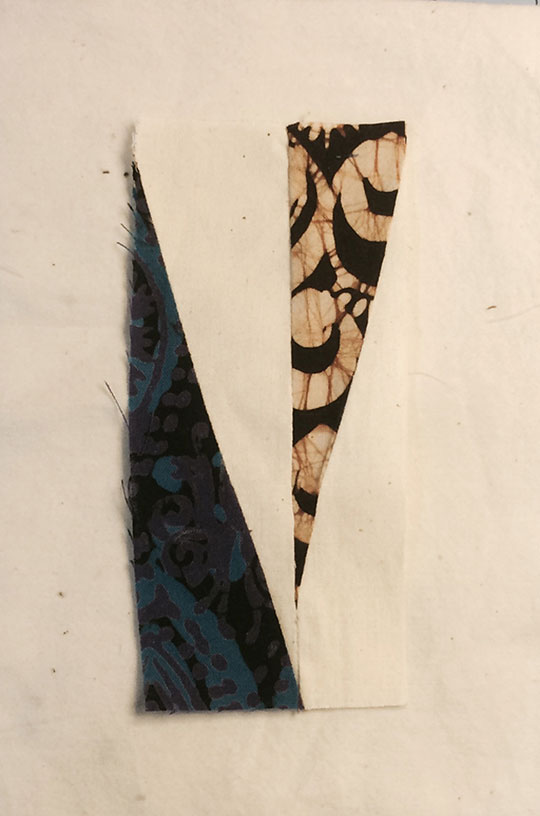
From a distance, you can almost imagine that these triangles are floating. That opened me to possibilities for another modern quilt, and I tucked that idea away for the future.
I still had a random assortment of blocks whose sizes and shapes were not quite the same. Some had been used, while others were still bare triangles.
How could I unify them? How could I use them all in one piece? I could see only one solution for pulling them together.
Method C: Use a paper foundation
But the paper had to be without lines, numbers, or precision because I was improvising. And there had to be no itty bits of paper to rip off when I was done. So, once again, I experimented.
1. I cut a bunch of 6" x 6" newspaper squares and went to work.
2. Laid this block on the paper.
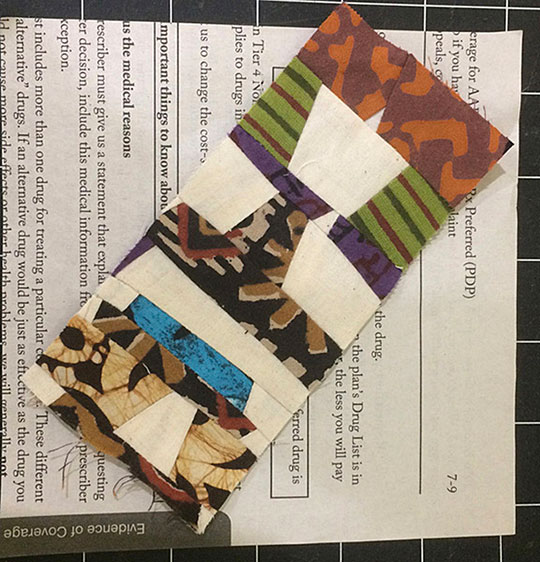
3. Added a strip.
4. Added more.

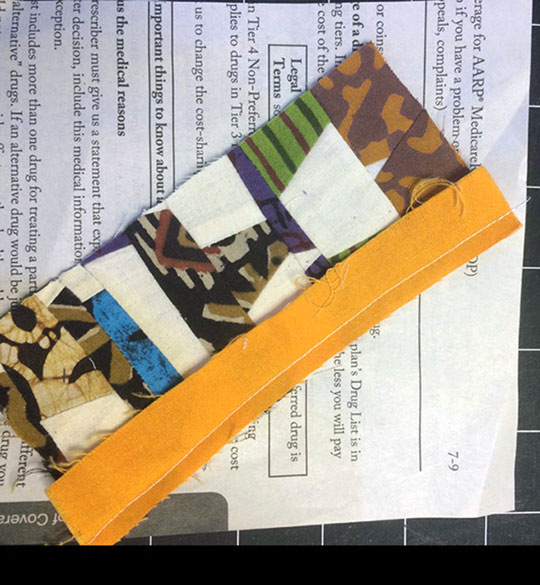
5. Kept adding till the newspaper was covered.
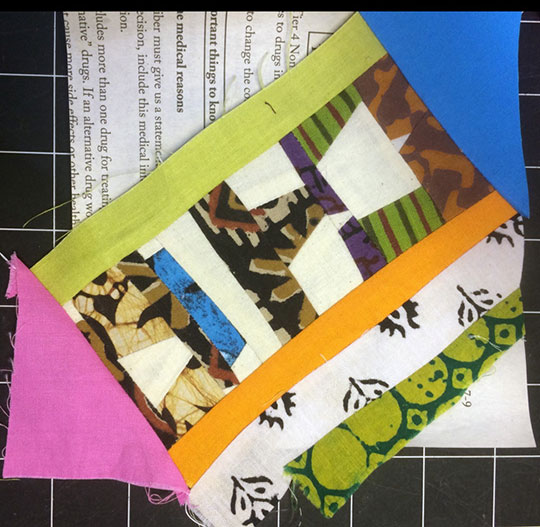
6. Trimmed as I went. This is the last trim.
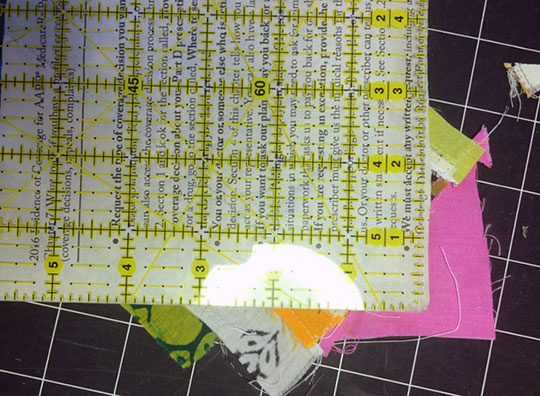
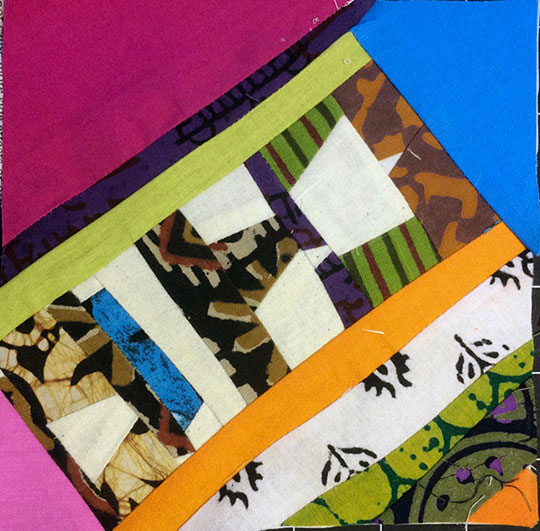
And there you have it! The paper backing comes off in a nanosecond! If you want to know the secret, I reveal it in Create Your Own Improv Quilts: Modern Quilts with No Rules & No Rulers. The book will hit the shelves in December, but you can pre-order a personally signed copy now on my website, www.studio78.net, and click on BUY MY BOOK in the menu bar.
The book is full of other fun, modern, improvisational ways to work—so join me in the fun of making stress-free, rule-free, pattern-free modern quilts!
P.S. Maybe by the time the book is out I'll have this no-pattern paper-pieced quilt done. Stay tuned. Don't forget to visit my website and my blog. And come see me on Facebook, Instagram, and Pinterest .


