

Bonus Buddy Bonanza!
Posted by Bonnie Hunter on Mar 9th 2018
Hi everyone!
I’m here on the C&T blog today to let you know of a little gadget that I can’t live without.
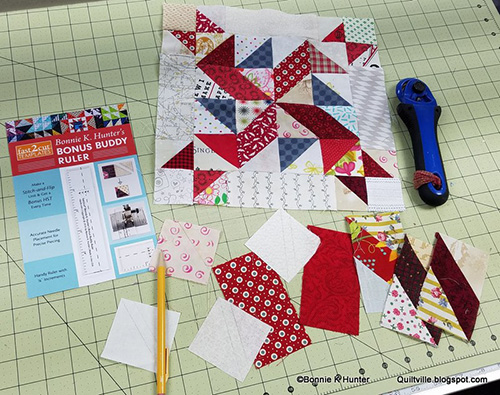
Every go-to-class bag, every sewing machine NEEDS a Bonus Buddy! It’s the perfect size for marking lines, measuring units, and setting your correct seam allowance by using the needle holes for either 1/4’’, 3/8’’, 1/2’’ or 5/8’’. But the best part of the Bonus Buddy is the bonus line for quickly marking stitch & flip corners when you want to save that bonus triangle in an ALREADY CORRECT SIZE.
With a 2 1/2’’ base square, I get a 2’’ unfinished bonus triangle unit that already measures 2’’ and finishes at 1 1/2".
It’s all in the placement of the line and where you sew in regard to the line. Full-color photos are included with complete directions, and you’ll be putting your bonus triangles to good use in no time.
The Bonus Buddy tool was first included with the Essential Triangle Tool package (and still is) but is also available as a stand-alone single so you can have multiples.
Where can you use bonus triangles? EVERYWHERE! And today I’m giving you a fun block pattern, Yankee Puzzle Plus, that uses all of the bonus triangles from the stitch & flip corners from the diamond-in-a-rectangle units in the block as well.
This tutorial also uses the Essential Triangle Tool for half-square triangle units. You can use any method that gives you a 2 1/2’’ unfinished half-square triangle, finishing at 2’’ in the block.
For this block you will need:
From red scraps cut:
• 4 rectangles 2 1/2’’ x 4 1/2’’
• 2 1/2’’ strips for half-square triangles, random short lengths for variety
From gray scraps cut:
• 1 strip 2 1/2’’ x approximately 6 1/2’’ long – enough to get 4 matching half-square triangles units.
From neutral scraps cut:
• 2 1/2’’ strips for half-square triangles, random short lengths for variety
• 8 squares 2 1/2’’ x 2 1/2’’ for stitch & flip corners.
• 4 squares 2’’ x 2’’ for cornerstones
• 4 rectangles 2’’ x 5 1/2’’ for sashings
Essential Triangle Tool Cutting
Place a red 2 1/2’’ strip with a neutral 2 1/2’’ strip, right sides together. You may want to cut for 2 blocks at a time, cutting 2 half-square triangle pairs per strip set, giving you 4 different red/neutral half-square triangle units per block.
For more on the Essential Triangle Tool, refer to my previous C&T post here.
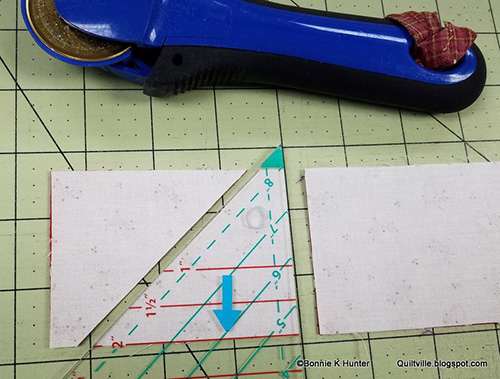
When cutting, remember to keep the line you are measuring by, in this case the 2’’ finished red line, ON the fabric, not on the mat beside the strip. Get it on there!

Setting Seam Allowance
I sew by unit size. And I will adjust my seam however I need to so unit size is achieved.
Read my previous article on the C&T blog for accurate cutting HERE.
How we cut the fabric is just as important as where we sew it to reach unit size, and a test is always required for me.
Place the needle in the 1/4’’ hole of the Bonus Buddy. Holding it straight, lower the feed dogs. There is enough “wiggle room” within the hole to fine tune your unit size depending upon fabric thickness, the kind of thread you are using, and how you tend to cut your pieces. Reaching unit size has all of these variables to keep in mind.
I like to use strips of old hotel room key or gift card and some removable double-stick poster tape to make a stationary guide on my machine bed to run my fabric up against. I place this next to the Bonus Buddy ruler, and when it is adhered, I remove the Bonus Buddy Ruler to sew.
If you have a modern zig-zag machine or one with a front-drop bobbin, you can make your guide small enough to fit just the bobbin cover in front of your feed dogs, so you don’t have to pull it up every time your bobbin runs out.
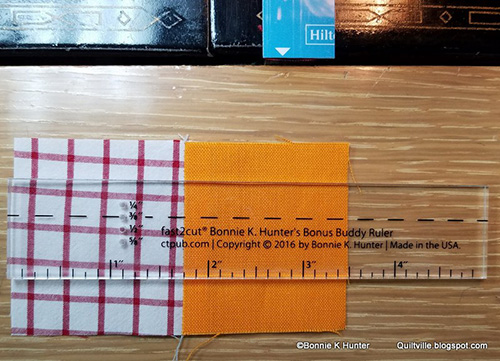
Run a test seam!
Grab a pair of 2’’ squares and sew them with right sides together. Press to one side and measure the unit! The markings on the Bonus Buddy show that I have reached 3 1/2’’ unit size – just what I want!
Stitch triangle units, press and measure!
Stitch the 4 triangle pairs with your adjusted 1/4’’ seam. Press seams toward the red triangles. Sliver trim to square if necessary. Units will measure 2 1/2’’ and finish at 2’’ in the block.
Repeat the process and make 4 matching gray/neutral half-square triangles in the same size.
Stitch & Flip Corner Prep
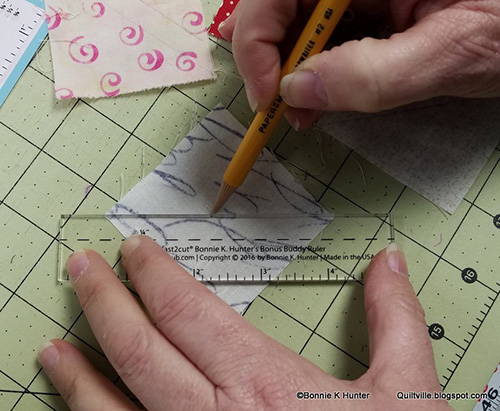
The Bonus Buddy is the perfect size to fit in your hand when drawing diagonals. And yes, I DO draw them. I am not drawing the seam line, I am drawing where the fabric has to fold so that when I do sew NEXT to the line, the fabric will fold up and over my line of stitching and reach all the way to the edge of the base unit, allowing me to save the whole bonus triangle from behind. If you sew ON the line, you will always be a smidge too short.
Use a fine-point marking tool, such as a mechanical pencil, to accurately draw your lines from corner to corner on the eight 2 1/2’’ corner squares.
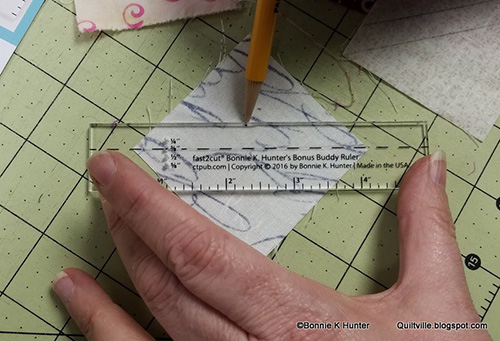
Drawing the Bonus Line!
Slide the dashed line on the Bonus Buddy up to the diagonal you just drew, with the 1/4’’ needle hole closest to your pencil. Draw a bonus line on all eight 2 1/2’’ corner squares.
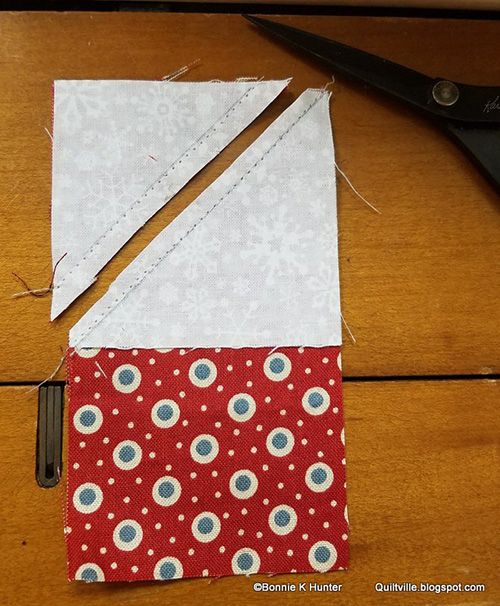
Using the lines as a guide, stitch one thread away from each line, keeping the stitching BETWEEN the lines. The stitching should be NEXT to the lines, not on them.
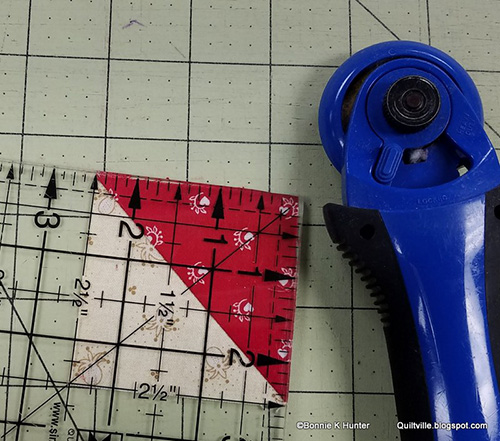
Cut between the two lines as shown. The upper cut-away corner is your bonus unit! Press seam toward the neutral on the rectangle unit, and toward the red on the bonus triangle.
Those bonus units should end up 2’’ square. Repeat for all 4 rectangle units.
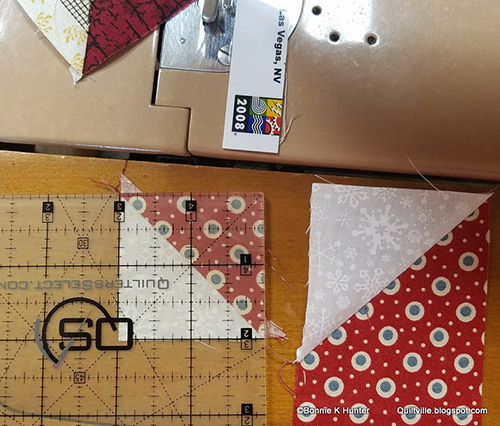
More Bonus Triangles in the Making!
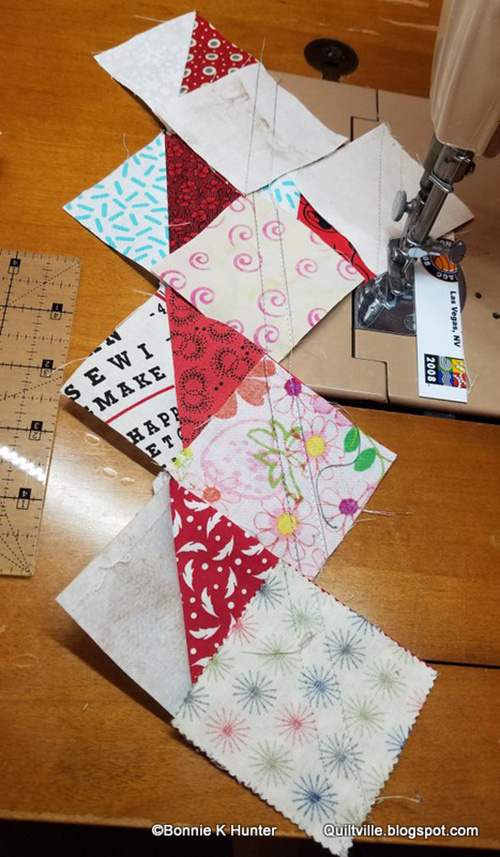
Repeat the process for the other end of the rectangles, remembering to stitch just to the inside of the line, keeping stitching BETWEEN the lines.
Four diamond-in-a-rectangle units made, and eight bonus triangles in the process.
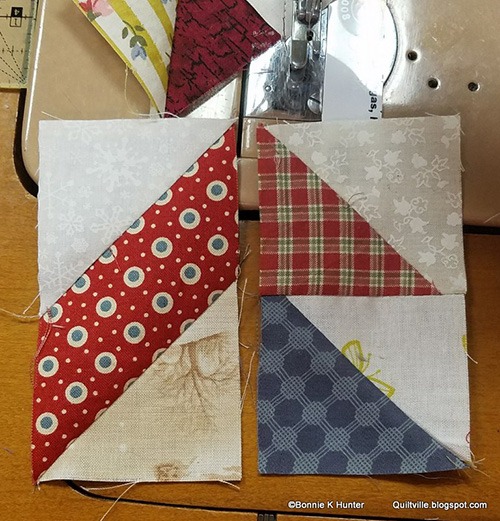
Making the Block Quarters.
Join the 4 red/neutral triangle units to the 4 gray/neutral triangle units as shown. Press seams toward the red triangle units.
Join the triangle units to the right side of each rectangle unit as shown, pressing seams toward the rectangle.
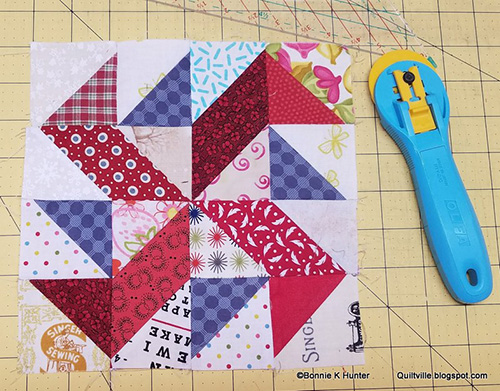
Rotate and assemble.
Rotate the 4 block quarters in pinwheel fashion. Join units into rows. Press center seams in an opposing manner and join rows to complete block center. Press. Block center will measure 8 1/2’’ square at this point.
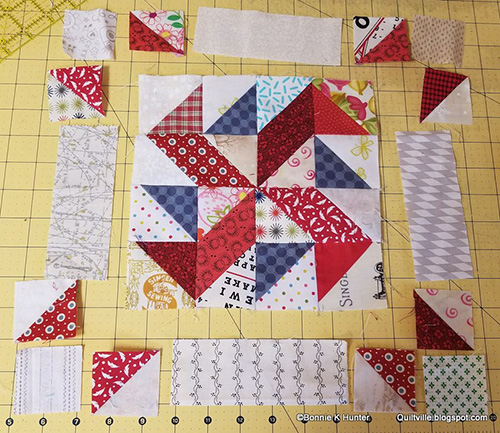
Center Surrounded!
Position the 8 bonus triangles, 4 side rectangles, and 4 cornerstones around the block center. Join units into 3 rows, top, center and bottom, with triangle seams pressing toward the center sashing rectangles. Press the top and bottom cornerstone seams toward the cornerstones, and the sashing seams toward the block center. Join rows to complete block. Press final 2 seams out toward the block top and bottom sashings. Block will measure 11 1/2’’ and finish at 11’’.
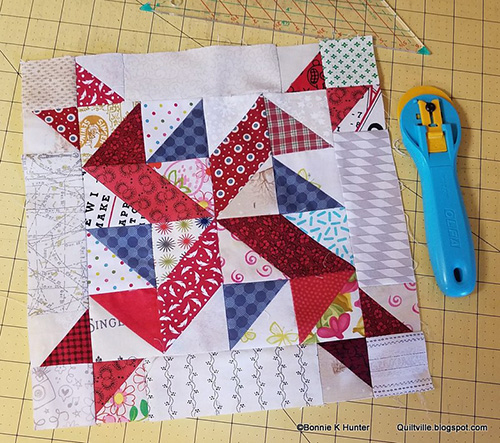
One done, more to come!
What will you make with your Yankee Puzzle Plus block? The ideas are endless. Just wait to see what I do with mine!
Follow Bonnie's Daily blog at http://quiltville.blogspot.com
Facebook: http://facebook.com/quiltvillefriends
Facebook Group: Quiltville's Open Studio
Instagram: @quiltville_bonnie


